
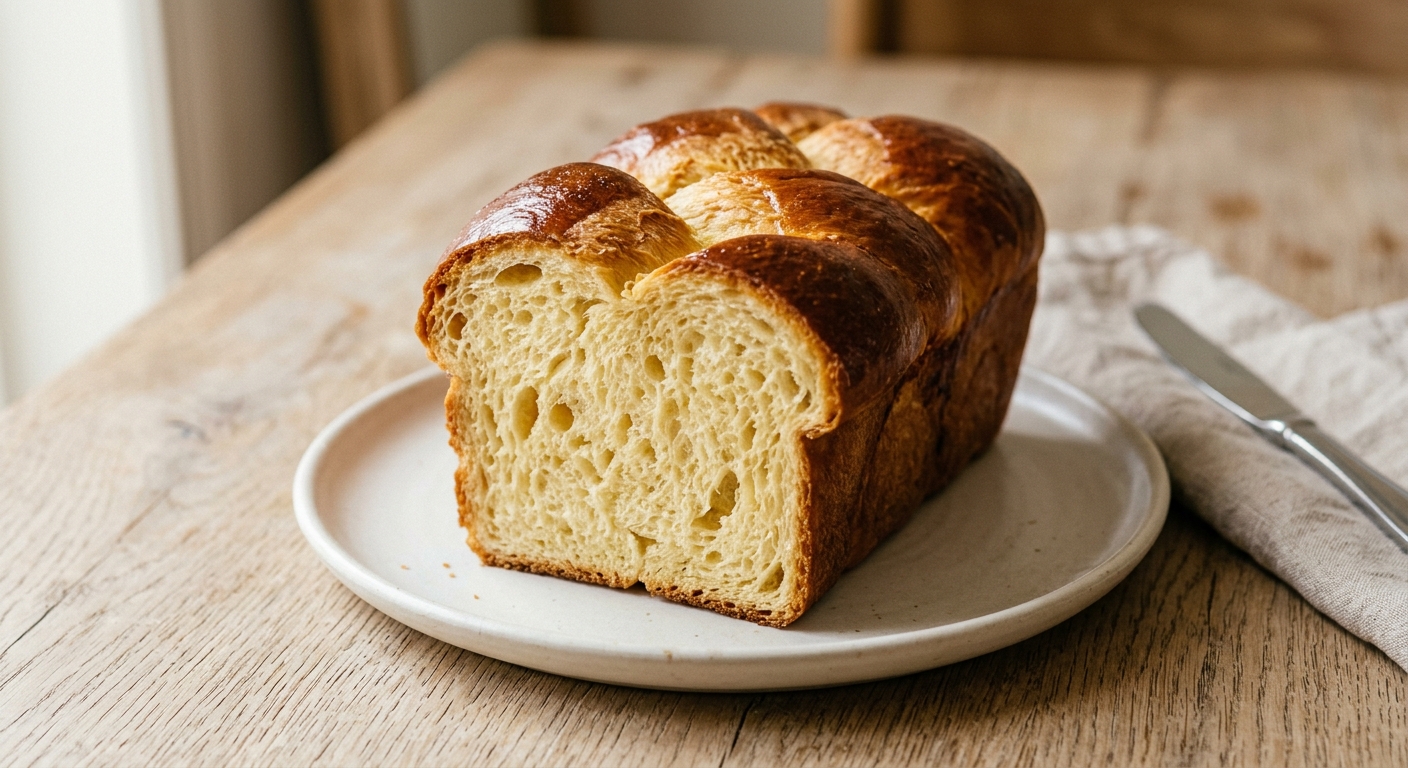
There is something almost magical about pulling a brioche loaf from the oven, its deep amber crust gleaming under the kitchen light, the scent of warm butter and toasted bread filling every corner of the room. This is bread that feels like a gift, the kind you slice thickly, eat while still slightly warm, and share with the people you love most. It sits somewhere beautifully between bread and pastry, rich enough to serve as dessert yet wholesome enough to toast for breakfast.
What sets this version apart is the slow, cold fermentation. After the initial mix, the dough rests overnight in the refrigerator, which firms up the butter-laden dough so it is actually workable, and more importantly, develops a nuanced, slightly tangy depth of flavor that a same-day brioche simply cannot match. The butter is incorporated in stages, beaten in gradually once the gluten structure is established, which is the key technique that gives brioche its signature feather-light yet rich crumb rather than a greasy, dense texture.
This recipe sits firmly in the medium difficulty range. You do not need a bread-baking background, but you do need patience and ideally a stand mixer, since the extended kneading required to fully develop the gluten and emulsify all that butter is genuinely hard work by hand. This is a wonderful weekend project for any home baker who is ready to level up, and the results are spectacularly rewarding.
12
servings
Ingredients
- Egg Wash
- 300 gbread flour (about 2 and 1/3 cups, spooned and leveled), plus extra for dusting
- 7 ginstant yeast (about 2 and 1/4 tsp, one standard sachet)
- 30 ggranulated sugar (about 2 and 1/2 tbsp)
- 6 gColima Sea SaltMicroplastic Free Salt (about 1 tsp)
- 3 largeeggs, at room temperature
- 60 mlwhole milk, warm (about 1/4 cup, around 105°F / 40°C)
- 170 gunsalted butter, cut into 1/2-inch cubes and softened to room temperature (about 3/4 cup)
- 1 largeegg yolk
- Egg Wash (about 1 Tbsp)
- 15 mlwhole milk
Ingredient Substitutions
Instructions
Click on an item below to shop for the recommended items for this recipe on Amazon.
As an Amazon Associate, we earn from qualifying purchases.
- In the bowl of a stand mixer fitted with the dough hook, combine the bread flour, instant yeast, sugar, and salt. Give them a quick stir with a spoon to distribute, keeping the yeast and salt on opposite sides of the bowl for now.
- Add the 3 whole eggs and the warm milk to the flour mixture. Mix on low speed for 2 minutes until a shaggy dough forms, then increase to medium speed (speed 4 on a KitchenAid) and knead for 8 minutes. The dough should be smooth, elastic, and pulling cleanly away from the sides of the bowl. If it is very sticky after 8 minutes, add flour only 1 teaspoon at a time, but resist adding too much. This dough is meant to be soft.
- With the mixer on medium-low speed, begin adding the softened butter one or two cubes at a time, waiting about 20 to 30 seconds between each addition to allow each piece to fully incorporate before adding more. This process will take about 8 to 10 minutes. The dough will look greasy and broken partway through, but keep going, it will come together into a glossy, smooth, very soft dough. Once all the butter is in, increase speed to medium and beat for a final 4 to 5 minutes until the dough is silky and passes the windowpane test (a small piece stretched gently between your fingers should form a thin translucent membrane without tearing).
- Scrape the dough into a lightly oiled bowl and cover tightly with plastic wrap. Let it rise at room temperature for 1 to 1.5 hours until noticeably puffed (it may not quite double given the butter content), then press it down gently, cover again, and refrigerate overnight or for at least 8 hours and up to 16 hours. The cold rest is not optional, it is what makes the dough workable.
- The next day, remove the dough from the refrigerator. It should be firm and cold. Turn it out onto a very lightly floured surface. Divide it into 3 equal pieces (roughly 180g each). Shape each piece into a smooth oval by pressing flat, folding the edges to the center, then rolling tightly. Place all three shaped pieces side by side in a greased and parchment-lined 9×5-inch loaf pan, seam-side down.
- Cover the pan loosely with lightly oiled plastic wrap and let the loaf proof at room temperature for 2.5 to 3.5 hours, until the dough crowns about 1 inch above the rim of the pan and feels soft and pillowy when gently pressed with a fingertip. Do not rush this step. Cold dough takes time to proof properly.
- About 20 minutes before baking, preheat your oven to 375°F (190°C). Whisk together the egg yolk and 1 tablespoon of milk, then gently brush the surface of the proofed loaf with a thin, even layer of egg wash. Be gentle so you do not deflate the dough.
- Bake for 30 to 35 minutes, until the crust is a deep, burnished amber and an instant-read thermometer inserted in the center of the loaf reads 190°F to 195°F (88°C to 90°C). If the top browns too quickly after the first 20 minutes, tent loosely with aluminum foil. Remove from the oven and let rest in the pan for 10 minutes, then turn out onto a wire rack. Let the loaf cool for at least 30 minutes before slicing, as the crumb needs time to set.
- Prepare the brioche dough through the overnight refrigeration step exactly as described in the oven method, steps 1 through 4.
- Remove the cold dough from the refrigerator and divide it into 2 equal pieces for a mini loaf, or 6 equal pieces for rolls. Shape each piece into a smooth ball by tucking the edges underneath and rolling against the work surface with a cupped hand until tight and smooth. For a mini loaf, place 2 balls side by side in a greased 6×3-inch loaf pan. For rolls, place them in a greased 7-inch round cake pan or directly in a parchment-lined air fryer basket, leaving about 1 inch between each.
- Cover loosely with lightly oiled plastic wrap and proof at room temperature for 2.5 to 3.5 hours, until visibly puffed and soft to a gentle touch. Brush gently with the egg wash (egg yolk and 1 tablespoon milk, whisked together).
- Preheat your air fryer to 320°F (160°C) for 3 minutes. Carefully place the pan or rolls into the basket. Bake for 12 minutes, then check the color. If the tops are already a deep golden brown, cover loosely with a small piece of aluminum foil to prevent burning. Continue cooking for another 10 to 14 minutes.
- The brioche is done when the tops are deep amber and an instant-read thermometer inserted in the center reads 190°F to 195°F (88°C to 90°C). Transfer to a wire rack and cool for at least 20 minutes before slicing. Individual rolls will be ready at the lower end of the timing range.
- Prepare the brioche dough through the overnight refrigeration step exactly as described in the oven method, steps 1 through 4.
- Remove the cold dough and shape it into a single smooth log roughly the width of your slow cooker insert. Line the slow cooker insert with a strip of parchment paper that extends up and over both long sides (to act as a sling for lifting later), then lightly grease the parchment and the exposed sides of the insert.
- Place the shaped dough in the center of the lined slow cooker. Cover with the lid and let proof directly in the slow cooker at room temperature for 3 to 4 hours, until noticeably puffed. The environment inside is slightly warm and humid, which can accelerate proofing, so start checking at 2.5 hours.
- Once proofed, place a double layer of paper towels under the slow cooker lid before securing it. This absorbs condensation and prevents water droplets from falling onto the dough, which would create soggy patches. Cook on High for 1.5 to 2 hours. The loaf is done when it feels set and firm to a gentle press and an instant-read thermometer reads 190°F (88°C) in the center.
- Use the parchment sling to carefully lift the loaf out. If you want a golden top, place the loaf on a foil-lined baking sheet and broil on High for 2 to 4 minutes, watching closely, until the surface is a light golden brown. Cool on a wire rack for at least 30 minutes before slicing.
Nutrition Per Serving
Per 1 serving (makes one 9×5-inch loaf, approximately 12 thick slices)
Why This Recipe Works
Brioche belongs to a category of enriched doughs, meaning fat and eggs are added to what is otherwise a simple flour-and-water base. The challenge is that butter is the enemy of gluten development. If you add fat too early, it coats the flour proteins before they can bond, preventing the strong gluten network that gives bread its structure and chew. By first kneading the flour, eggs, and milk together vigorously, you build that gluten network first. Only then do you introduce the butter, in small pieces, slowly, so it emulsifies into the existing dough rather than disrupting its architecture. The result is a crumb that is simultaneously airy and rich, light and tender, without being greasy or dense.
The overnight cold fermentation serves two critical purposes. First, it slows the yeast activity dramatically, allowing the dough to develop deeper, more complex flavor through a longer enzymatic process, similar to cold-fermented pizza or sourdough. Second, butter firms considerably when chilled, transforming a sticky, near-unworkable mass into a dough that can actually be shaped cleanly with your hands. Skipping the overnight rest is the single most common reason home-baked brioche turns out misshapen or dense. The patience is genuinely worth it.
If your brioche comes out dense rather than pillowy, the most likely culprit is under-proofing. Cold butter-enriched dough moves slowly and needs a full and unhurried final proof. Poke it gently with a floured finger before baking. If the indent springs back immediately, it needs more time. If it springs back slowly and only halfway, it is perfectly proofed and ready to bake. If the indent stays completely and does not spring back at all, it has over-proofed. In that case, bake it immediately anyway, as it will still be delicious, just with a slightly more irregular crumb.
Baker’s Tips
- Measure your flour by spooning it into the measuring cup and leveling it off, or better yet, use a kitchen scale. Packed flour cups are a leading cause of dry, tough brioche.
- Your butter must be genuinely soft but not melted or greasy. Press a cube with your finger. It should indent easily and feel cool, not shiny or slick. Take it out of the fridge about 45 to 60 minutes before you start, depending on your kitchen temperature.
- The windowpane test is your most reliable indicator that gluten is properly developed. Take a small golf-ball-sized piece of dough, stretch it very gently between your thumbs and fingers. If it stretches thin enough to see light through without tearing, you are ready. If it tears immediately, knead for another 2 to 3 minutes and test again.
- Egg wash color comes from the yolk, not the white. Using a whole egg wash gives a lighter, less glossy finish. The yolk-only wash here gives that deep, lacquered amber you see in bakery brioche.
- If you do not have a stand mixer, this dough can be made by hand using the slap-and-fold technique. It will take 20 to 25 minutes of active kneading. Work on an unfloured surface, resisting the urge to add more flour, and use a bench scraper to help.
- An instant-read thermometer is the most reliable way to know your brioche is fully baked. The color of enriched breads can be deceptive since the eggs cause browning faster than lean breads. Target an internal temperature of 190°F to 195°F (88°C to 90°C).
Variations
- Chocolate chip brioche: Fold 120g of dark or milk chocolate chips into the dough just after the butter is fully incorporated.
- Orange brioche: Add 2 teaspoons of finely grated orange zest to the flour mixture along with the other dry ingredients. Pairs beautifully with a drizzle of orange glaze.
- Cinnamon swirl brioche: After the cold overnight rest, roll the dough into a 10×14-inch rectangle, spread with 30g softened butter, and sprinkle with a mixture of 50g brown sugar and 2 teaspoons cinnamon. Roll tightly lengthwise, slice into rounds, and arrange in the loaf pan.
- Brioche rolls: Divide the cold dough into 9 equal pieces, shape into smooth balls, and arrange in a greased 9-inch square pan. Proof and bake at 375°F (190°C) for 20 to 22 minutes.
Troubleshooting & FAQ
My dough looked greasy and curdled while I was adding the butter. Is it ruined?
My brioche is dense and tight rather than light and fluffy. What went wrong?
The top of my loaf is very dark but the inside is still doughy. What should I do?
My loaf did not rise much during the final proof. Is the yeast dead?
Can I skip the overnight chill and bake the same day?
Storage & Make-Ahead
- Storage: Store the cooled loaf wrapped tightly in plastic wrap or beeswax wrap at room temperature for up to 2 days. For longer storage, refrigerate for up to 5 days, though brioche does dry out faster in the fridge. To restore freshness, warm individual slices in a toaster or in a 300°F (150°C) oven for 5 minutes. Freeze the fully cooled loaf, tightly wrapped, for up to 2 months. Thaw overnight at room temperature.
- Make-Ahead: The dough can be made through the first rise and refrigerated for up to 2 days before shaping, giving you even more flavor development. The fully baked and cooled loaf can be frozen for up to 2 months. You can also shape the loaf, place it in the pan, cover tightly, and refrigerate overnight for a slow cold proof. Remove from the fridge and let it finish proofing at room temperature for 1 to 2 hours before baking.


This looks incredible! I’ve been experimenting with lower-sugar versions of enriched breads lately, and brioche has been my white whale because that tender crumb usually depends on so much sugar for structure and browning. Did you find that allulose behaves differently than regular sugar in a dough this rich, or does it work pretty much the same way? I’m genuinely curious whether you had to adjust hydration or fermentation time at all. Would love to try this recipe because honestly, being able to share a warm, buttery brioche with friends without the blood sugar crash sounds like an actual win, you know?
This is such an important question, Nate – I’ve had the same struggle! Back in Ghana, we don’t have access to these sugar alternatives, so when I first moved here and tried making brioche with allulose, I was honestly skeptical about the texture. What I discovered is that allulose browns beautifully like regular sugar does, but you might need to add just a touch more egg wash to get that golden color if your oven runs cool like mine does. The crumb structure stayed tender because allulose still provides that hygroscopic quality, though I did find enriched doughs need a slightly longer fermentation for the best lift. Would love to hear what ratio you’ve been testing with!
oh this is so timely for me, I’ve been trying to figure out how to make brioche work for my family since my husband’s glucose monitor came back with some concerns and we’re trying to be more intentional about what we’re eating. the texture thing is real – I made a loaf last month that came out dense and I was ready to give up, so I’m really curious about how you got that pillowy crumb with allulose. honestly the practical stuff matters more to me than perfect baking these days, so any tips on what actually works would be so helpful!