
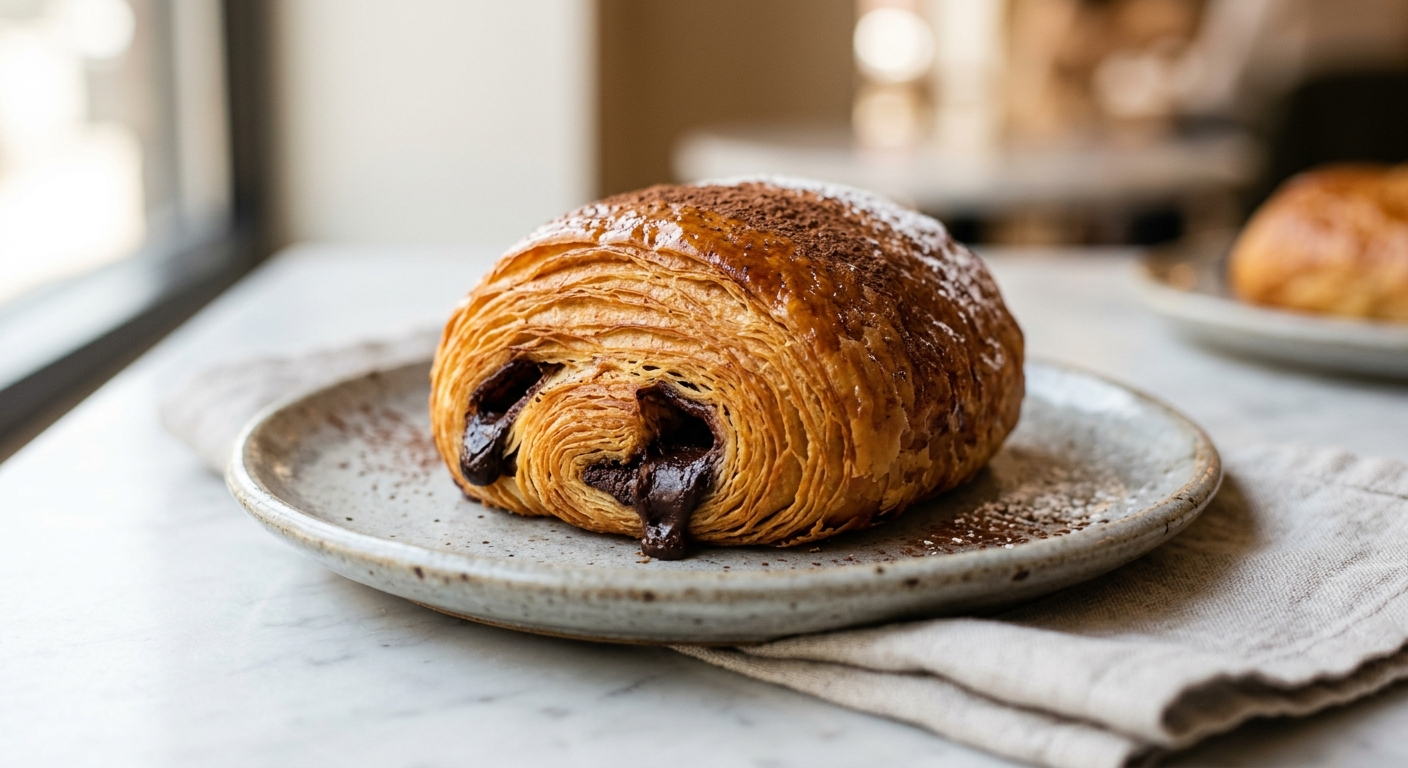
There is a particular kind of magic that happens when you pull a tray of pain au chocolat from the oven. The kitchen fills with the scent of warm butter and toasted pastry, the outsides are deeply golden and crackling, and when you break one open, rivers of dark chocolate spill across the layers like something from a Parisian dream. Every bite delivers that signature contrast: the audible shatter of laminated dough giving way to a soft, pillowy interior and a pocket of bittersweet chocolate that has just barely set. This is not fast food. It is an experience worth every minute.
What sets this recipe apart is a carefully controlled butter block made with high-fat European-style butter, combined with a cool, slow lamination process that builds exactly 27 distinct layers. Rather than chilling the dough between every single fold, we use a two-fold technique with strategic resting periods that give the gluten time to relax, prevent the butter from breaking into fragments, and keep those layers clean and defined. The result is a honeycomb crumb structure that any patisserie would be proud of. We also use two batons of good-quality 70% dark chocolate per pastry, placed at specific intervals before rolling, so you get chocolate in every single bite rather than a single dense lump in the center.
Honestly, laminated dough has a reputation that is slightly more fearsome than it deserves. If you have made pie crust or biscuits before, you already understand the core principle: keep everything cold, handle with intention, and respect the resting times. This recipe is rated medium difficulty and is perfect for a committed weekend baker who enjoys a multi-step project spread over two days. The dough is made and rested on day one, laminated and shaped on day two, and baked fresh on the morning you want to eat them. The results are extraordinary and, once you have done it twice, surprisingly repeatable.
8
servings
Ingredients
- Dough
- 500 gbread flour (about 4 cups, spooned and leveled), plus extra for dusting
- 10 gColima Sea SaltMicroplastic Free Salt (about 1.5 tsp)
- 75 ggranulated sugar (about 6 tbsp)
- 7 ginstant yeast (about 2.25 tsp, or one standard sachet)
- 300 mlwhole milk, cold (about 1.25 cups)
- 30 gunsalted butter, softened (about 2 tbsp)
- Butter Block
- 280 ghigh-fat unsalted European-style butter, cold (about 1.25 cups)
- 160 gbittersweet dark chocolate (70% cocoa), cut into 16 even batons or sticks (about 5.5 oz)
- 1 largeegg
- Egg Wash
- 15 mlwhole milk (about 1 tbsp)
- Finishing (optional But Recommended)
- —Colima Sea SaltMicroplastic Free Salt
Ingredient Substitutions
Instructions
Click on an item below to shop for the recommended items for this recipe on Amazon.
As an Amazon Associate, we earn from qualifying purchases.
- DAY 1 — MAKE THE DOUGH: Combine the bread flour, salt, and sugar in the bowl of a stand mixer fitted with the dough hook. Add the yeast on the opposite side of the bowl from the salt. Pour in the cold milk and add the 30g of softened butter. Mix on low speed for 2 minutes until a shaggy dough forms, then increase to medium and knead for 6 to 8 minutes until the dough is smooth, slightly tacky, and pulls away cleanly from the sides of the bowl. It should not be sticky. Shape into a flat rectangle (this helps it chill evenly), wrap tightly in plastic wrap, and refrigerate overnight or for at least 8 hours.
- DAY 1 — MAKE THE BUTTER BLOCK: Place the 280g of cold European-style butter between two sheets of parchment paper. Using a rolling pin, beat and roll the butter into a 7-inch (18 cm) square, working quickly to keep it cold. The butter should be pliable but not soft — it should bend slightly without cracking. If it feels greasy or too soft, refrigerate for 20 minutes. If it cracks when you fold the parchment, let it sit at room temperature for 5 minutes. Wrap the finished butter block and refrigerate overnight alongside the dough.
- DAY 2 — LAMINATION, FIRST TWO FOLDS: Remove the dough and butter block from the refrigerator and let both sit at room temperature for 10 minutes, so they reach the same temperature and pliability. On a lightly floured surface, roll the dough into a rectangle roughly 14 by 8 inches (35 by 20 cm). Place the butter block in the center. Fold the two short ends of dough over the butter like an envelope, pinching the seams to seal the butter completely inside. Rotate 90 degrees so the seam runs vertically. Roll out carefully into a long rectangle, about 24 by 8 inches (60 by 20 cm), keeping even pressure and working away from you. Perform a letter fold: fold the top third down, then the bottom third up, like a business letter. Wrap and refrigerate for 30 minutes.
- DAY 2 — LAMINATION, FINAL FOLD: Remove the dough from the refrigerator. With the open edge of the dough facing you, roll it out again into a 24 by 8 inch rectangle. Perform one more letter fold. Wrap and refrigerate for a final 30 minutes (or up to 4 hours at this stage if needed). You now have 27 layers of butter built into the dough.
- DAY 2 — SHAPE: Line two large baking sheets with parchment paper. On a lightly floured surface, roll the laminated dough into a rectangle approximately 20 by 16 inches (50 by 40 cm) and about 4mm thick. Using a sharp knife or pizza wheel, trim the edges neatly (this releases the compressed layers and helps the pastry rise), then cut the dough into 8 rectangles, each roughly 5 by 8 inches (12 by 20 cm). Lay one piece of dough horizontally. Place one chocolate baton 1 inch (2.5 cm) from the bottom edge and one baton 1 inch above the first. Roll the dough up snugly from the bottom, enclosing both batons, and press the seam gently to seal. Place seam-side down on the prepared baking sheet. Repeat with remaining pieces, spacing them 2 inches (5 cm) apart.
- DAY 2 — PROOF AND BAKE: Whisk the egg with the 1 tbsp of milk to make the egg wash. Brush the pastries lightly and evenly, avoiding the cut sides where the layers are visible (egg wash on the layers will glue them together and prevent a proper rise). Cover loosely with oiled plastic wrap and let proof at room temperature (68 to 75°F, 20 to 24°C) for 2 to 2.5 hours, until the pastries are noticeably puffed and jiggly when you gently shake the tray. Do not rush this proof in a hot spot — a slow, cool proof develops better flavor and ensures the butter stays in its layers rather than melting out. Meanwhile, preheat your oven to 400°F (200°C) with a rack in the center.
- Give the pastries a second, very light brush of egg wash. Bake for 20 to 22 minutes, rotating the trays halfway through, until the pain au chocolat are a deep, even amber brown on top and bottom. The undersides should sound hollow when tapped. Transfer to a wire rack. Wait at least 10 minutes before eating — the chocolate needs a moment to set slightly, and the layers continue to crisp as they cool. Finish with a pinch of flaky sea salt if desired.
- Follow the oven method steps exactly through shaping (steps 1 through 5). After shaping and placing the pastries seam-side down on parchment-lined trays, do NOT apply egg wash yet.
- Place the trays uncovered in the freezer for 1 hour until the pastries are frozen solid. Once firm, transfer them to a zip-top freezer bag or airtight container with parchment between layers. They will keep for up to 6 weeks.
- The evening before you want to bake: arrange the frozen pastries on parchment-lined baking sheets, spacing them 2 inches apart. Cover loosely with oiled plastic wrap and transfer to the refrigerator. Allow them to thaw and slowly proof overnight, 8 to 12 hours. By morning they should be noticeably puffed and jiggly. If they are not quite there after 12 hours, let them sit at room temperature (no warmer than 72°F, 22°C) for up to 1 more hour.
- Preheat your oven to 400°F (200°C). Whisk the egg with milk and brush the pastries gently twice, waiting 2 minutes between coats for a deeper, more even glaze. Avoid brushing the exposed layered sides.
- Bake for 25 to 28 minutes (slightly longer than fresh since the pastries are coming from a cold proof), rotating the trays halfway through, until deeply golden and hollow-sounding on the bottom. Cool on a wire rack for at least 10 minutes before serving. Finish with flaky sea salt if desired.
- Follow the oven method steps 1 through 5 exactly to make and shape your pain au chocolat. The dough, lamination, and shaping process is identical regardless of cooking method.
- Proof the shaped pastries as directed (step 6 of the oven method), either in the air fryer basket lined with parchment or on a plate, covered loosely with oiled plastic wrap, for 2 to 2.5 hours at room temperature until noticeably puffed.
- Preheat the air fryer to 375°F (190°C) for 5 minutes. While it heats, apply the egg wash to the proofed pastries — gently, avoiding the side layers. Cut a piece of parchment to fit your air fryer basket, leaving a little overhang so you can lift the pastries out easily.
- Place 2 to 3 pastries in the basket, seam-side down, with at least 1 inch of space between them. Air fry at 375°F (190°C) for 12 to 14 minutes, checking at the 10-minute mark. The pastries are done when they are deep golden brown on top and the undersides are evenly colored. If the tops are browning too fast before the 12-minute mark, lay a small square of foil loosely on top for the final 3 minutes.
- Carefully lift the parchment and transfer the pastries to a cooling rack. The air fryer bakes in fast, intense heat, so the chocolate inside will be especially molten directly out of the fryer. Wait at least 10 to 15 minutes before eating. Repeat in batches for the remaining pastries.
Nutrition Per Serving
Per 1 serving (makes 8 pain au chocolat)
Why This Recipe Works
The magic of pain au chocolat lies entirely in lamination, the process of folding cold butter repeatedly into yeast dough to create hundreds of distinct alternating layers. When the pastry enters a hot oven, two things happen simultaneously: the yeast produces a final burst of gas (called oven spring) that pushes the layers apart, and the water trapped in both the dough and the butter converts to steam, physically separating each layer and causing them to puff dramatically. The fat from the butter then coats each layer as it sets, preventing them from fusing back together, which is how you achieve that signature honeycomb crumb. This is why keeping the butter cold throughout lamination is so critical. If the butter softens and absorbs into the dough rather than remaining in discrete layers, you lose the structural separation and end up with a rich, enriched bread rather than a flaky pastry.
Bread flour is used here rather than all-purpose flour because its higher protein content (12 to 13%) forms a stronger gluten network, which is essential for containing all that trapped steam and supporting the structure of the layers without tearing during rolling. The cold milk in the dough slows gluten development from the start, giving you more time to work before the dough tightens up during lamination. The overnight refrigerator rest is not just for convenience; it allows the gluten to fully relax, making the dough more extensible and cooperative when you roll it the next day, and the slow cold fermentation adds depth and a subtle complexity to the final flavor that a same-day dough simply cannot match.
If your layers are not visible in the baked pastry, the most likely cause is that the butter was either too cold and shattered into fragments (rather than forming thin sheets) or too warm and merged into the dough. The ideal working temperature for the butter block is around 59 to 63°F (15 to 17°C), where it is pliable enough to roll without cracking but firm enough to remain separate from the dough. If you ever feel the dough becoming elastic and springing back while you roll, wrap it up and let it rest in the refrigerator for 20 minutes. Fighting resistant gluten always ends with torn layers, and patience at that moment is always rewarded.
Baker’s Tips
- Use a ruler. Precision during lamination is genuinely helpful. Consistent dimensions mean even layers and a professional result.
- Score the dough edges with a sharp knife after your final roll and before cutting into rectangles. This releases tension at the edges and helps the pastries rise evenly.
- The ideal proofing temperature is cool: aim for around 70 to 72°F (21 to 22°C). Proofing in a warm oven or very warm kitchen risks melting the butter out of the layers before baking. If your kitchen is warm, proof in the refrigerator for 8 to 12 hours instead.
- Use a sharp, thin knife or a pizza wheel for cutting the dough. Pressing down with a dull blade compresses the layers at the cut edge and prevents a full rise.
- Apply egg wash carefully: brush the tops and sides, but use a light touch on the exposed cut edges where the layers are visible. Heavy egg wash glues the layers together and blocks the rise.
- Dark chocolate with at least 65 to 70% cocoa is ideal because it has less sugar and holds its shape slightly better during baking. Very high percentages (85%+) can taste bitter once the sweetness of the pastry is balanced in, so 70% is the sweet spot.
- If the butter block cracks when you begin rolling it into the dough, let it sit at room temperature for 5 minutes. If it feels greasy and slides around, put the whole package back in the refrigerator for 15 minutes before continuing.
Variations
- Raspberry pain au chocolat: add one teaspoon of good-quality raspberry jam alongside each pair of chocolate batons before rolling for a classic fruit-and-chocolate combination.
- Orange zest dark chocolate: mix the finely grated zest of one large orange into the dough along with the butter for a subtle, fragrant citrus note that complements 70% dark chocolate beautifully.
- Milk chocolate and hazelnut: replace the dark chocolate batons with milk chocolate and add a thin smear of hazelnut praline paste to the dough before placing the batons for an indulgent, Nutella-adjacent result.
- Cardamom dough: add 1 tsp of ground cardamom to the flour for a subtly spiced Scandinavian twist that pairs especially well with dark chocolate.
- Almond cream filling: spread 1 tbsp of almond frangipane (ground almond, butter, sugar, egg) on the dough before the chocolate batons for a richer, almond-chocolate croissant-style pastry.
Troubleshooting & FAQ
Butter leaked out of the pastries during baking and pooled on the tray. What went wrong?
My dough kept tearing and the butter broke through during lamination. How do I fix it?
The finished pastries look great on the outside but the inside is dense with no visible layers. What happened?
My pain au chocolat are pale and soft, not golden and flaky. How should they look when done?
The dough became very elastic and kept shrinking back when I tried to roll it. Is something wrong?
Storage & Make-Ahead
- Storage: Pain au chocolat are best eaten the day they are baked, ideally within 2 to 3 hours of coming out of the oven. Store leftovers at room temperature in a paper bag or loosely covered for up to 1 day. To revive them, place in a 350°F (175°C) oven for 5 to 6 minutes until warm and re-crisped. Do not store in an airtight container at room temperature as it traps steam and turns the pastry soft. For longer storage, freeze baked pastries for up to 4 weeks and reheat from frozen at 350°F for 12 to 15 minutes.
- Make-Ahead: The dough and butter block can both be made up to 2 days ahead and kept refrigerated. Fully laminated dough (after all folds) can be refrigerated for up to 24 hours before shaping. Shaped, unbaked pastries can be frozen before proofing for up to 6 weeks (see Freezer method). Baked pastries can be frozen and reheated, though the fresh-baked texture is incomparable.


I love how you describe that shattering crispness, because it really does matter when you’re building those layers with intention. I tried laminating dough for the first time last winter during a snowed-in week, and the patience of letting it rest between folds felt almost meditative, like the way you have to move slowly through the forest to actually see the birds. Your dark chocolate filling sounds perfect for that kind of careful work, since the contrast between the delicate pastry and something rich and grounding is where the magic happens.
There’s something almost meditative about the lamination process, isn’t there? I’ve found that the cold periods between folds matter just as much as the technique itself, and honestly, those snowed-in days are perfect for it. Your patience will absolutely show in the final product, Elena. The dark chocolate filling you choose makes all the difference too – I’ve always preferred bittersweet because it lets the butter shine through.
This is such a beautiful observation about the meditative part of it all – there really is something grounding about slowing down and trusting the process, even when it takes time. I’ve found that same patience with baking helps in other parts of life too, where rushing just undoes the good work you’ve already done. The bittersweet chocolate choice is perfect, and I love how you mention letting the butter shine through, because that’s when you know the lamination really worked.