
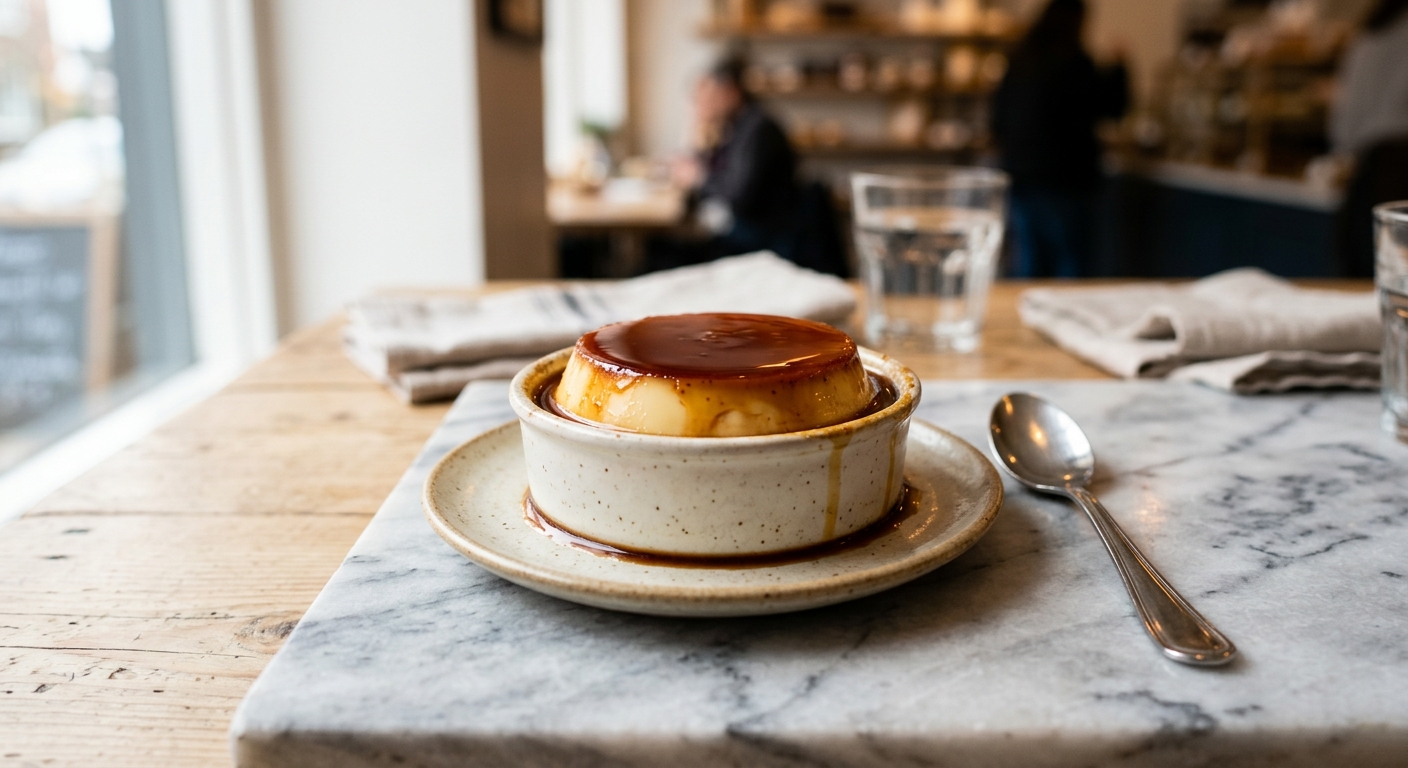
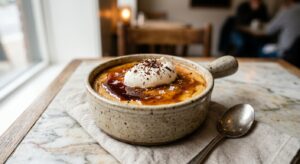
There is something almost magical about panna cotta. You pour a warm, cream-scented liquid into a mold, slide it into the refrigerator, and hours later you unmold something that wobbles like a dream and melts on the tongue in an instant. Add a burnt caramel, and you have transformed a classic Italian dessert into something genuinely sophisticated: a deep amber sauce with edges of bitterness that cut through all that richness, leaving you reaching for another spoonful before you have even finished the first.
What sets this version apart is the caramel itself. Most recipes call for a light golden caramel, sweet and safe. Here, we push the sugar further, past amber and into a true dark, smoky burn, the kind that smells faintly of coffee and toffee and makes you a little nervous you have gone too far. That edge of bitterness is the secret. It balances the lush, vanilla-kissed cream so that every bite feels layered and complex rather than cloying. The panna cotta base is also deliberately restrained in gelatin, using just enough to set the cream to a soft, yielding texture that barely holds its shape when unmolded.
This recipe sits firmly in the medium difficulty category, not because any single step is complicated, but because making a dark caramel requires your full attention and a little courage. It is perfect for confident beginner bakers who want to level up their repertoire, and an absolute joy for experienced home cooks looking for a make-ahead dinner party showstopper. Everything can be prepared up to two days in advance, leaving you completely free to enjoy your own gathering.
6
servings
Ingredients
- Blooming The Gelatin)
- 600 mlheavy cream, divided (about 2.5 cups)
- 120 mlwhole milk (about 0.5 cup)
- 7 gpowdered unflavored gelatin (about 2.25 tsp, or 1 standard sachet)
- 45 mlcold water (3 tbsp
- 60 ggranulated sugar for the panna cotta base (about 0.25 cup)
- 1 tsppure vanilla extract
- —Pinch of Colima Sea SaltMicroplastic Free Salt
- 200 ggranulated sugar for the burnt caramel sauce (about 1 cup)
- 60 mlcold water for the caramel (about 0.25 cup)
- Caramel Sauce (about 0.5 Cup)
- 120 mlheavy cream, warmed
- 30 gunsalted butter, cut into cubes (about 2 tbsp)
- Caramel Sauce And Finishing
- 0.5 tspColima Sea SaltMicroplastic Free Salt
Ingredient Substitutions
Instructions
Click on an item below to shop for the recommended items for this recipe on Amazon.
As an Amazon Associate, we earn from qualifying purchases.
- Bloom the gelatin: Pour the cold water into a small bowl and sprinkle the powdered gelatin evenly over the surface. Do not stir. Let it sit for 5 to 10 minutes until the gelatin has absorbed the water and looks like wet sand. This step is essential. Gelatin that is not properly bloomed will leave lumps in your panna cotta.
- Make the panna cotta base: Combine 480ml (2 cups) of the heavy cream, the whole milk, and the 60g granulated sugar in a medium saucepan over medium heat. Stir gently until the sugar dissolves and the mixture just begins to steam, about 4 to 5 minutes. Do not let it boil. Remove from heat.
- Dissolve the gelatin: Add the bloomed gelatin to the warm cream mixture and whisk gently until completely dissolved, about 1 to 2 minutes. Hold the mixture up to the light and look for any undissolved granules. If you see any, return the pan to very low heat for 30 seconds and whisk again. Stir in the vanilla extract and the pinch of fine sea salt.
- Strain and pour: Pour the mixture through a fine-mesh sieve into a large measuring jug for easy pouring. Lightly grease 6 ramekins or dariole molds with a neutral oil (such as grapeseed or sunflower). Divide the panna cotta mixture evenly among the molds. Let cool to room temperature, about 20 minutes, then cover each mold with plastic wrap and refrigerate for at least 4 hours, or preferably overnight.
- Make the burnt caramel sauce: Combine the 200g granulated sugar and 60ml cold water in a heavy-bottomed saucepan (light-colored if possible, so you can monitor the color). Cook over medium-high heat without stirring until the sugar dissolves. Once the syrup is clear, increase heat to high and cook, swirling the pan gently by the handle rather than stirring, until the caramel turns a deep mahogany brown, the color of dark cola. This will take 8 to 12 minutes total. You want it to go past golden amber: look for wisps of smoke and a slightly sharp, almost burnt smell. Pull it off the heat the instant it smells like burnt coffee rather than just toffee.
- Finish the caramel: Standing back to protect yourself from the vigorous bubbling, carefully pour the warmed cream into the caramel in a slow, steady stream, whisking constantly. The mixture will seize and bubble furiously. Return to medium-low heat and whisk until smooth and any hardened caramel bits have melted, 1 to 2 minutes. Remove from heat and whisk in the cubed butter and flaky sea salt until glossy. Pour into a heatproof jar and let cool to room temperature. The sauce will thicken as it cools.
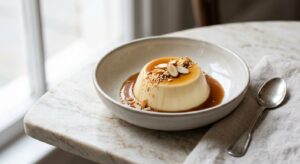
- Unmold and serve: To unmold, run a thin, flexible knife or small offset spatula around the inner edge of each mold. Place a serving plate over the top of the mold, invert, and give it a gentle but decisive shake. The panna cotta should release cleanly. If it resists, briefly dip the bottom of the mold in warm water for 10 seconds and try again. Spoon the burnt caramel sauce generously over each panna cotta and finish with a small pinch of flaky salt.
- Follow steps 1 through 4 of the classic stovetop method exactly, including blooming the gelatin, making the cream base, dissolving the gelatin, and pouring into lightly greased molds.
- Let the filled molds cool at room temperature for 15 minutes, then place them in the freezer (do not cover with plastic wrap yet, to avoid condensation dripping in). Set a timer for 45 minutes.
- While the panna cottas are setting in the freezer, make the burnt caramel sauce following steps 5 and 6 of the classic method. Allow it to cool at room temperature.
- Check the panna cottas at 45 minutes. They should be set around the edges and just barely wobbly in the very center. If the center is still quite liquid, return to the freezer for another 10 to 15 minutes. Do not leave them longer than 90 minutes total or the edges will begin to freeze and the texture will suffer.
- Once set, transfer the molds to the refrigerator for at least 15 minutes before unmolding. This slight tempering makes unmolding cleaner and ensures the interior is fully, evenly set without any icy spots. Unmold and serve as described in step 7 of the classic method.
Nutrition Per Serving
Per 1 serving (makes 6 individual panna cottas in 6-ounce ramekins or dariole molds)
Why This Recipe Works
Panna cotta, which translates simply as ‘cooked cream,’ relies on gelatin as its only structural element. Gelatin is a protein derived from collagen, and when dissolved in warm liquid and then chilled, its protein chains form a loose, flexible network that traps the liquid in place. The ratio of gelatin to liquid is the most critical variable: too much and the panna cotta becomes rubbery and bouncy, like flavored gelatin; too little and it will not set at all. This recipe uses a deliberately low ratio of 7g gelatin to 720ml of total liquid, which sits right at the threshold of a barely-there set. That slight trembling quality when you unmold it is not an accident. It is the goal. Blooming the gelatin in cold water first is non-negotiable: dry gelatin granules added directly to hot liquid will clump on the outside and leave undissolved lumps in the finished dessert.
The burnt caramel works on the principle of the Maillard reaction and pyrolysis, or thermal decomposition, of the sucrose molecules. As sugar is heated past its melting point of around 320°F (160°C), it breaks down into hundreds of new flavor compounds, including furans, diacetyl, and various aldehydes, producing that characteristic deep toffee flavor. Pushing the caramel further, into what most recipes call ‘burnt,’ allows some of those compounds to break down further still, creating bitter, coffee-like notes. The key technical moment is adding warm cream to the hot caramel. Cold cream would cause the hot sugar to seize violently and potentially crystallize. Warming the cream first minimizes the temperature shock, resulting in a smoother, more cohesive sauce. The butter added at the end emulsifies into the hot sauce, adding gloss and a velvety body that a cream-only caramel lacks.
If your panna cotta does not unmold cleanly, the most common cause is insufficient chilling time or a mold that was not greased. If your caramel seizes into a lumpy mass when you add the cream, do not panic: return the pan to medium-low heat and whisk patiently. The solid lumps of caramel will melt back into the cream as the temperature rises. If your caramel tastes overwhelmingly bitter rather than pleasantly so, you took it too far. Next time, pull the pan from the heat the moment you see wisps of smoke rising and smell that sharp edge, before the color reaches true black at the edges of the pan.
Baker’s Tips
- Use a light-colored or stainless steel saucepan for the caramel so you can accurately judge the color. Dark nonstick pans make it nearly impossible to see when you have hit the right shade.
- Warm the cream for the caramel sauce in the microwave or a small saucepan before adding it to the hot caramel. This prevents violent seizing and makes a smoother sauce.
- Grease the molds with a very thin, even coat of neutral oil using a pastry brush or a paper towel. Too much oil and you will see an oily residue on the finished panna cotta.
- For the cleanest unmolding, chill the panna cottas for a full 4 hours. Overnight chilling produces the best, most stable set.
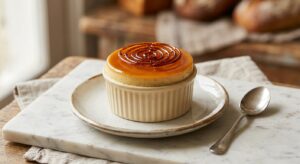
- If you are nervous about unmolding at the table, you can serve the panna cotta directly in the ramekins with the caramel sauce spooned on top. They are just as beautiful and there is zero stress.
- Taste the caramel sauce before adding salt. Different flaky salts vary in intensity. Start with half the amount and add more to your preference.
- The caramel sauce will thicken considerably as it cools. If it becomes too thick to pour, simply reheat it gently over low heat or for 20 to 30 seconds in the microwave, stirring until fluid again.
Variations
- Espresso Burnt Caramel Panna Cotta: Whisk 1 tbsp of instant espresso powder into the warm cream mixture along with the vanilla. The coffee deepens the flavor and creates a beautiful mocha undertone against the dark caramel.
- Vanilla Bean Version: Split 1 vanilla bean and scrape the seeds into the cream mixture along with the pod. Remove the pod before straining. This gives a more pronounced, floral vanilla flavor than extract alone.
- Salted Honey Caramel Sauce: Replace the burnt caramel with a salted honey caramel by substituting 60g of the granulated sugar with 80ml of good-quality honey. Cook to a deep amber as directed, then finish with butter and salt as usual. The honey adds a floral depth.
- Individual Chocolate Swirl: After pouring the panna cotta mixture into the molds, drizzle 1 tsp of warm dark chocolate ganache into each and use a toothpick to swirl gently. The chocolate sets within the cream as it chills.
Troubleshooting & FAQ
My panna cotta did not set and is still liquid after 4 hours. What went wrong?
My caramel turned into a hard, grainy lump when I added the cream. Is it ruined?
My caramel tastes too bitter, almost burnt and unpleasant. How do I fix it?
My panna cotta has a rubbery, bouncy texture instead of being silky and soft. What happened?
The panna cotta stuck to the mold and broke apart when I tried to unmold it. How do I prevent this?
Storage & Make-Ahead
- Storage: Store unmolded or still-in-mold panna cottas covered in the refrigerator for up to 3 days. The burnt caramel sauce keeps in an airtight jar in the refrigerator for up to 2 weeks. Gently warm the sauce in a small saucepan or microwave before serving if it has thickened too much. Do not freeze set panna cottas for long-term storage as the texture becomes grainy on thawing.
- Make-Ahead: This dessert is purpose-built for making ahead. The panna cottas can be made up to 2 days in advance and stored in their molds, covered, in the refrigerator. The burnt caramel sauce can be made up to 2 weeks ahead. On the day of serving, simply unmold and sauce. This makes it one of the most practical dinner party desserts you can have in your repertoire.


omg this is exactly the kind of dessert i’d make for someone who needs a little joy in their life – there’s something about that combination of textures that just feels… i dunno, affirming? like you’re saying “i care enough to make something beautiful for you” without making it about restriction. i’ve had students mention how food becomes complicated when you’re managing health stuff, and recipes like this feel like they give back some of the pleasure without the guilt. would love to know what your patients reaction was, miriam.
oh this sounds absolutley divine – theres something about that bittersweet caramel against silky panna cotta that just feels like comfort and elegance at the same time. i made a similar dessert for a patient last year who couldnt eat much anymore but could manage small spoonfuls, and honestly watching her face light up at that first taste reminded me why food matters so much. the simplicity of your version means more people can give this a try, which ngl makes me really happy. definitely saving this one.
honestly this is perfect for what i’ve been looking for – my spouse is deployed and i’m hosting the unit families next month, and i need something that looks impressive but wont have me stressed in the kitchen while managing everything else. the no-oven thing is huge too because our oven’s been acting up. gonna make a batch this weekend to test it out, so grateful people like you share recipes that actually work for real life situations.