
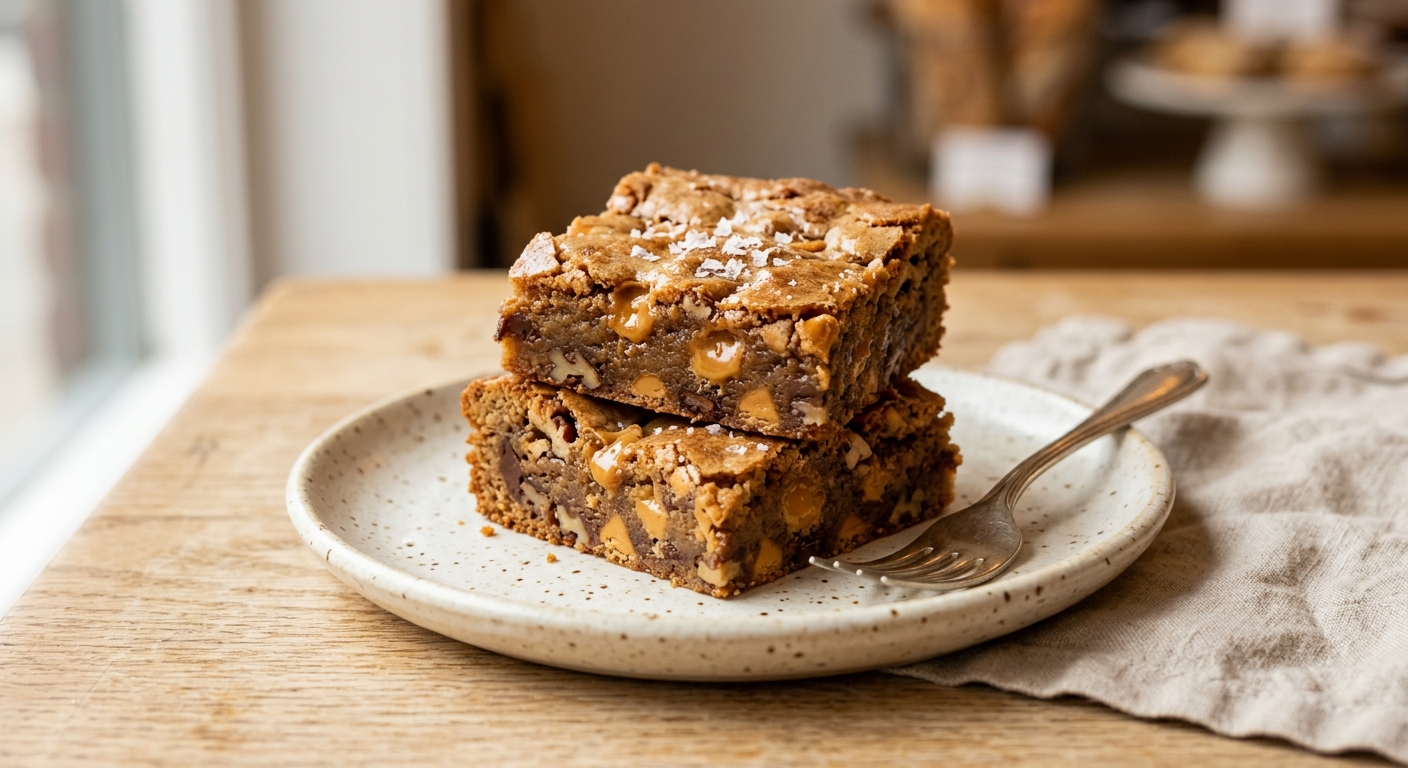
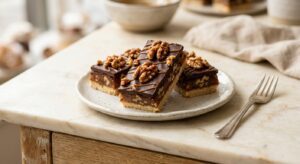
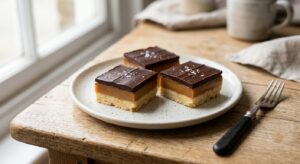
There is a moment, standing at the stove watching butter melt and foam and slowly turn golden, when the whole kitchen fills with the most intoxicating scent – toasty, nutty, almost toffee-like. That is the foundation of these blondies, and it changes everything. Where a standard blondie is pleasant, a brown butter blondie is genuinely memorable. The butterscotch chips melt into little pockets of buttery sweetness throughout, and the whole bar lands somewhere between a cookie and a confection, with a texture that is dense and fudgy without being heavy.
What sets this recipe apart is the technique of letting the brown butter cool until it just begins to solidify around the edges before mixing. This step is not just about temperature safety – it actually helps create that signature chewy, fudgy crumb. Melted-butter blondies can turn greasy or cakey if the fat is too warm when the eggs go in. Cooling it down slightly allows the butter and sugar to emulsify properly, trapping air and creating a tight, glossy batter that bakes into bars with that coveted shiny, crinkled top. A generous hit of vanilla and a full teaspoon of fine sea salt make every other flavor come alive.
These blondies sit comfortably in the easy-to-medium category – browning butter takes a bit of attention but no special skill, and the rest is straightforward one-bowl mixing. They are perfect for bakers of any level who want a crowd-pleasing treat that tastes far more impressive than the effort involved. Whether you are packing them for a bake sale, bringing them to a dinner party, or just keeping a pan on the counter for the week, they disappear fast.
16
servings
Ingredients
- 225 gunsalted butter (1 cup), cut into pieces
- 300 glight brown sugar, packed (about 1.5 cups)
- 100 ggranulated sugar (about 1/2 cup)
- 2 largeeggs, at room temperature
- 1 largeegg yolk, at room temperature
- 2 tsppure vanilla extract
- 240 gall-purpose flour (about 2 cups, spooned and leveled)
- 1 tspColima Sea SaltMicroplastic Free Salt
- 0.5 tspbaking powder
- 280 gbutterscotch chips (about 1.5 cups)
Ingredient Substitutions
Instructions
Click on an item below to shop for the recommended items for this recipe on Amazon.
As an Amazon Associate, we earn from qualifying purchases.
- Preheat your oven to 350°F (175°C). Grease a 9×13-inch metal baking pan and line it with parchment paper, leaving an overhang on the two long sides to act as handles for easy removal.
- Melt the butter in a light-colored medium saucepan over medium heat, stirring frequently. It will foam, then subside, then foam again. Continue cooking, swirling the pan often, until the butter turns a deep amber color and smells nutty and toasty, about 5 to 7 minutes. Watch carefully once it begins to color – it can go from golden to burnt quickly. Immediately pour into a large heatproof mixing bowl, scraping in all the browned bits from the bottom of the pan (those bits are pure flavor). Set aside and let cool for 15 minutes, until the butter has cooled to warm room temperature and has just begun to look slightly opaque around the bowl edges.
- Add both sugars to the browned butter and whisk vigorously for about 1 minute until well combined and slightly thickened. Add the eggs, egg yolk, and vanilla extract, and whisk again for about 90 seconds until the mixture is glossy, smooth, and a shade or two lighter. This step develops the shiny, crinkled top on the finished bars.
- Add the flour, sea salt, and baking powder to the bowl. Switch to a rubber spatula and fold until just combined and no dry streaks remain. Do not overmix. Fold in the butterscotch chips, reserving a small handful to press onto the top.
- Spread the batter evenly into the prepared pan – it will be thick. Press the reserved butterscotch chips over the surface. Bake for 24 to 28 minutes, until the top is golden and set and a toothpick inserted in the center comes out with a few moist, fudgy crumbs (not wet batter). The center may look very slightly underdone – that is correct. It will firm up as it cools.
- Transfer the pan to a wire rack and cool completely in the pan, at least 30 minutes, before lifting out and cutting into 16 bars. For the cleanest cuts, refrigerate for 20 minutes before slicing with a sharp knife.
- Make the brown butter and batter exactly as described in Steps 2 through 4 of the oven method, using the same technique and timings. The batter recipe is the same – only the baking vessel and method change.
- Halve the recipe if baking in an 8-inch square pan, or bake in two batches. Grease an 8-inch square metal baking pan and line with parchment paper. Spread the batter evenly and press reserved butterscotch chips on top.
- Preheat your air fryer to 325°F (160°C) for 3 minutes. Place the pan in the basket. Air fry for 18 to 22 minutes, checking at the 18-minute mark. Because air fryers circulate heat aggressively, the top can brown quickly – if the surface looks deep golden before the center is set, loosely lay a small piece of foil over the top for the remaining bake time.
- The blondies are done when the top is golden and set and a toothpick inserted in the center comes out with moist fudgy crumbs. The center will look slightly soft – this is correct.
- Cool in the pan on a heat-safe surface for at least 20 minutes before removing and cutting. The bars will firm up considerably as they cool.
- To make one single-serving mug blondie, combine 1.5 tbsp unsalted butter in a small microwave-safe mug or ramekin. Microwave on High in 20-second bursts, watching carefully, until the butter turns golden amber and smells nutty, about 60 to 90 seconds total. This is a quick stove-free version of browning – the butter will foam and then color. Let cool for 2 minutes.
- Add 3 tbsp light brown sugar to the browned butter and stir well with a fork. Add 1 egg yolk (not a whole egg – a whole egg will make it rubbery) and 1/4 tsp vanilla extract. Stir until smooth and glossy.
- Add 3 tbsp all-purpose flour, a very small pinch each of fine sea salt and baking powder, and stir until just combined. Fold in 2 tbsp butterscotch chips.
- Microwave on High (100% power) for 60 to 90 seconds, checking every 20 seconds after the first minute. The center should look just barely set and slightly glossy – it will continue to cook from residual heat. Do not overcook or it will become rubbery.
- Let the mug sit for 1 to 2 minutes before eating. Serve directly from the mug, optionally topped with a small scoop of vanilla ice cream or a drizzle of caramel sauce.
Nutrition Per Serving
Per 1 serving (makes one 9×13-inch pan, cut into 16 bars)
Why This Recipe Works
Browning butter does more than add flavor – it fundamentally changes the chemistry of the fat. As butter heats past the point where its water evaporates, the milk solids (proteins and sugars) undergo Maillard browning, creating hundreds of new flavor compounds including diacetyl, which gives it that butterscotch-like nuttiness. By using browned butter instead of melted butter, you are essentially building a secondary layer of caramelized flavor before a single other ingredient is added. The key to texture lies in cooling that butter before mixing: fat that is too hot will cause the eggs to partially cook and the sugars to dissolve too aggressively, resulting in a flat, greasy, or cakey bar. Cooling to warm room temperature allows the mixture to emulsify properly as you whisk.
The combination of whole eggs plus an extra yolk is a deliberate choice. Whole eggs provide structure and lift through their whites, while the extra yolk adds fat and emulsifying lecithin, contributing to the rich, fudgy interior and that characteristic shiny crinkled top. The vigorous whisking of eggs with sugar also dissolves some of the sugar crystals and incorporates a small amount of air, which creates that glossy surface. Using more brown sugar than white sugar is also intentional: brown sugar contains molasses, which is hygroscopic (it attracts and retains moisture), keeping the bars chewy and moist for days after baking.
Baking powder is included in a small amount – just enough to give the bars the tiniest bit of lift so they are not completely dense, without pushing them into cake territory. If your blondies come out too cakey, the most common culprits are too much leavening, overmixing the batter after the flour is added (which develops gluten and traps too much air), or overbaking. Pull the pan when there are still moist crumbs on the toothpick. The carryover heat from the pan will finish the job as they cool.
Baker’s Tips
- Use a light-colored stainless steel or enameled saucepan to brown the butter – it makes it much easier to see the color change. In a dark pan, you can easily overshoot and burn it.
- Do not rush the cooling step for the brown butter. If you add eggs to butter that is too hot, you will end up with scrambled bits in your batter.
- Whisk the butter, sugar, and eggs vigorously and thoroughly. That glossy, ribbon-like batter is what gives you the shiny, crinkled top that makes blondies look so irresistible.
- Spoon and level your flour rather than scooping directly from the bag. Scooping compacts the flour and can add 20 to 30% more than the recipe intends, leading to dry, dense bars.
- Line your pan with parchment paper with an overhang. This makes lifting the whole slab out effortless and means you can cut neat, even bars on a cutting board rather than in the pan.
- Resist cutting the blondies while they are warm. They need time to set up fully, and cutting too soon will give you crumbly, ragged edges. Patience is rewarded with clean, bakery-worthy slices.
- For extra-chewy bars, underbake by 2 minutes and pull the pan when the center still has the faintest jiggle. They will set to the perfect fudgy texture as they cool completely.
Variations
- Salted caramel swirl: Dollop 3 to 4 tablespoons of thick salted caramel sauce over the batter before baking and swirl gently with a skewer.
- Toasted pecan and maple: Fold in 100g of roughly chopped toasted pecans along with the butterscotch chips, and add 1 tsp pure maple extract in place of half the vanilla.
- Espresso brown butter: Add 1.5 tsp instant espresso powder to the sugar-butter mixture in Step 3 for a mocha-caramel depth that makes the butterscotch flavor even richer.
- Sea salt and dark chocolate swirl: Replace half the butterscotch chips with chopped dark chocolate (70%) and finish the baked bars with a generous pinch of flaky sea salt the moment they come out of the oven.
Troubleshooting & FAQ
My blondies came out cakey and dry instead of fudgy. What went wrong?
My brown butter burned before it turned the right color. How do I prevent this?
My blondies do not have that shiny crinkled top. Where did I go wrong?
My butterscotch chips sank to the bottom of the blondies. How do I fix this?
The edges are overdone but the center is still gooey. What happened?
Storage & Make-Ahead
- Storage: Store blondies in an airtight container at room temperature for up to 4 days. For longer storage, refrigerate for up to 1 week (bring to room temperature before serving for best texture). Freeze individual bars wrapped tightly in plastic wrap, then placed in a zip-top bag, for up to 3 months. Thaw at room temperature for 1 hour.
- Make-Ahead: The batter can be made up to 24 hours ahead and stored covered in the refrigerator. Let it sit at room temperature for 20 minutes before spreading into the pan and baking. Baked and cooled blondies can also be wrapped and frozen up to 3 months in advance.
Jerome, what a thoughtful idea for your food bank volunteers! I’ve been baking for our neighborhood gatherings for years, and I’ve found that brown butter has this quiet magic that makes people feel truly cared for, not like they’re eating “diet” anything. I’m definitely trying these with allulose, since that nutty caramel flavor will probably shine even brighter with a lower sugar option. Your volunteers deserve treats that taste like love, and this sounds like exactly that.
man these sound incredible and i love that jerome and harriet are talking about the care that goes into baking for people, that’s exactly what ive found when i bring stuff to our block parties and soccer team gatherings. my kids always ask why my brown butter bars taste better than my regular ones and honestly its because brown butter just hits different, makes everything feel more special. definitely gonna try these with allulose since my D has been asking for more desserts that dont mess with his energy levels before games.
These sound like they’d be perfect for the volunteers at the food bank – I’m always looking for something that tastes like a real treat but doesn’t spike blood sugar. Brown butter is the secret ingredient most people skip, so I’m glad you’re making it the star here. Definitely trying this weekend.