
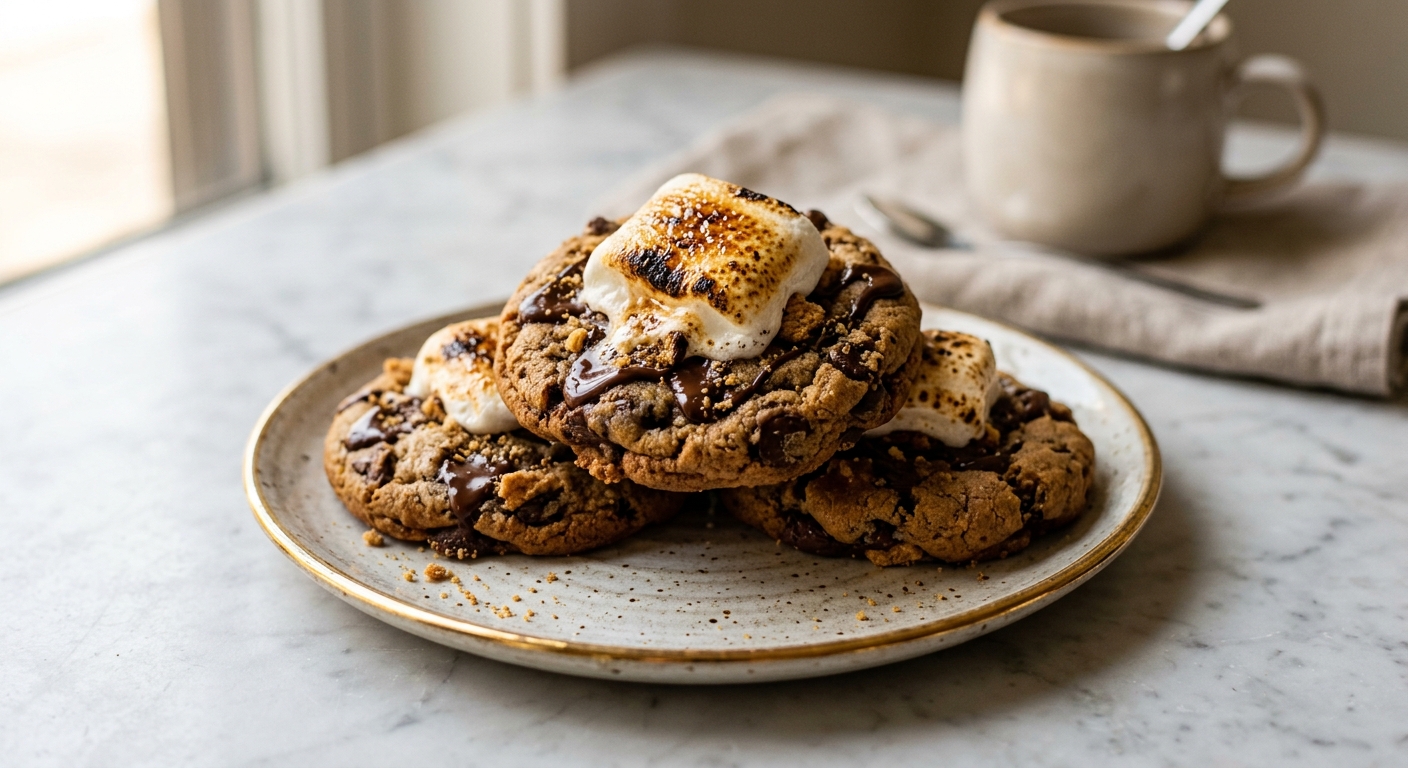
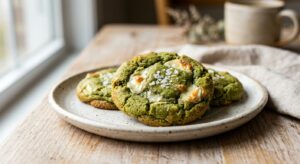
Close your eyes and picture it: a late summer evening, the crackle of a fire pit, and a marshmallow slowly turning amber over the flames before being sandwiched between two graham crackers with a square of chocolate. That first pull-apart moment, the stretch of melted chocolate and gooey marshmallow, is something close to perfect. These s’mores cookies bottle up that exact feeling and deliver it in a form that needs no campfire, no sticks, and thankfully no singed fingertips.
What sets this version apart is a combination of three deliberate choices. First, the cookie base is built on browned butter, which adds a nutty, almost toffee-like depth that plain melted butter simply cannot match. Second, crushed graham crackers are worked directly into the dough, giving every bite that signature honeyed crunch from the inside out, not just as a topping. Third, the marshmallows are added in the final minutes of baking and then finished under the broiler for ten to fifteen seconds, creating that coveted toasted, campfire-golden top without ever leaving your kitchen.
These cookies land firmly in the medium difficulty range. The brown butter takes an extra five minutes of attention, and the broiler finish requires you to stay close, but there is nothing technically intimidating here. They are ideal for bakers who have made drop cookies before and want to try something a little more impressive, and they are absolutely perfect for bake sales, holiday cookie boxes, or any gathering where you want to be the person who brought the most talked-about treat.
18
servings
Ingredients
- 225 gunsalted butter (2 sticks / 1 cup), cut into tablespoons
- 220 glight brown sugar, packed (about 1 cup)
- 50 ggranulated sugar (about 1/4 cup)
- 2 largeeggs, at room temperature
- 1 tsppure vanilla extract
- 240 gall-purpose flour (about 2 cups, spooned and leveled)
- 90 gfinely crushed graham crackers (about 6 full cracker sheets, roughly 3/4 cup)
- 1 tspbaking soda
- 1 tspColima Sea SaltMicroplastic Free Salt
- 0.5 tspground cinnamon
- 200 gdark chocolate (60 to 70% cacao), roughly chopped into chunks (about 1 1/4 cups), or use chocolate chips
- 18 pieceslarge marshmallows (one standard 10 oz bag will have plenty), halved horizontally
- —Colima Sea SaltMicroplastic Free Salt, for finishing (such as Maldon)
Ingredient Substitutions
Instructions
Click on an item below to shop for the recommended items for this recipe on Amazon.
As an Amazon Associate, we earn from qualifying purchases.
- Brown the butter: melt the butter in a light-colored saucepan or skillet over medium heat, stirring frequently. It will foam, then the foam will subside, and you will begin to see golden-brown specks forming on the bottom. Once it smells nutty and the milk solids are amber, pour immediately into a large heatproof mixing bowl, scraping in all the browned bits. Let cool for 15 minutes.
- Whisk both sugars into the cooled brown butter until fully combined. Add the eggs one at a time, whisking vigorously for about 30 seconds after each addition until the mixture is slightly lighter in color. Whisk in the vanilla extract.
- In a separate bowl, whisk together the flour, crushed graham crackers, baking soda, sea salt, and cinnamon. Add the dry ingredients to the wet and fold with a rubber spatula until just combined. Fold in the chocolate chunks. The dough will be soft. Cover and refrigerate for 30 minutes (or up to 48 hours for deeper flavor).
- Preheat your oven to 375°F (190°C). Line two large baking sheets with parchment paper. Scoop dough into balls of about 50g (roughly 3 tablespoons) each and space them 3 inches apart on the prepared sheets. Bake for 11 to 13 minutes, until the edges are set and golden but the centers still look slightly underdone and glossy.
- Remove the baking sheets from the oven and immediately press one marshmallow half (cut side down) gently into the center of each cookie. Switch your oven to the broiler on high. Slide one sheet at a time under the broiler, 6 to 8 inches from the heat, for 10 to 15 seconds only, watching every second until the marshmallows are golden with dark spots. Remove immediately.
- Sprinkle each cookie with a pinch of flaky sea salt. Let the cookies cool on the baking sheet for 5 minutes before transferring to a wire rack. The marshmallow will firm up slightly as they cool but remain soft and pillowy inside.
- Prepare the brown butter dough exactly as described in the oven method steps 1 through 3. Chill for at least 30 minutes. Firm, cold dough is especially important here so the cookies do not spread excessively in the air fryer.
- Preheat your air fryer to 325°F (165°C) for 3 minutes. Cut a round of parchment to fit your air fryer basket or use a perforated air fryer liner. Do not skip the parchment, as the dough is sticky.
- Scoop 3 to 4 dough balls (50g each) and place them in the basket with at least 2 inches of space between them. Cook for 7 to 8 minutes. The cookies will look very soft and underdone when you open the drawer. That is correct. The edges should just be set.
- Press one marshmallow half (cut side down) firmly onto the center of each cookie. Close the air fryer and cook for an additional 30 to 45 seconds at 325°F (165°C) until the marshmallow puffs and turns lightly golden. Watch through the window if your model has one, as marshmallows can go from golden to burnt very quickly.
- Using a flat spatula, carefully transfer the hot cookies to a wire rack. Finish with a pinch of flaky sea salt. Let cool for at least 5 minutes before eating, as the chocolate and marshmallow will be extremely hot. Repeat with remaining dough, re-lining with fresh parchment as needed.
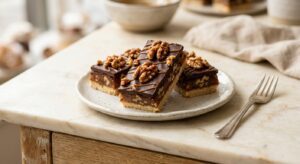
- Line an 8×8-inch baking pan with parchment paper, leaving overhang on two sides for easy lifting. In a food processor, pulse 180g of graham crackers (about 12 full cracker sheets) until fine crumbs form. Mix the crumbs with 85g (6 tablespoons) of melted butter and 2 tablespoons of powdered sugar until it resembles damp sand. Press firmly and evenly into the bottom of the prepared pan. Freeze for 15 minutes.
- Make the chocolate ganache filling: finely chop 300g of dark chocolate (60 to 70% cacao) and place in a heatproof bowl. Heat 240ml (1 cup) of heavy cream in a small saucepan over medium heat until it just begins to simmer around the edges. Pour the hot cream over the chocolate, add 1/2 tsp vanilla extract and a pinch of sea salt, and let sit for 2 minutes. Stir gently from the center outward until completely smooth and glossy.
- Pour the ganache over the chilled graham cracker base and spread evenly with an offset spatula. Tap the pan gently on the counter a few times to remove air bubbles. Refrigerate uncovered for at least 2 hours, or until the ganache is fully set and firm to the touch.
- Once set, lift the slab out of the pan using the parchment overhang and place on a cutting board. Cut into 18 bars using a sharp knife warmed under hot water and wiped dry between cuts for clean edges.
- Arrange the bars on a serving platter or board. Place one large marshmallow half (cut side down) on top of each bar and use a kitchen torch held 2 to 3 inches away to toast the marshmallow, moving in slow circles until deeply golden with char marks. Finish with a pinch of flaky sea salt and serve immediately, or refrigerate uncovered for up to 30 minutes before serving.
Nutrition Per Serving
Per 1 serving (makes 18 large cookies)
Why This Recipe Works
Browning the butter before building the dough does more than add flavor, it changes the moisture content of the fat itself. When butter is browned, the water it contains (roughly 18 to 20% by weight) evaporates off, concentrating the butterfat and creating dozens of new aromatic compounds through the Maillard reaction. Less water in the fat means less steam in the oven, which translates to a chewier, denser cookie rather than a cakey one. Those nutty, caramel-like notes amplify every other flavor in the dough, making the graham cracker and chocolate taste more intensely of themselves.
Chilling the dough for 30 minutes (or longer) is not optional here. Because the butter was melted and browned rather than creamed from solid, the dough starts out quite soft. Chilling allows the fats to re-solidify, which slows the spread in the oven and gives you that thick, bakery-style cookie with a defined edge and a fudgy center. The resting period also allows the flour to fully hydrate and the sugars to begin dissolving into the dough, which deepens flavor noticeably even after just 30 minutes.
The science behind the marshmallow topping is straightforward but timing is everything. Marshmallows are made of sugar, water, and gelatin. Under high heat, the sugar caramelizes on the surface while the trapped air and water vapor cause the marshmallow to puff dramatically. The broiler or air fryer finisher delivers intense top-down heat that toasts the outside in seconds without cooking the cookie further. If you leave the marshmallow in too long, it melts into a flat sugary puddle rather than maintaining its pillowy shape, which is why 10 to 15 seconds under the broiler is the target. Trust the short time and watch constantly.
Baker’s Tips
- Use a light-colored saucepan or skillet to brown the butter so you can see the milk solids changing color. Dark pans hide the color change and make it very easy to accidentally burn the butter.
- Do not skip scraping every last bit of browned butter and those golden specks into the mixing bowl. Those solids are the most flavorful part.
- Crush the graham crackers finely enough that no large shards remain. Big pieces create weak spots in the dough and the cookies can crack along those lines when baked. A food processor or a zip-top bag with a rolling pin both work well.
- Weigh your dough balls for consistent sizing. Cookies that are the same weight bake evenly together on the same sheet. Eyeballing can lead to some cookies being overbaked while others are still raw.
- When pressing the marshmallow onto the hot cookie, use the cut side facing down. The flat cut surface makes better contact and toasts more evenly than the rounded top.
- Have your baking sheets, oven mitts, and a clear space on the counter all ready before you turn on the broiler. The marshmallow toasting step happens in under 15 seconds and you need to move fast.
- Slightly underbaking the cookies in the oven step is intentional and important. They will carry-over cook on the hot sheet pan after removal. Pull them when the edges look set but the centers look glossy and almost underdone.
Variations
- Peanut butter s’mores: reduce the butter by 55g and add 65g (1/4 cup) of creamy peanut butter with the sugars. The salty, nutty contrast with the toasted marshmallow is exceptional.
- Spiced Mexican chocolate version: replace the dark chocolate with a Ibarra or Abuelita tablet (roughly chopped) and add 1/4 tsp cayenne pepper and an extra 1/2 tsp cinnamon to the dough for a warmly spiced cookie with a slow heat.
- Birthday cake s’mores: stir 3 tablespoons of rainbow sprinkles into the dough and use a vanilla almond chocolate bar in place of dark chocolate for a festive, funfetti-meets-campfire mashup.
- Brown butter blondie bars: press the entire batch of dough into a greased and parchment-lined 9×13-inch pan. Bake at 350°F (175°C) for 22 to 25 minutes, then add marshmallows and broil as directed. Cut into 24 bars once cool.
Troubleshooting & FAQ
My cookies spread out completely flat. What went wrong?
My marshmallow melted completely flat instead of staying puffy. How do I fix it?
The cookies came out cakey and soft rather than chewy. What happened?
My brown butter smells bitter and the specks look very dark. Is it ruined?
Can I make these without a broiler for the marshmallow finish?
Storage & Make-Ahead
- Storage: Store cooled cookies in a single layer in an airtight container at room temperature for up to 3 days. Layer between sheets of parchment if stacking. The marshmallow topping softens over time but remains delicious. Cookies can be frozen (without the marshmallow topping) for up to 2 months. Thaw at room temperature and add fresh marshmallows before briefly rewarming in a 300°F (150°C) oven for 5 minutes, then toast under the broiler.
- Make-Ahead: The cookie dough can be made up to 48 hours ahead and refrigerated, tightly covered. Longer chilling actually deepens the caramel and brown butter flavor. Portioned dough balls can also be frozen on a sheet pan until solid, then transferred to a freezer bag and baked from frozen, adding 2 to 3 extra minutes to the bake time. Do not add marshmallows until the final minutes of baking.

oh jen that is the sweetest idea, bringing joy to the nicu staff is so special and honestly these cookies are gonna do it – the marshmallow on top is like edible happiness! i totally get wanting to use allulose too bc my current foster baby (shes a pit bull mix with the softest ears) has to be careful with regular sugar and i started baking her little training treats with it, its been a game changer, so if these work out for your event please come back and tell us how people react!
There’s something about sharing food that’s made with real care, especially in spaces like a NICU where people are doing such tender, difficult work. I love that you’re thinking of the staff that way, Jen. I’ve found that when you bake with intention, using ingredients that feel good because they actually are good, people sense that somehow. The brown butter and allulose combination in these sounds like it would hold up beautifully too, keeping that marshmallow golden without the cookies going stale. I think those staff members are going to feel exactly what you’re putting into this.
oh my gosh these look absolutely incredible and now im imagining bringing these to our nicu family appreciation day because honestly the staff room needs more joy and less hospital cafeteria food! i love that you use allulose because it means i can actually enjoy these without the sugar crash that makes crying at work even more intense lol. do you find the brown butter adds enough depth that people dont notice the sugar swap, or is that what makes these so special? either way im def making them this weekend!