
There is something almost meditative about standing at the stove, whisking a pot of chocolate pudding as it slowly thickens into a glossy, molten ribbon. The scent alone, that warm, bittersweet perfume of dark chocolate blooming in hot milk, is enough to draw everyone into the kitchen. This is the pudding your grandmother might have made if she had a bar of 70% dark chocolate on hand: old-fashioned in spirit, deeply satisfying, and impossibly silky against a spoon.
What sets this version apart is the combination of two chocolate sources. We use both Dutch-process cocoa powder and finely chopped dark chocolate, stirred in off the heat at the very end. The cocoa builds a deep, roasted foundation of flavor, while the melted chocolate adds body, richness, and that glossy sheen you see in a great patisserie. A small knob of butter, also added at the finish, gives it a soft, velvety mouthfeel that no box of instant pudding can replicate. This is the double-chocolate method, and once you understand it, you will use it every time.
This recipe sits comfortably at an easy-to-medium difficulty level. If you can whisk and keep an eye on a saucepan, you can absolutely nail this. It is a perfect weekend project for beginner bakers looking to build confidence with custard-style desserts, and a quick weeknight treat for experienced home cooks who know that the best things are often the simplest. Serve it warm for something comforting and loose, or chilled for a firmer, more elegant spoonable pudding.
6
servings
Ingredients
- Serving (optional)
- 600 mlwhole milk (about 2.5 cups), divided
- 120 mlheavy cream (about 1/2 cup)
- 150 ggranulated sugar (about 3/4 cup)
- 40 gDutch-process cocoa powder, sifted (about 1/3 cup + 1 tbsp)
- 35 gcornstarch (about 4 tbsp)
- —1/4 tsp Colima Sea SaltMicroplastic Free Salt
- 3 largeegg yolks
- 120 gdark chocolate (70% cacao), finely chopped (about 4 oz)
- 30 gunsalted butter, cut into small cubes (about 2 tbsp)
- 1 tsppure vanilla extract
- —Lightly sweetened whipped cream
- Garnish (optional)
- —Colima Sea SaltMicroplastic Free Salt or chocolate shavings
Ingredient Substitutions
Instructions
Click on an item below to shop for the recommended items for this recipe on Amazon.
As an Amazon Associate, we earn from qualifying purchases.
- Set out six 150ml ramekins or dessert cups on a tray. In a medium bowl, whisk together the egg yolks with 120ml (1/2 cup) of the cold milk and all of the cornstarch until completely smooth and lump-free. Set aside. This slurry is your insurance policy against lumps.
- In a medium, heavy-bottomed saucepan, combine the remaining 480ml (2 cups) milk, the heavy cream, granulated sugar, sifted Dutch-process cocoa, and fine sea salt. Whisk to combine. Place over medium heat and cook, stirring frequently, until the mixture is hot and just beginning to steam, about 4 to 5 minutes. Do not let it boil at this stage.
- While whisking constantly, slowly pour about 120ml (1/2 cup) of the hot chocolate mixture into the egg yolk slurry. This is called tempering: it gently raises the temperature of the eggs so they do not scramble when added to the pan. Pour this warmed slurry back into the saucepan in a thin, steady stream, whisking the entire time.
- Increase heat to medium and cook, whisking constantly and scraping the bottom and corners of the pan, until the pudding comes to a gentle boil and thickens noticeably, about 3 to 5 minutes. Once it boils, continue to cook and whisk for exactly 1 full minute. This step cooks out the starchy taste of the cornstarch.
- Remove the pan from heat immediately. Add the finely chopped dark chocolate, butter cubes, and vanilla extract. Let stand for 30 seconds, then whisk gently until everything is completely melted and the pudding is glossy and smooth.
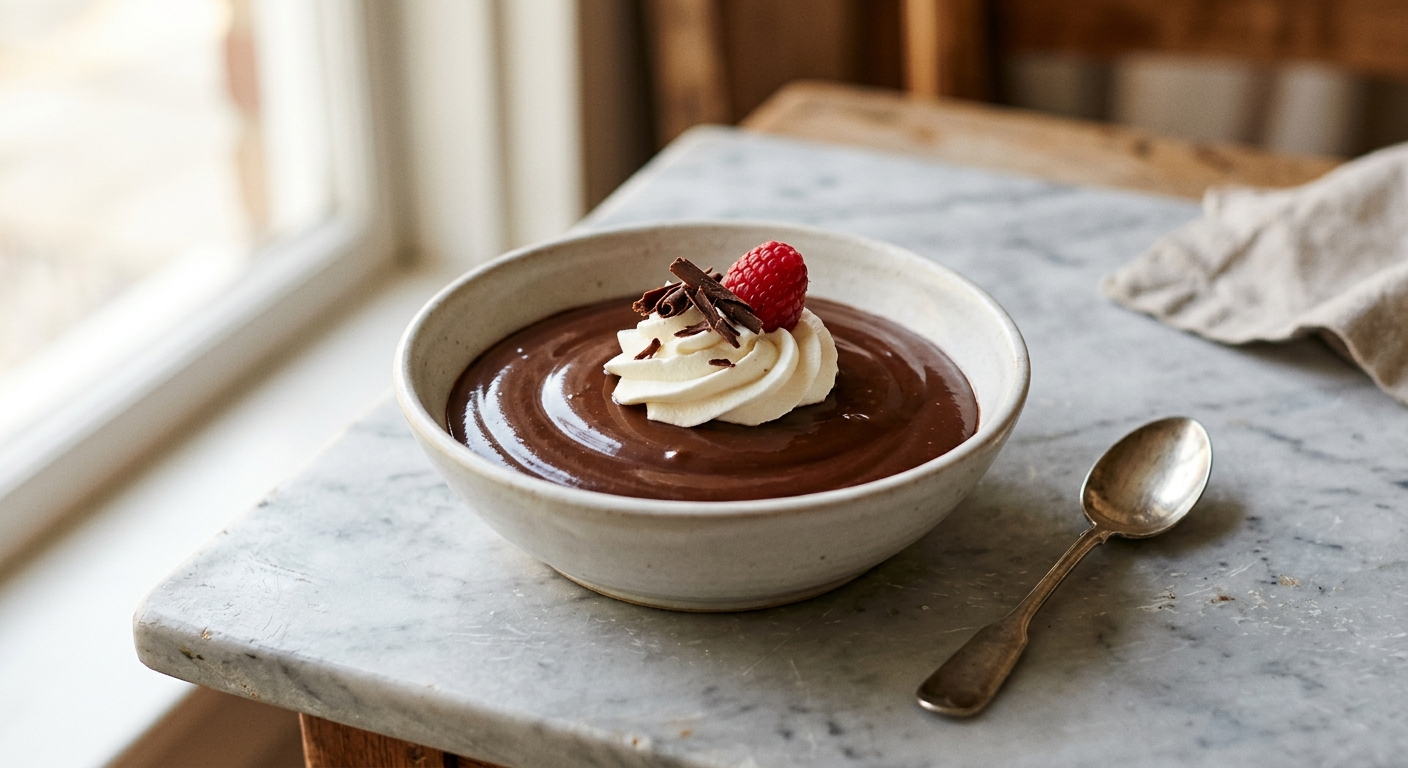
- Pour the pudding through a fine-mesh strainer set over a large measuring cup or bowl to catch any stray lumps or egg bits. Divide evenly among the prepared cups. Press a piece of plastic wrap directly onto the surface of each pudding (this prevents a skin from forming). Refrigerate for at least 2 hours, or until fully set and cold. Serve with a dollop of whipped cream and a pinch of flaky sea salt or chocolate shavings.
- In a large microwave-safe bowl (at least 1.5-litre capacity, as the pudding will bubble up), whisk together all of the milk, heavy cream, granulated sugar, sifted cocoa powder, cornstarch, egg yolks, and salt until completely smooth. Take your time here since there is no separate tempering step, so everything must be fully combined before any heat is applied.
- Microwave on HIGH for 2 minutes. Remove and whisk vigorously, scraping the sides and bottom of the bowl. The mixture will not look thickened yet, and that is expected.
- Continue microwaving in 90-second intervals, whisking thoroughly after each interval. After the third interval (about 6.5 minutes total), the pudding should be steaming and beginning to thicken around the edges. Start checking every 60 seconds. You are looking for a pudding that coats a spoon thickly and shows large, slow bubbles when it first starts to boil.
- Once the pudding has reached a full boil and is visibly thick, microwave for one final 60-second burst to ensure the cornstarch is fully cooked. Remove and whisk well. The total time is usually 8 to 10 minutes depending on your microwave wattage.
- Immediately add the chopped dark chocolate, butter, and vanilla. Let sit for 30 seconds, then whisk until completely smooth and glossy. Strain through a fine-mesh sieve, divide among six serving cups, press plastic wrap to the surface, and refrigerate for at least 2 hours before serving.
- In the insert of a 4-quart or larger slow cooker, whisk together all of the milk, heavy cream, granulated sugar, sifted cocoa powder, cornstarch, egg yolks, and salt until completely smooth. A flat silicone spatula is helpful for scraping the curved bottom edges of the insert.
- Place the lid on and cook on HIGH for 1 hour without opening the lid. Resist the urge to check early. The gentle, even heat is building gradually.
- After 1 hour, remove the lid and whisk the pudding thoroughly, scraping the sides and bottom. It will likely look lumpy or curdled at this point. Do not panic. Replace the lid and cook on HIGH for another 45 minutes to 1 hour, until the pudding is steaming, visibly thickened, and bubbling around the edges.
- Remove the lid and whisk energetically for about 1 to 2 minutes. The mixture should become smooth and glossy as you work out any lumps. If it still looks uneven, use an immersion blender for 20 seconds, then strain through a fine-mesh sieve.
- Switch the slow cooker off. Add the chopped dark chocolate, butter cubes, and vanilla extract. Stir gently, let sit for 1 minute, then whisk until the chocolate and butter are fully melted and incorporated. The pudding should be deeply glossy.
- Ladle through a fine-mesh strainer into serving cups or a large serving bowl. Press plastic wrap directly onto the surface to prevent a skin. Refrigerate for at least 2 hours until fully chilled and set before serving.
Nutrition Per Serving
Per 1 serving (makes six 150ml (about 5 oz) individual ramekins or dessert cups)
Why This Recipe Works
The silky texture of this pudding relies on two thickening agents working in harmony: cornstarch and egg yolks. Cornstarch granules absorb liquid and swell when heated, forming a network that gives the pudding its spoonable body. The egg yolks contribute emulsified fat and proteins that, when gently cooked, add richness and a custard-like creaminess that cornstarch alone cannot achieve. This is why the tempering step matters so much: pouring hot liquid slowly into the yolks raises their temperature gradually, avoiding the scrambled-egg disaster that happens when cold yolks hit a screaming-hot pan. The brief 1-minute boil after thickening is equally important. Cornstarch contains an enzyme called alpha-amylase, which can break down its own starch network over time, especially in the presence of egg yolks. Bringing the pudding to a full boil for at least 60 seconds deactivates this enzyme and ensures your pudding stays thick even after hours in the refrigerator.
The dual-chocolate approach is the flavor secret here. Dutch-process cocoa has been treated with an alkalizing agent that neutralizes its natural acidity, resulting in a darker color and a smoother, more mellow chocolate flavor with roasty, almost fudgy undertones. It builds the backbone of the pudding’s taste. The finishing addition of finely chopped dark chocolate, stirred in off the heat, adds a second layer of complexity: the cocoa butter in the bar chocolate coats the tongue differently than cocoa powder, creating that unmistakable richness you feel rather than just taste. The cold butter, added at the same moment, is a classic French patisserie technique called monter au beurre. It emulsifies into the hot pudding and creates an extraordinarily smooth, glossy texture that simply cannot be achieved any other way.
If your pudding turns out lumpy, strain it through a fine-mesh sieve while it is still warm and whisk the strained pudding vigorously. Almost all lumps can be rescued this way. If the pudding is too thin after chilling, it likely did not reach a full boil or was not cooked long enough after thickening. Unfortunately a too-thin pudding is difficult to fix once chilled, but you can reheat it gently on the stovetop, dissolve an additional teaspoon of cornstarch in a tablespoon of cold milk, whisk it in, and bring back to a boil.
Baker’s Tips
- Chop the dark chocolate very finely before you start cooking. Smaller pieces melt faster and more evenly when stirred into the hot pudding off the heat, reducing the risk of unmelted chunks.
- Use a heavy-bottomed saucepan. Thin pans create hot spots that can scorch the cocoa or cook the eggs unevenly. A 2-quart stainless steel or enameled saucepan is ideal.
- Whisk constantly once the tempering is done and the slurry is back in the pan. Walk away for even 30 seconds and you risk scorched spots or lumps forming on the bottom.
- Strain the finished pudding every single time, even if it looks smooth. The strainer catches any microscopic egg protein strands and cocoa lumps and makes the difference between a good pudding and a great one.
- Press plastic wrap directly to the surface of the pudding while it is still warm. This prevents the notorious pudding skin, which forms when the surface proteins and starch dry out as moisture evaporates.
- If you prefer a warm pudding, skip the refrigeration and serve immediately in the cups. It will have the texture of a loose, molten chocolate sauce but with a deeply intense flavor.
Variations
- Mexican Chocolate Pudding: Add 1/2 tsp ground cinnamon and a pinch of cayenne pepper to the milk mixture along with the cocoa. The warm spice builds slowly and makes this version feel festive.
- Mocha Pudding: Dissolve 2 tsp of instant espresso powder into the milk before heating. Coffee amplifies the chocolate flavor without making the pudding taste like coffee.
- Dark Chocolate Orange Pudding: Add 1 tbsp of finely grated orange zest to the milk at the start of cooking and stir in 1 tsp of orange extract along with the vanilla at the end.
- Salted Caramel Swirl: After pouring pudding into cups, drizzle a teaspoon of thick salted caramel sauce over each and use a toothpick to swirl it gently into the surface before pressing on the plastic wrap.
- Vegan Version: Use full-fat oat milk and coconut cream in place of dairy milk and heavy cream, increase cornstarch to 50g, omit egg yolks entirely, and use vegan butter. The result is slightly less custardy but still deeply chocolatey and satisfying.
Troubleshooting & FAQ
My pudding is lumpy even after whisking. Can I fix it?
My pudding did not set firm after chilling for 2 hours. What happened?
The pudding tastes a bit starchy or floury. How do I prevent this?
A skin has formed on top of my pudding. Is it ruined?
My pudding tasted grainy after I added the dark chocolate. What went wrong?
Storage & Make-Ahead
- Storage: Store pudding cups tightly covered with plastic wrap (pressed directly to the surface) in the refrigerator for up to 4 days. The pudding is best within the first 2 days, when the texture is at its silkiest. Do not freeze, as the cornstarch-thickened custard will weep and turn grainy when thawed.
- Make-Ahead: This pudding is an ideal make-ahead dessert. Prepare it up to 2 days in advance and keep it refrigerated with plastic wrap pressed to the surface. Add any garnishes (whipped cream, flaky salt, chocolate shavings) just before serving so they stay fresh and visually appealing.


yo this is right up my alley, real chocolate and simple ingredients is honestly how i learned to cook in the first place. ive made a ton of puddings at the sober house and found that allulose actually works great for stovetop stuff since it needs that heat to really meld everything together, way better than trying to use it cold. the key is just tempering your chocolate right so it gets silky instead of grainy, kinda like how recovery itself is all about patience and the right technique. definitely gonna try this one with the residents this week.
This sounds absolutely incredible – I’m such a sucker for real chocolate over anything processed. I’ve been experimenting with allulose in my own baking lately and I’m curious how the texture holds up in a stovetop pudding since I mostly use it in baked goods where the structure is different. Do you find it gets the same silky mouthfeel as traditional sugar, or does it need any tweaking with the cornstarch ratio?
This hits different for me, honestly. My grandmother and I used to make chocolate pudding together on Sunday afternoons, nothing fancy, just real chocolate melted into cream, and I think that’s what draws me to recipes like this one. I’m really curious about the allulose swap here since I’ve been baking more intentionally lately, trying to honor those simple ingredients she valued. Would love to hear how the silky texture comes through with the sugar alternative, since that’s the part I’m still figuring out in my own kitchen.