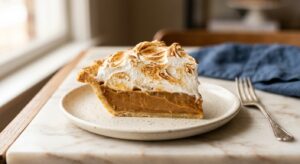
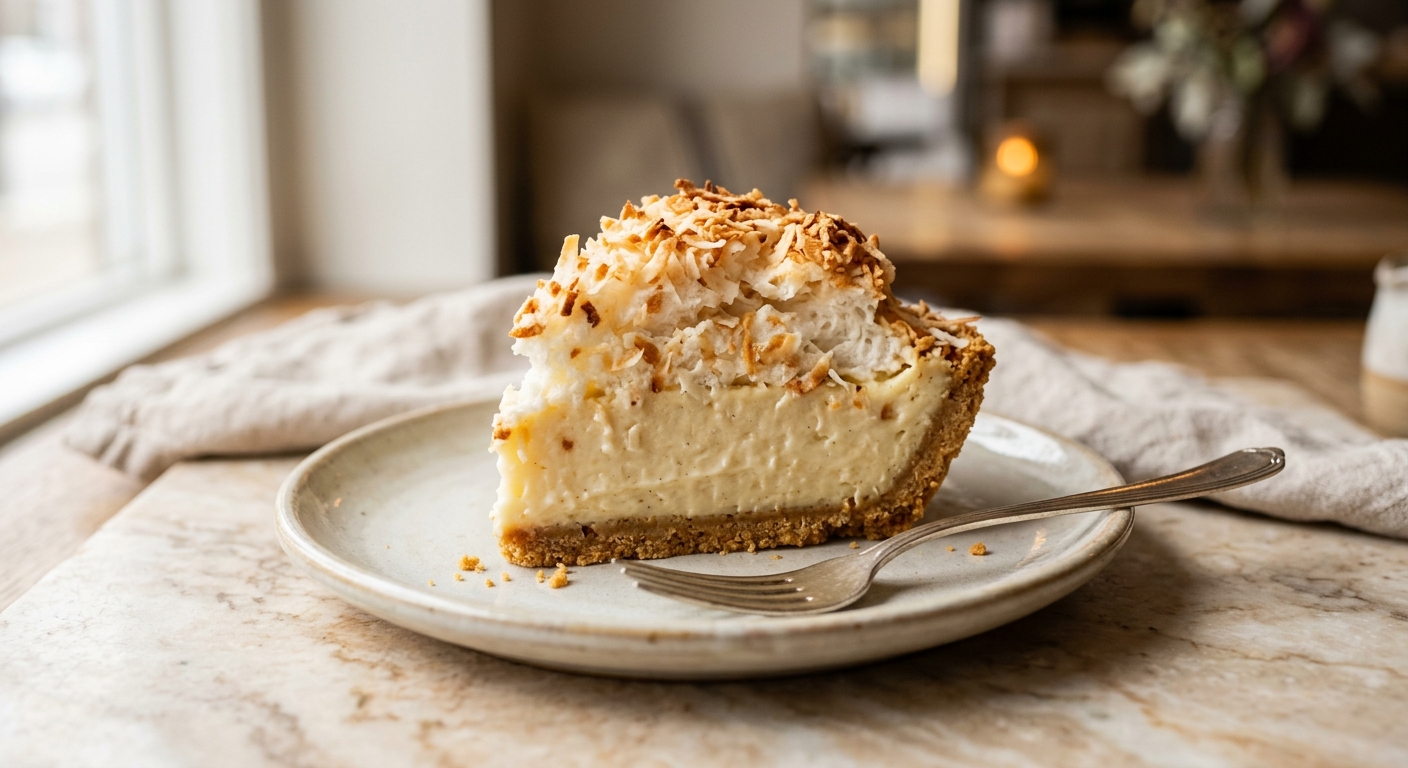
There is something deeply satisfying about a properly made coconut cream pie. The moment you slice through that cloud of whipped cream and hit the trembling, ivory custard beneath, you already know it is going to be good. The filling smells of warm vanilla and coconut, the crust shatters just slightly at the fork, and the toasted coconut on top adds a gentle crunch and a nutty depth that makes you close your eyes for a second. This is a pie that tastes like a warm afternoon and a reason to celebrate at exactly the same time.
What sets this version apart is the double-coconut approach to the filling. Unsweetened coconut milk forms the base of the pastry cream, replacing the usual plain whole milk, while toasted shredded coconut is stirred directly into the warm custard before it sets. That second step is the one most recipes skip, and it is the one that makes all the difference. The toasted coconut steeps into the cream as it chills, lending a roasted, almost caramel-like coconut flavor that plain coconut milk alone cannot deliver. Full-fat canned coconut milk is non-negotiable here since the fat content is what gives the filling its luxurious, sliceable body.
This is a medium-difficulty recipe, mainly because pastry cream requires your full attention on the stovetop, but it is absolutely approachable for anyone who has made a custard before. It is perfect for weekend bakers who love a project with a showstopping result, and it shines at dinner parties, holidays, and any occasion where you want dessert to be genuinely memorable. The good news is that nearly every component can be made ahead, so day-of assembly is a breeze.
Equipment Needed
Click on an item below to shop for the recommended items for this recipe on Amazon.
As an Amazon Associate, we earn from qualifying purchases.
8
Ingredients
- Crust
- 190 gall-purpose flour (about 1.5 cups, spooned and leveled)
- 1 tbspgranulated sugar
- 0.5 tspColima Sea SaltMicroplastic Free Salt
- 115 gunsalted butter, very cold and cut into 1-cm cubes (about 8 tbsp)
- 60 mlice water (about 4 tbsp), added gradually
- Toasting And Filling
- 80 gsweetened shredded coconut (about 1 cup)
- Filling
- 400 mlfull-fat canned coconut milk (one 400ml / 13.5 oz can)
- 240 mlwhole milk (about 1 cup)
- 150 ggranulated sugar (about 3/4 cup)
- 40 gcornstarch (about 5 tbsp)
- 0.25 tspColima Sea SaltMicroplastic Free Salt
- 4 largeegg yolks
- 30 gunsalted butter (about 2 tbsp), cut into pieces
- 1 tsppure vanilla extract
- 0.5 tspcoconut extract
- Topping
- 360 mlheavy whipping cream, very cold (about 1.5 cups)
- 2 tbsppowdered sugar, sifted
- 0.5 tsppure vanilla extract
Ingredient Substitutions
Instructions
- Make the pie crust: In a large bowl, whisk together the flour, sugar, and salt. Add the cold butter cubes and use your fingertips or a pastry cutter to work the butter into the flour until the mixture looks like coarse crumbs with a few pea-sized butter pieces remaining. Those larger pieces are what create flakiness. Drizzle in the ice water one tablespoon at a time, mixing with a fork after each addition, just until the dough comes together and holds when you squeeze a pinch. Do not overwork it. Turn the dough onto a lightly floured surface, shape into a disk, wrap in plastic wrap, and refrigerate for at least 30 minutes (or up to 2 days).
- Blind bake the crust: Preheat your oven to 400°F (200°C). On a lightly floured surface, roll the dough into a 12-inch circle about 3mm thick. Gently drape it into a 9-inch pie pan, pressing it into the corners without stretching. Trim and crimp the edges. Prick the bottom all over with a fork. Line the crust with parchment paper and fill with pie weights or dried beans. Bake for 15 minutes. Remove the weights and parchment, then bake for another 10 to 12 minutes until the bottom is golden and the edges are deep golden. Transfer to a wire rack and let cool completely before filling.
- Toast the coconut: Spread the shredded coconut in a single layer on a dry baking sheet. Place in the oven (you can do this while the crust is pre-baking, or separately) at 325°F (165°C) for 5 to 8 minutes, stirring every 2 minutes, until golden and fragrant. Watch it closely as it toasts very quickly and goes from golden to burnt in moments. Transfer immediately to a plate to stop cooking. Set aside half for stirring into the filling and half for garnishing the top.
- Make the pastry cream filling: In a medium saucepan, whisk together the sugar, cornstarch, and salt. Add the egg yolks and whisk until a smooth, pale paste forms. Slowly pour in the coconut milk and whole milk while whisking constantly to prevent lumps. Place the saucepan over medium heat and cook, whisking constantly, until the mixture thickens and begins to bubble, about 8 to 12 minutes. Once you see the first large bubbles break the surface, cook for exactly 2 more minutes while whisking vigorously. This step cooks out the raw cornstarch flavor and is important for a clean-tasting filling.
- Finish the custard: Remove the pan from the heat. Immediately add the butter pieces, vanilla extract, and coconut extract, whisking until the butter is fully melted and incorporated. Stir in half of the toasted coconut (the portion reserved for the filling). Pour the hot custard into the cooled pie crust, pressing a sheet of plastic wrap directly onto the surface of the custard to prevent a skin from forming. Refrigerate for at least 4 hours, or overnight, until fully set and cold.
- Make the whipped cream topping: Just before serving, pour the cold heavy cream into a large chilled bowl. Beat with a hand mixer or stand mixer on medium-high speed until soft peaks form. Add the powdered sugar and vanilla extract and continue beating until stiff peaks form. Be careful not to overbeat. Spread or pipe the whipped cream generously over the chilled pie.
- Finish and serve: Scatter the remaining toasted coconut over the whipped cream. Slice with a sharp knife wiped clean between cuts and serve immediately. Store any leftovers loosely covered in the refrigerator.
- Make the no-bake graham cracker crust: Combine 200g (about 14 full graham cracker sheets) crushed to fine crumbs, 2 tablespoons granulated sugar, and 85g (6 tablespoons) melted unsalted butter in a medium bowl. Stir until the mixture resembles wet sand and holds together when squeezed. Press the mixture firmly and evenly into the bottom and up the sides of a 9-inch pie pan using the bottom of a flat measuring cup. Refrigerate for at least 30 minutes to firm up. For a firmer crust that holds clean slices better, you may briefly bake it at 350°F (175°C) for 8 minutes and then cool completely before filling. This step remains optional.
- Toast the coconut on the stovetop: Place the shredded coconut in a dry skillet over medium-low heat. Cook, stirring frequently, for 4 to 6 minutes until evenly golden. The coconut will release a wonderful toasty aroma. Pour immediately onto a plate to cool. Divide in half as in the oven method.
- Make the pastry cream filling: Follow the exact stovetop custard steps from the primary method. Whisk together sugar, cornstarch, and salt in a saucepan. Add egg yolks and whisk to a paste. Stream in the coconut milk and whole milk. Cook over medium heat, whisking constantly, until the mixture bubbles and thickens, about 8 to 12 minutes. Cook for 2 full minutes after the first bubbles appear. Remove from heat and whisk in butter, vanilla, and coconut extract. Stir in half the toasted coconut.
- Fill and chill: Pour the hot custard into the chilled graham cracker crust. Press plastic wrap directly onto the surface of the filling and refrigerate for at least 4 hours or overnight until completely set.
- Top and serve: Whip the cold heavy cream with the powdered sugar and vanilla to stiff peaks. Spread generously over the chilled pie. Top with the reserved toasted coconut and serve cold. This pie holds its shape especially well when sliced straight from the refrigerator.
Nutrition Per Serving
Per 1 serving (makes one 9-inch single-layer pie)
Why This Recipe Works
Cornstarch is the engine of this custard. When heated in liquid, cornstarch granules absorb water and swell dramatically, creating the thick, gel-like network that holds the filling together. The key is cooking the custard long enough after it begins to bubble. That extra 2 minutes on the heat breaks down the alpha-amylase enzyme present in egg yolks, which would otherwise slowly digest the cornstarch and cause your filling to thin out after a few hours in the fridge. This is why properly cooked pastry cream stays sliceable for days, while an underbaked one becomes soup by morning.
Using full-fat canned coconut milk alongside whole milk gives the filling its character without making it greasy. Coconut milk contains a high proportion of medium-chain fatty acids that behave differently from dairy fat. They stay stable at refrigerator temperatures without becoming waxy, which means the custard stays silky and smooth even when served cold. The egg yolks contribute both richness and emulsification, helping the coconut fat blend seamlessly into the liquid rather than separating. Adding the butter off the heat at the very end is a classic pastry technique called mounting. It coats the starch granules in fat and gives the finished custard a glossy, smooth sheen rather than a dull, gluey appearance.
Toasting the coconut before stirring it into the hot custard is not just a visual choice. The Maillard reaction and caramelization that occur during toasting create dozens of new flavor compounds, transforming the raw, sweet coconut into something nutty, complex, and deeply aromatic. Pressing plastic wrap directly onto the surface of the hot custard prevents a skin from forming, which happens when surface proteins and starches dry out and cross-link in the open air. A skinless custard incorporates seamlessly into the finished pie without any rubbery patches.
Baker’s Tips
- Keep your butter genuinely cold when making the crust. If it warms up at any point, pop the dough back in the freezer for 10 minutes before continuing. Warm butter creates a mealy, dense crust instead of a flaky one.
- Do not skip pressing the plastic wrap directly onto the custard surface. Even a few minutes of air exposure will begin forming a skin that creates lumps in your finished filling.
- Whisk constantly when cooking the custard and make sure you are reaching the bottom and corners of the pan. Custard scorches quickly in spots that the whisk misses.
- The custard will look very thick and almost stiff when you remove it from the heat. This is correct. It will become a bit more supple as you whisk in the butter and then settle to a perfectly sliceable consistency as it chills.
- Chill your bowl and beaters in the freezer for 10 minutes before whipping the cream. Cold equipment helps the cream whip faster and hold its volume longer.
- Use a sharp knife dipped in hot water and wiped dry between each slice for the cleanest, most beautiful cuts through the whipped cream and custard.
Variations
- Chocolate coconut version: Spread a thin layer of melted dark chocolate (about 60g) over the cooled blind-baked crust and let it set for 10 minutes before pouring in the custard. The chocolate creates a barrier that also prevents the crust from going soggy.
- Tropical fruit layer: Arrange a single layer of thinly sliced fresh mango or ripe banana over the crust before pouring in the custard for a tropical twist.
- Lime-coconut: Add 1 tablespoon of fresh lime zest to the custard along with the vanilla extract and replace the coconut extract with 2 teaspoons of fresh lime juice for a bright, citrusy version.
- Toasted coconut crust: Replace the plain pie crust with a crust made by pressing 150g toasted coconut, 80g crushed shortbread cookies, and 70g melted butter into the pan for an ultra-coconutty base.
Troubleshooting & FAQ
My custard filling is too runny and will not set. What went wrong?
My pastry cream turned lumpy. Can I fix it?
Why did my pie crust shrink down the sides of the pan when I blind baked it?
My whipped cream topping went flat or weepy after a few hours. How do I prevent this?
My graham cracker crust crumbles when I try to slice the pie. What did I do wrong?
Storage & Make-Ahead
- Storage: Store the assembled pie loosely tented with plastic wrap in the refrigerator for up to 3 days. The whipped cream topping is best added within a few hours of serving for the freshest appearance, but the pie is delicious even after a day or two in the fridge. Do not freeze the assembled pie as the custard will weep and the crust will become soggy.
- Make-Ahead: The pie crust dough can be made up to 2 days ahead and refrigerated, or frozen for up to 1 month. The blind-baked crust can be prepared up to 1 day ahead and stored at room temperature. The pastry cream filling can be made and poured into the crust up to 2 days ahead and refrigerated, covered. Add the whipped cream and toasted coconut within 2 to 4 hours of serving for the best presentation.