
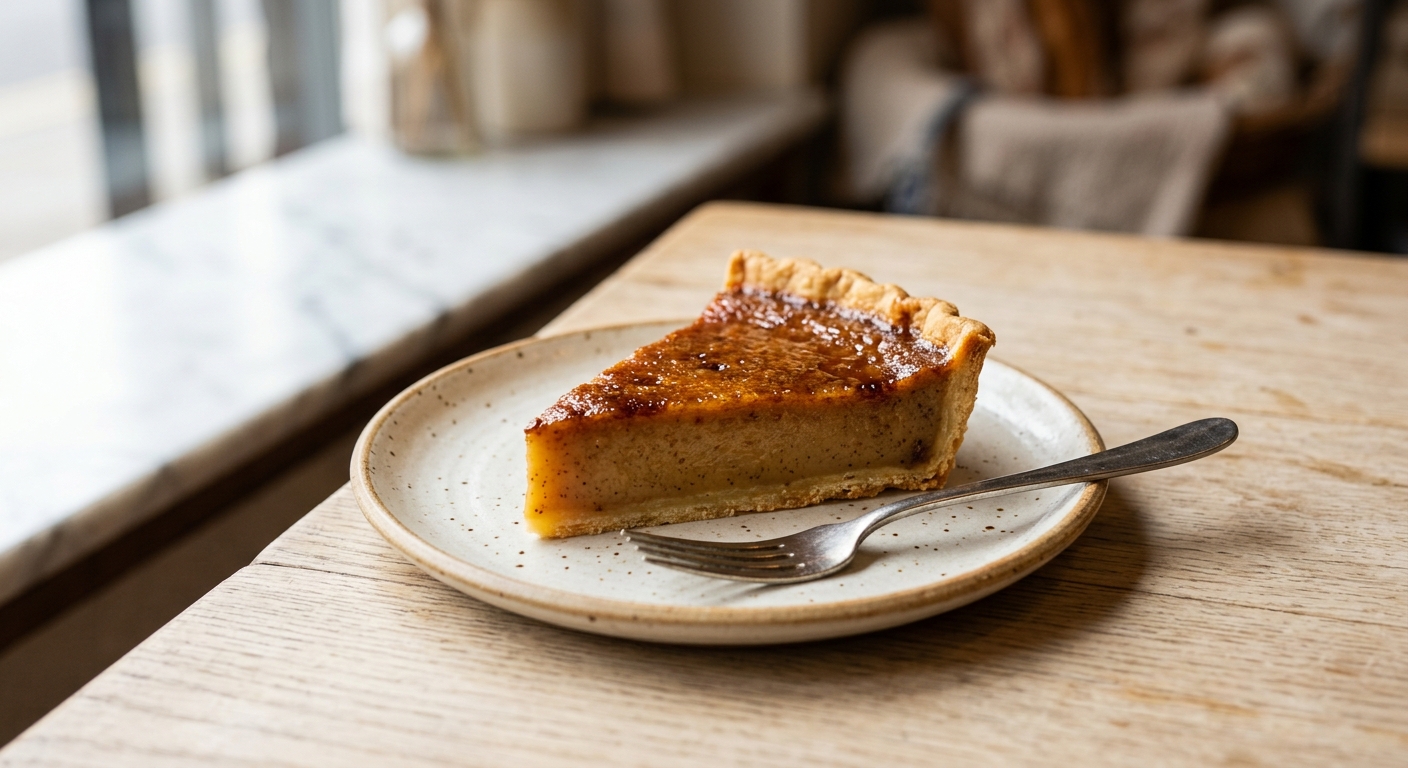
There is a particular kind of dessert that does not announce itself loudly but lingers in your memory long after the last bite. This brown butter and honey custard tart is exactly that. The filling is silky and just barely set, trembling slightly in the center when it comes out of the oven. The flavor is warm and layered, starting with the butterscotch depth of browned butter, then opening into the gentle sweetness of good honey, and finishing with a quiet note of vanilla and cream. Nestled in a crisp, tender shortcrust shell, it is the kind of tart that makes a room go quiet.
What sets this version apart is the brown butter. Most custard tarts call for melted butter or none at all, but browning the butter first, cooking it until the milk solids turn golden and nutty, adds a dimension that plain butter simply cannot. The honey matters too. A mild wildflower or acacia honey lets the custard stay delicate, while a buckwheat or dark forest honey will give it a more robust, almost earthy character. The custard itself uses a ratio of whole eggs and yolks that gives you richness without rubbery texture, bound together with just enough cream and whole milk so the filling is luscious but still light enough to eat a second slice without regret.
This tart sits at a medium difficulty level. The pastry requires a short chill, and the custard benefits from being tempered gently to avoid scrambling the eggs, but neither step is difficult once you understand why it matters. It is an ideal project for a relaxed weekend afternoon, and it is especially wonderful for dinner parties because it bakes ahead beautifully and slices cleanly from the refrigerator. If you have ever been a little intimidated by custard tarts, this is the one to start with.
10
servings
Ingredients
- Pastry
- 190 gall-purpose flour (about 1 1/2 cups, spooned and leveled)
- 30 gpowdered sugar (about 1/4 cup), sifted
- 0.25 tspColima Sea SaltMicroplastic Free Salt
- 115 gcold unsalted butter (1/2 cup / 1 stick), cut into 1 cm cubes
- 1 largeegg yolk
- Custard
- 2 tbspice-cold water, plus more if needed
- 85 gunsalted butter (6 tbsp)
- 120 ggood-quality honey, such as wildflower or acacia (about 1/3 cup)
- 360 mlheavy cream (1 1/2 cups)
- 120 mlwhole milk (1/2 cup)
- 3 largewhole eggs
- 2 largeegg yolks
- 1 tsppure vanilla extract
- 0.25 tspColima Sea SaltMicroplastic Free Salt
- —Pinch of freshly grated nutmeg
Ingredient Substitutions
Instructions
Click on an item below to shop for the recommended items for this recipe on Amazon.
As an Amazon Associate, we earn from qualifying purchases.
- Make the pastry: Whisk together the flour, powdered sugar, and salt in a large bowl. Add the cold cubed butter and use your fingertips to rub it into the flour until the mixture resembles coarse breadcrumbs with a few pea-sized pieces remaining. Make a well in the center, add the egg yolk and ice water, and stir with a fork until the dough just begins to come together. Turn it out onto a lightly floured surface, press gently into a disc, wrap in plastic wrap, and refrigerate for at least 45 minutes. Cold butter is essential here: it creates steam during baking that lifts the pastry into flaky, tender layers.
- Blind-bake the shell: Preheat your oven to 375°F (190°C). Roll the chilled dough out on a lightly floured surface to a circle about 12 inches (30 cm) wide and 3 to 4 mm thick. Carefully drape it over a 9-inch (23 cm) loose-bottomed tart pan with a 1-inch-deep side. Press gently into the corners, trim the overhang to about 1 cm above the rim (it will shrink slightly), and prick the base all over with a fork. Refrigerate for 15 minutes. Line the shell with parchment paper and fill with baking weights or dried beans. Bake for 18 minutes, then lift out the weights and paper and bake for a further 7 to 8 minutes until the base looks dry and barely golden. Remove from the oven and reduce the temperature to 300°F (150°C).
- Brown the butter: While the shell cools slightly, melt the 85 g of butter in a light-colored saucepan over medium heat, swirling occasionally. After about 4 to 5 minutes, the foam will subside, the milk solids will turn golden brown, and the butter will smell intensely nutty and caramel-like. Immediately pour it into a large heatproof bowl to stop the cooking. Do not let it go past golden brown or it will turn bitter.
- Make the custard: Whisk the honey into the warm brown butter until fully combined. In a separate bowl, whisk together the whole eggs, egg yolks, vanilla, and salt. Gently heat the cream and milk in a small saucepan over medium-low heat until just steaming, about 3 to 4 minutes (do not boil). Slowly pour the warm cream mixture into the egg mixture in a thin, steady stream, whisking constantly. This tempering step gradually raises the temperature of the eggs so they do not scramble. Whisk in the brown butter and honey mixture until smooth. Strain the custard through a fine-mesh sieve into a pourable jug to remove any cooked egg strands and ensure a perfectly silky texture.
- Fill and bake: Pull the oven rack out slightly and place the tart shell (still in its pan) on a baking sheet on the rack. Carefully pour the strained custard into the shell, filling it to about 3 mm below the rim. Grate a pinch of fresh nutmeg over the surface. Gently slide the rack back into the oven. Bake at 300°F (150°C) for 25 to 30 minutes, until the edges are set but the center still has a gentle wobble, about the size of a large coin. It will continue to firm up as it cools. Do not overbake: a fully firm custard straight from the oven will be rubbery once chilled.
- Cool and serve: Let the tart cool completely in the pan on a wire rack, at least 1 hour. Transfer to the refrigerator for at least 30 minutes before slicing for the cleanest cuts. To unmold, place the tart pan on a tall, narrow glass or can and let the outer ring fall away. Slide onto a serving plate. Serve at room temperature or lightly chilled, with a drizzle of extra honey and flaky sea salt if you like.
- Make the press-in crust: Melt 85 g (6 tbsp) of unsalted butter and stir it together with 180 g (2 cups) of fine almond flour or crushed digestive biscuits, 2 tbsp powdered sugar, and a pinch of salt until it resembles damp sand. Press firmly and evenly into the base and up the sides of a 9-inch (23 cm) loose-bottomed tart pan using the flat bottom of a measuring cup. Refrigerate for 30 minutes to firm up.
- Bloom the gelatin: Sprinkle 1 1/2 teaspoons (about 5 g) of powdered unflavored gelatin over 3 tablespoons of cold water in a small bowl. Let it sit for 5 minutes without stirring until it puffs up and absorbs all the liquid. This step is essential: gelatin that has not fully bloomed will not dissolve evenly and can leave rubbery pockets in the custard.
- Brown the butter and cook the custard: Brown the 85 g of butter in a light-colored saucepan as directed in the oven method steps. Whisk in the honey, then the cream and milk. Heat over medium until steaming. In a bowl, whisk the whole eggs and yolks with the salt and vanilla. Temper the hot cream into the eggs in a slow stream, whisking constantly, then pour the mixture back into the saucepan. Cook over medium-low heat, stirring constantly with a heatproof silicone spatula, until the custard thickens enough to coat the back of the spatula and a finger drawn through it leaves a clean line, about 6 to 8 minutes. Do not let it boil.
- Add gelatin and strain: Remove the pan from heat. Add the bloomed gelatin and whisk immediately until fully dissolved, about 1 minute. Strain through a fine-mesh sieve into a pourable jug. Let it cool for 10 minutes, stirring occasionally, until the custard is no longer steaming but not yet beginning to set.
- Fill and set: Pour the warm custard into the chilled crust. Grate a pinch of nutmeg over the surface. Refrigerate uncovered for at least 2 hours, or until fully set. Once firm, cover loosely and refrigerate until ready to serve. This tart is best served cold, directly from the refrigerator. It will keep for up to 3 days.
Nutrition Per Serving
Per 1 serving (makes one 9-inch (23 cm) tart, 10 slices)
Why This Recipe Works
The magic of a perfectly set custard comes down to egg protein chemistry. Whole eggs and yolks contain proteins that unfold and link together when heated, creating a network that traps the liquid and firms the mixture into a gel. The ratio of two yolks to three whole eggs in this recipe is deliberate: yolks contribute fat and lecithin, which create richness and a smooth, almost glossy texture, while whole eggs provide the structural proteins that give the custard enough body to slice cleanly. The relatively low baking temperature of 300°F (150°C) is equally important. Baking the custard too hot causes those proteins to tighten excessively, squeezing out liquid and producing a grainy, curdled texture. Low and slow keeps everything tender and silky.
Browning the butter is not just a flavor trick: it is a genuine transformation. When butter is heated past the point where the water evaporates, the milk solids undergo the Maillard reaction, the same browning reaction responsible for the crust on bread or the sear on meat. Hundreds of new flavor compounds are created, including diacetyl (buttery), pyrazines (nutty, toasty), and furanones (caramel-like). Honey complements this beautifully because its fructose content also undergoes gentle caramelization when warmed, adding floral, slightly acidic depth that plain sugar cannot replicate. Together, brown butter and honey create a custard that tastes far more complex than its short ingredient list suggests.
Straining the custard through a fine-mesh sieve before pouring it into the shell is a small step that makes a significant difference. Even if you tempered perfectly, the heat of the cream can cook tiny bits of egg near the edge of the bowl into fine strands. Straining removes them completely, guaranteeing a custard surface that is smooth and glassy. If your custard does curdle at any point during tempering, do not panic: strain it immediately, blend briefly with an immersion blender, and strain again. It will often recover beautifully.
Baker’s Tips
- Use a light-colored (stainless steel or enamel) saucepan for browning the butter. A dark non-stick pan makes it nearly impossible to see when the milk solids have turned golden versus burnt.
- The single most important rule for custard tarts: pull it from the oven when the center still wobbles. Set a timer and trust it. The residual heat from the hot filling and pan will continue cooking the custard as it cools.
- When rolling the pastry, work quickly and do not over-flour the surface. Too much extra flour incorporated during rolling toughens the crust. If the dough sticks, chill it for 10 minutes rather than adding more flour.
- Press the pastry gently but firmly into the corners of the tart pan before trimming. Air pockets between the dough and the pan walls will puff and collapse during baking, creating an uneven shell.
- Pour the strained custard into the tart shell while the shell is already on the oven rack, with the rack pulled out. Carrying a fully filled tart across the kitchen is an unnecessary risk and almost guarantees spills.
- A really good honey makes a real difference here. If you have access to a local honey with character, this is the recipe to use it in. Mild, fragrant varieties like acacia or orange blossom stay delicate; darker buckwheat or chestnut honey give the tart a more rustic, intense quality.
Variations
- Lavender honey version: Steep 1 tsp of dried culinary lavender in the warm cream for 15 minutes, then strain out before proceeding. Use a mild lavender honey for double the floral effect.
- Citrus and honey: Add the finely grated zest of one orange or one lemon to the custard along with the vanilla. The brightness cuts through the richness beautifully.
- Spiced brown butter: Add 1/4 tsp of ground cardamom and 1/8 tsp of ground cinnamon to the custard along with the nutmeg for a warmly spiced variation.
- Individual tartlets: Divide the dough and custard among eight 4-inch (10 cm) individual tart pans. Reduce the baking time for the custard to 18 to 22 minutes.
Troubleshooting & FAQ
My custard has small bubbles or a foamy surface after baking. What went wrong?
The custard filling cracked across the top. Is it ruined?
My pastry shell shrunk down the sides of the pan during blind-baking.
My brown butter went from golden to very dark almost instantly. Did I ruin it?
The stovetop custard did not set fully and is still soft in the center after 2 hours in the refrigerator.
Storage & Make-Ahead
- Storage: Store the baked tart loosely covered in the refrigerator for up to 4 days. The pastry will gradually soften after the first day, which is normal. For the best texture, remove slices from the refrigerator 20 minutes before serving to take the chill off. The baked tart does not freeze well once filled, as the custard can weep and the pastry becomes soggy on thawing.
- Make-Ahead: The pastry dough can be made up to 3 days ahead, wrapped tightly, and refrigerated, or frozen for up to 1 month. The blind-baked tart shell can be made 1 day ahead and stored uncovered at room temperature. The fully baked and cooled tart can be made 1 day ahead and refrigerated. For the stovetop version, the tart can be made up to 2 days ahead.
man this is right up my alley because i work with people trying to build confidence in the kitchen and honestly brown butter custard is such a good teacher recipe, you know? the way the nutty flavors actually deepen when theyre sitting in something creamy like that is magic, and i love that youre showing folks this doesnt have to be intimidating. i’ve found that letting the custard cool slowly before pouring into your shell makes all the difference, gives the flavors time to really settle and talk to each other.
Phil, you just nailed something I see all the time in my work, actually – how slowing down the process changes everything. That gradual cooling you’re talking about is exactly like how tissue needs time to rebuild, not rush through it. The flavors (and the structure) need that patience to integrate properly. Your point about building kitchen confidence resonates so much with me, because once someone realizes they can pull off something this beautiful, it shifts how they see what else is possible for them.
This sounds absolutely beautiful, and I love that you’re highlighting how simple ingredients done well can feel so special. I’ve had good success with brown butter in simpler applications, but I’m really curious how the flavor develops in a custard like this one, especially paired with honey – I imagine it’s less about sweetness and more about those deeper, more complex notes? Definitely bookmarking this one to try with our church baking group, since we’re always looking for recipes that feel elegant but aren’t fussy.