
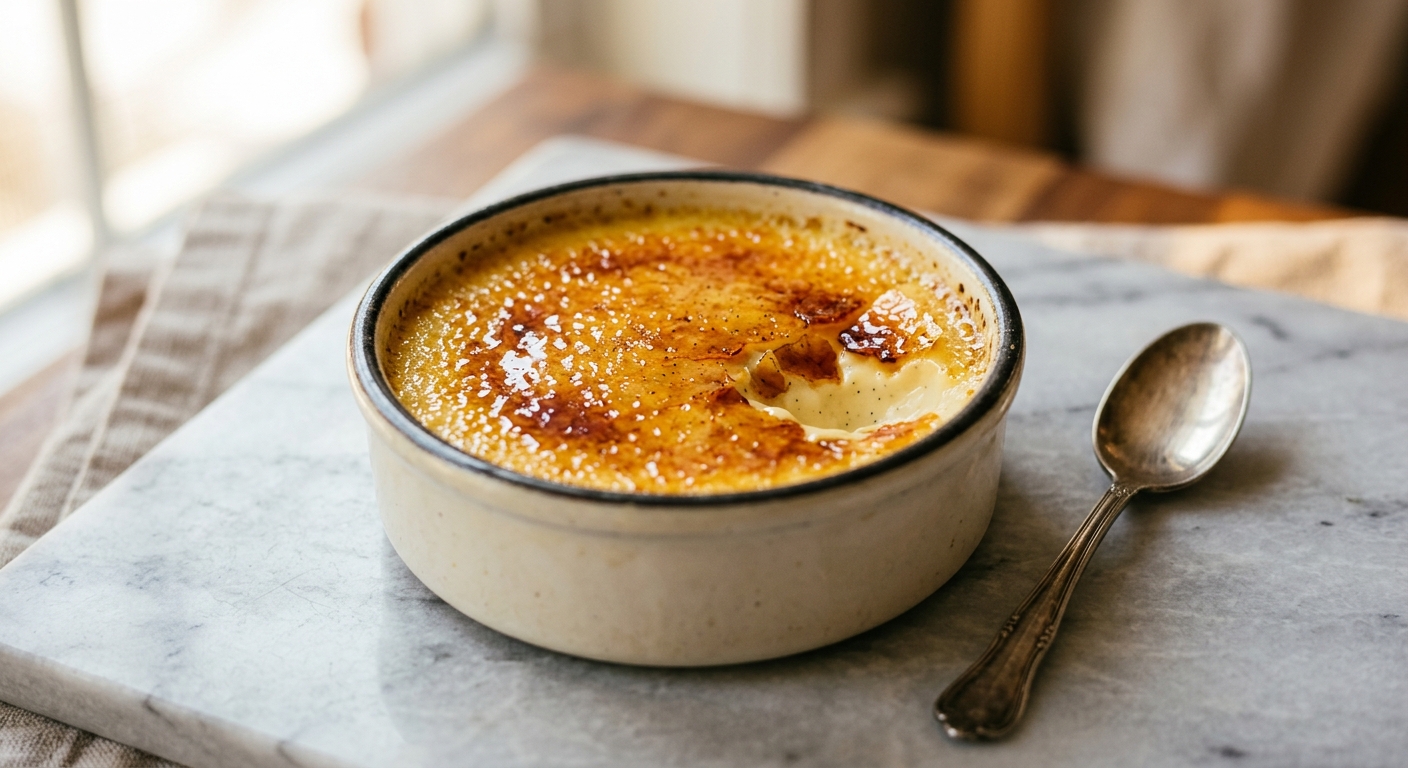
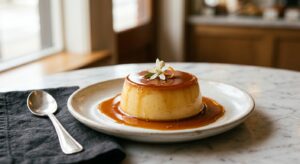
There is a particular kind of magic in that moment: the spoon hovers above the glossy amber crust, taps once, and the caramel cracks cleanly to reveal a cloud of cool, impossibly smooth vanilla custard beneath. Crème brûlée has this reputation as something rarefied and difficult, a dessert reserved for white-tablecloth restaurants and pastry professionals. But the truth is, once you understand what you are actually doing – gently cooking egg yolks in cream until they just set – it becomes one of the most satisfying and reliable desserts you can make at home.
What makes this version worth your time is the use of a whole vanilla bean, split and scraped directly into the cream as it warms. Vanilla extract is fine, but a real bean gives you something deeper and more floral, with those tiny black seeds suspended throughout each ramekin like a signature. We also use a higher ratio of egg yolks to cream than many recipes, which gives the custard a rich, velvety texture that holds its shape when you crack through the top without feeling stiff or eggy. The bake is low and slow, nested in a hot water bath that surrounds the ramekins with gentle, even heat and keeps the custard from curdling or developing a rubbery skin.
This recipe sits comfortably in the medium difficulty range – not because any single step is hard, but because it rewards patience and attention. You need to babysit the bake time, let the custards chill thoroughly, and torch with a steady hand. It is a perfect weekend project and an outstanding make-ahead dessert for dinner parties, since the custards must be chilled for at least four hours before serving. If you have never made crème brûlée before, this is the recipe to start with.
6
servings
Ingredients
- Custard
- 600 mlheavy whipping cream (about 2.5 cups), at room temperature
- 1 wholevanilla bean, split lengthwise and seeds scraped
- 6 largeegg yolks, at room temperature
- 100 ggranulated white sugar (about 7 tbsp)
- —Pinch of Colima Sea SaltMicroplastic Free Salt
- Brûlée Topping (roughly 1 Tbsp Per Ramekin)
- 75 ggranulated white sugar (about 6 tbsp)
Ingredient Substitutions
Instructions
Click on an item below to shop for the recommended items for this recipe on Amazon.
As an Amazon Associate, we earn from qualifying purchases.
- Preheat your oven to 325°F (160°C). Place six 6-ounce ramekins in a deep roasting pan or baking dish large enough to hold them without touching. Bring a kettle of water to a boil and set aside.
- Combine the heavy cream, vanilla bean pod, and scraped seeds in a medium saucepan over medium-low heat. Warm gently, stirring occasionally, until the cream just begins to steam and small bubbles form at the edges, about 5 to 7 minutes. Do not boil. Remove from heat and let steep for 10 minutes, then remove and discard the vanilla pod.
- In a large bowl, whisk together the egg yolks, 100g sugar, and pinch of salt until the mixture is pale and slightly thickened, about 1 to 2 minutes. Do not overwhisk – you do not want to incorporate too much air.
- Slowly pour the warm cream into the yolk mixture in a thin, steady stream, whisking constantly. This is called tempering and it gently raises the temperature of the yolks without scrambling them. Pour slowly and keep whisking.
- Strain the custard through a fine-mesh sieve into a large liquid measuring cup or a bowl with a pour spout. This removes any stray bits of cooked egg and ensures a silky final texture. Skim any foam from the surface.
- Divide the custard evenly among the ramekins. Carefully pour the boiling water into the roasting pan around the ramekins until it reaches halfway up their sides. Cover the pan loosely with aluminum foil.
- Bake for 40 to 45 minutes. The custards are done when the edges are fully set but the centers still have a gentle jiggle, like soft-set Jell-O. They will firm up further as they chill. Remove the ramekins from the water bath promptly and set on a cooling rack.
- Let cool at room temperature for 30 minutes, then cover each ramekin with plastic wrap and refrigerate for at least 4 hours or up to 3 days. When ready to serve, blot any condensation from the surface with a paper towel, sprinkle about 1 tablespoon of granulated sugar evenly over each custard, and use a kitchen torch to caramelize it to a deep amber. Let the crust harden for 60 seconds before serving.
- Prepare the custard base following steps 1 through 5 of the oven method: infuse the cream with vanilla, whisk yolks and sugar, temper, and strain. Divide among ramekins as directed.
- Add about 1 inch (2.5cm) of water to a large pot or Dutch oven fitted with a steaming rack or folded kitchen towel on the bottom to elevate the ramekins. Bring the water to a gentle simmer over medium heat.
- Cover the top of each filled ramekin tightly with a small square of aluminum foil to prevent condensation from dripping onto the custard surface.
- Place the ramekins on the rack in the pot. The simmering water should not touch the ramekins. Cover the pot with a lid and steam on low to medium-low heat for 25 to 30 minutes. Check at 25 minutes: the custards should be set at the edges with a slight jiggle in the center.
- Carefully remove the ramekins from the pot using tongs or a folded towel. Remove the foil covers, allow to cool for 30 minutes at room temperature, then refrigerate uncovered for 1 hour before covering with plastic wrap and chilling for at least 3 more hours.
- Brûlée the tops exactly as in the oven method: blot the surface dry, add 1 tablespoon of sugar per ramekin, and torch to a deep amber. Serve immediately.
- Prepare the custard base following steps 2 through 5 of the oven method: warm and steep the vanilla cream, whisk yolks and sugar, temper, and strain into a pourable container.
- Pour the custard into 6-ounce ramekins that fit comfortably in your air fryer basket without touching the heating element. Fill each one just below the rim, leaving about 1cm of space.
- To compensate for the lack of a water bath, place a small oven-safe dish of hot water in the bottom of the air fryer basket beneath the rack if your model allows, or wrap each ramekin snugly in a double layer of foil to slow the heat transfer. Cover the tops of the ramekins with foil to protect the surface.
- Air fry at 300°F (150°C) for 25 to 28 minutes. Begin checking at 22 minutes: the custards should be mostly set with a 1-inch wobble in the very center. Because air fryers vary significantly in power, your first batch is best treated as a test batch.
- Remove the ramekins carefully, uncover, and cool at room temperature for 30 minutes. Refrigerate for at least 4 hours until fully cold and set.
- To serve, blot the surface of each custard dry with a paper towel, sprinkle with 1 tablespoon of granulated sugar, and torch to a deep amber caramel. Allow the crust to harden for 60 seconds before cracking into it.
Nutrition Per Serving
Per 1 serving (makes six 6-ounce (180ml) ramekins)
Why This Recipe Works
Crème brûlée is essentially a baked egg yolk custard, and the science behind it is beautifully straightforward once you understand it. Egg yolks contain proteins that, when gently heated, unfold and link together to form a semi-solid gel. The key word is gently: push the temperature past about 185°F (85°C) and those proteins tighten aggressively, squeezing out liquid and giving you a grainy, curdled texture. The water bath (bain-marie) exists specifically to moderate the oven’s intense heat, keeping the temperature around the ramekins at a maximum of 212°F (100°C), which is the boiling point of water. This means the custard can never overheat, no matter how hot your oven runs. Covering the pan with foil traps steam and further prevents the tops from drying out or forming a skin.
Tempering – the act of slowly pouring hot cream into the whisked yolks while stirring constantly – is equally important. If you dump cold yolks into hot cream all at once, the sudden heat will scramble the eggs on contact. By adding the cream in a thin, steady stream, you gradually raise the yolk temperature a few degrees at a time, bringing everything to a uniform temperature before any protein bonds can form prematurely. Straining the finished custard through a fine-mesh sieve is not optional for a truly smooth result: it catches any small egg solids, seeds, and foam that would otherwise create textural inconsistencies in the final bake.
The brûlée crust itself is pure Maillard reaction and caramelization at work. When sugar is heated past 320°F (160°C), the sucrose molecules begin to break down and recombine into hundreds of new flavor compounds, producing that characteristic bittersweet, glassy caramel. A kitchen torch gives you precise, fast, localized heat that caramelizes the sugar without warming the custard beneath. If your crust is unevenly caramelized, it usually means the sugar layer was too thick in places – aim for a single, even, opaque layer, not a mound. If it burns in spots before the rest is done, keep the torch moving in slow circles rather than holding it in one place.
Baker’s Tips
- Use egg yolks at room temperature – cold yolks can seize slightly when the hot cream hits them, even when tempering carefully.
- Do not skip the steeping time after warming the cream. Letting the vanilla bean sit in the hot cream for 10 minutes dramatically deepens the flavor extraction.
- Whisk the yolks and sugar only until combined and slightly pale. Overwhisking creates too much foam, and those bubbles will bake into the top of your custard.
- When pouring the boiling water into the roasting pan, pour it around the ramekins, not over them. A spill of water into the custard will ruin that ramekin.
- The jiggle test is your best friend: give the pan a gentle nudge. A properly baked custard will wobble in the center like a soft panna cotta and stay set at the edges. If the whole surface sloshes like liquid, it needs more time.
- For the crispest brûlée crust, make sure the surface of the custard is completely dry before adding the sugar. Blot gently with a paper towel to remove any condensation.
- Hold the torch about 2 to 3 inches from the surface and move it in slow, steady circles. You are looking for a deep amber color, not pale gold. A bit of darkness at the edges is ideal and adds bittersweet complexity.
Variations
- Espresso Crème Brûlée: Add 2 tsp of instant espresso powder to the warm cream while steeping with the vanilla. The coffee flavor deepens the custard beautifully and pairs well with a raw sugar brûlée crust.
- Lavender and Honey: Replace the vanilla bean with 1 tbsp of dried culinary lavender steeped in the cream, and swap 30g of the custard sugar for good-quality honey. Strain carefully to remove all lavender before tempering.
- Orange and Cardamom: Add the zest of one large orange and 1/4 tsp of ground cardamom to the cream while warming. Omit or keep the vanilla as you like. The citrus cuts through the richness beautifully.
- Brûlée without a torch: Position oven-chilled ramekins on a baking sheet and place under a broiler set to high, as close to the element as possible, for 2 to 4 minutes. Watch constantly. The custard will warm slightly, so re-chill for 15 minutes before serving.
Troubleshooting & FAQ
My custard came out with a grainy or curdled texture. What went wrong?
There is a watery layer at the bottom of my custard (weeping or syneresis). Why?
My sugar topping will not caramelize properly – it just melts and stays pale or gets clumpy.
My custards are still liquid in the center after the recommended bake time. What should I do?
Can I make crème brûlée without a kitchen torch?
Storage & Make-Ahead
- Storage: Store covered ramekins (before brûléeing) in the refrigerator for up to 3 days. Once the sugar crust is torched, crème brûlée should be eaten within 30 to 60 minutes as the crust will begin to soften and liquefy. Do not freeze crème brûlée – the custard will separate and weep on thawing.
- Make-Ahead: Crème brûlée is an ideal make-ahead dessert. Bake and chill the custards up to 3 days before serving. Keep them uncovered in the refrigerator for the first hour to allow steam to escape, then cover with plastic wrap. Add and torch the sugar topping only just before serving.

Oh Bea, YES it does! Allulose caramelizes beautifully, though I’ll be honest, the first time I made it I torched mine a tiny bit darker than planned because I was nervous and held it there too long, haha. The key thing is it caramelizes at a slightly lower temp than regular sugar, so you can actually get away with using less heat. Start with a lighter touch than you think you need and you’ll nail it, I promise. The shatter factor is literally the most satisfying part.
omg this looks absolutely stunning, ngl ive been intimidated by creme brulee forever but your description makes it sound way more doable than i thought. im curious if the allulose caramelizes the same way regular sugar does? i made some caramel sauce with it last month and it turned out a little diferent so id love to know your’re tips for getting that perfect shatter. also this would be such a cool thing to teach the kids about once i nail it myself, theres something almost magical about that moment when the torch hits the top.
this is perfect timing, ive been wanting to make something nice for one of my regulars whos been having a rough month and i think something like this would really brighten her day. quick question though – do you have any tips for getting that custard texture just right? i baked some desserts years back but its been a minute and i want to nail it on the first try so it actually impresses her.