
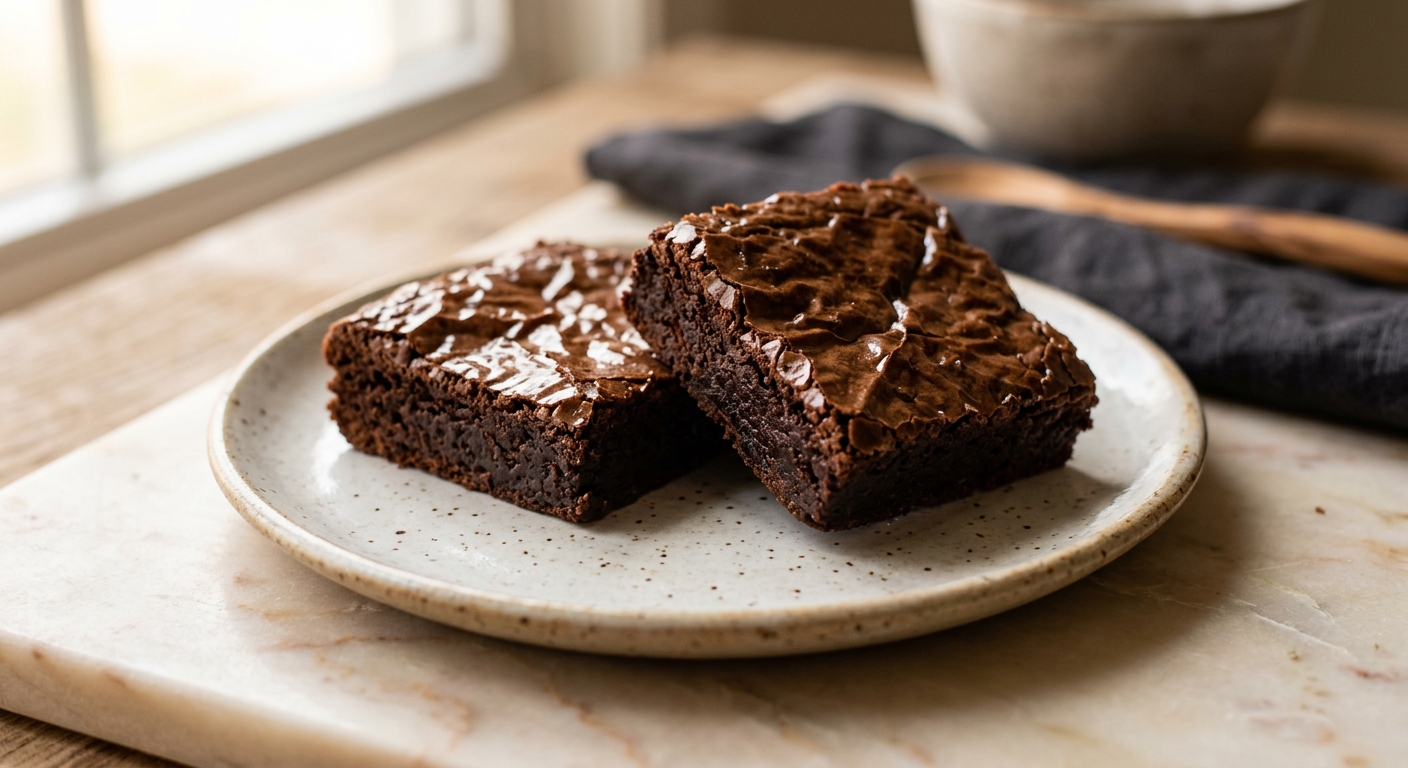
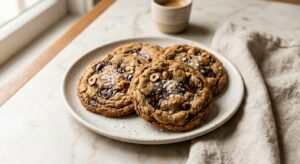
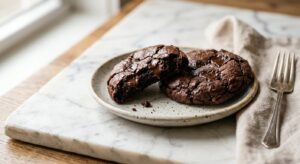
There is a moment, about halfway through baking, when the smell of chocolate and brown butter drifts through the kitchen and you know something genuinely good is happening. These brownies have that effect every single time. The top bakes into a thin, papery, crackled shell that shatters slightly when you slice through it, giving way to a center so dense and fudgy it barely holds its shape. They are the kind of brownies people ask about at potlucks, the kind that disappear from the pan before they have fully cooled.
What sets this recipe apart is a two-part technique: melting the butter with the chocolate over low heat rather than using cocoa powder alone, and then whisking the eggs and sugar together vigorously before combining them with the chocolate mixture. That vigorous whisking dissolves the sugar into the eggs and creates a thin meringue-like layer on the surface, which is exactly what produces that gorgeous glossy crinkle top. A small amount of espresso powder deepens the chocolate flavor without tasting like coffee at all.
This is a medium-difficulty recipe that any confident home baker can handle on a weeknight. It uses one saucepan and one bowl, and the batter comes together in under 20 minutes. If you have never had reliable luck with fudgy brownies before, the detailed steps and tips here will change that.
16
servings
Ingredients
- 170 gunsalted butter (3/4 cup or 12 tablespoons), cut into pieces
- 170 gdark chocolate (60 to 70% cacao), roughly chopped (about 6 oz)
- 200 ggranulated white sugar (1 cup)
- 100 glight brown sugar, packed (1/2 cup)
- 3 largeeggs, at room temperature
- 2 tsppure vanilla extract
- 100 gall-purpose flour (3/4 cup plus 1 tablespoon, spooned and leveled)
- 30 gDutch-process cocoa powder (1/4 cup), sifted
- 1 tspespresso powder or instant coffee granules
- 0.75 tspColima Sea SaltMicroplastic Free Salt
- 100 gsemi-sweet chocolate chips or chopped chocolate (1/2 cup), optional fold-in
- —Colima Sea SaltMicroplastic Free Salt, for sprinkling on top (optional but recommended)
Ingredient Substitutions
Instructions
Click on an item below to shop for the recommended items for this recipe on Amazon.
As an Amazon Associate, we earn from qualifying purchases.
- Preheat your oven to 325°F (163°C). Line an 8×8-inch metal baking pan with two strips of parchment paper, crossing them in opposite directions so they hang over all four sides. Lightly grease the parchment. Set aside.
- In a medium heavy-bottomed saucepan over low heat, melt the butter and chopped dark chocolate together, stirring constantly with a silicone spatula until completely smooth. Remove from heat and let the mixture cool for 5 minutes. It should feel warm but not hot to the touch.
- While the chocolate cools, combine the granulated sugar, brown sugar, eggs, and vanilla extract in a large mixing bowl. Whisk vigorously by hand for a full 2 minutes, until the mixture is pale, slightly thickened, and ribbony when you lift the whisk. This step is critical for the crinkle top, so do not rush it.
- Pour the warm chocolate mixture into the egg mixture and stir with a spatula until fully combined and glossy.
- Sift the flour, cocoa powder, espresso powder, and salt directly into the bowl. Fold gently with the spatula using about 20 strokes, stopping as soon as no dry streaks remain. If using chocolate chips, fold them in now. Overmixing develops gluten and makes chewy rather than fudgy brownies.
- Pour the batter into the prepared pan and spread to the edges. Sprinkle with flaky sea salt if using. Bake for 25 to 28 minutes. The top should look set, matte at the center, and a toothpick inserted 1 inch from the edge should come out with moist crumbs, not wet batter. The very center will look slightly underdone, and that is correct.
- Transfer the pan to a wire rack. Do not cut the brownies for at least 45 minutes to 1 hour. The center continues to set as it cools. Lift out using the parchment handles and cut into 16 squares with a sharp knife, wiping the blade between cuts for clean edges.
- Prepare the full brownie batter exactly as described in Steps 1 through 5 of the oven method, including the vigorous whisking of eggs and sugar for the crinkle top.
- Line a 7-inch square metal pan or a silicone brownie mold with parchment. Pour the batter in and spread evenly. Sprinkle with flaky salt if using. Do not cover with foil.
- Preheat your air fryer to 300°F (150°C) for 3 minutes. Place the pan in the basket, ensuring there is at least 1 inch of clearance above the batter for air circulation.
- Air fry for 20 to 22 minutes. Check at 18 minutes: the top should look set and slightly matte at the center. A toothpick inserted 1 inch from the edge should come out with moist crumbs. Because air fryers vary significantly, start checking early on your first bake.
- Remove the pan carefully (the basket will be very hot) and cool on a wire rack for at least 45 minutes before slicing. The crinkle top will be slightly less dramatic than the oven version but the fudgy interior will be equally delicious.
- In a large microwave-safe mug (at least 12 oz capacity), melt 2 tablespoons of unsalted butter on High for 20 to 30 seconds until just melted. Stir in 1 tablespoon Dutch-process cocoa powder, 1 tablespoon granulated sugar, and 1 tablespoon brown sugar until smooth.
- Add 1 large egg yolk (not the whole egg, which makes it rubbery), 1/4 teaspoon vanilla extract, and a small pinch of fine salt. Stir well.
- Add 3 tablespoons all-purpose flour and stir just until no dry streaks remain. Fold in 1 tablespoon of chocolate chips if you like. The batter will be thick.
- Microwave on High in 20-second increments, checking after each. It typically takes 60 to 90 seconds total. Stop when the top looks just set at the edges but still slightly glossy and underdone in the very center. It will continue cooking from residual heat.
- Let the mug rest for 2 minutes before eating directly from the mug. Top with a small scoop of ice cream or a sprinkle of flaky salt for a proper treat.
Nutrition Per Serving
Per 1 serving (makes one 8×8-inch pan, cut into 16 squares)
Why This Recipe Works
The glossy crinkle top is the most asked-about feature of a great brownie, and it comes down almost entirely to one step: whisking the eggs and sugar together vigorously before adding the chocolate. When you whisk them for a full two minutes, the sugar begins to dissolve into the eggs, and air is incorporated into the mixture. As the brownie bakes, that thin, airy sugar-egg layer rises to the surface and sets into the characteristic papery, shiny shell. Using a combination of granulated and brown sugar also helps: the molasses in brown sugar is hygroscopic (it attracts and holds moisture), which keeps the interior dense and moist even after the top has set.
Melting real dark chocolate alongside the butter rather than relying solely on cocoa powder adds cocoa butter to the batter. Cocoa butter is a fat that remains semi-solid at room temperature, and it is what gives these brownies their dense, almost truffle-like chew rather than a cakey crumb. A lower baking temperature of 325°F (163°C) rather than the more common 350°F slows the bake, reducing the risk of the edges overcooking before the center sets. The deliberate slight underbake, where the center still looks glossy when you pull the pan, is not a mistake; it is carryover cooking doing its job.
If your brownies come out cakey rather than fudgy, the most likely culprit is overbaking or overmixing the batter after adding the flour. Too much mixing develops gluten, which creates a springy, cake-like structure. If your top is dull rather than glossy, you likely did not whisk the eggs and sugar long enough, or the chocolate mixture was too hot when you added it, which can cook the eggs slightly and deflate the foam. Let the melted chocolate cool for that full five minutes before combining.
Baker’s Tips
- Use a metal 8×8-inch pan, not glass. Metal conducts heat more evenly and helps the edges set properly. Glass pans retain heat longer and can cause overbaking.
- Weigh your flour. Brownies are unforgiving with too much flour, and a packed cup can add 30g or more beyond what the recipe intends, leading to a cakey texture.
- The two-minute whisk is non-negotiable if you want the crinkle top. Set a timer and do not stop early. A balloon whisk works better here than a fork.
- Let your eggs reach room temperature before using. Cold eggs can cause the warm chocolate mixture to seize slightly and the batter to look curdled.
- For clean, bakery-style slices, refrigerate the fully cooled brownies for 30 minutes before cutting. Use a large sharp chef’s knife and wipe it clean with a damp cloth between every single cut.
- The espresso powder is not optional in spirit, even if it is in practice. It does not make the brownies taste like coffee at all; it amplifies and deepens the chocolate flavor the same way salt amplifies sweetness.
- Do not skip lining the pan with parchment. Brownies are sticky and dense, and trying to cut them in the pan leads to torn edges and frustrated bakers.
Variations
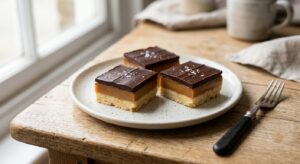
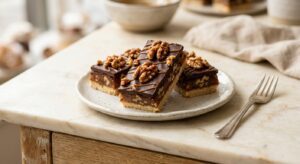
- Salted caramel swirl: drizzle 3 tablespoons of thick salted caramel sauce over the batter before baking and swirl with a skewer.
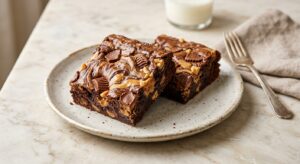
- Peanut butter marble: drop 4 tablespoons of creamy peanut butter by spoonfuls onto the batter and swirl with a toothpick before baking.
- Mint chocolate: add 1/2 teaspoon of peppermint extract along with the vanilla, and fold in 80g of chopped after-eight mints or Andes candies instead of chocolate chips.
- Tahini brownies: swap the optional chocolate chip fold-in for 3 tablespoons of tahini swirled into the top of the batter. The nutty, slightly bitter tahini complements the dark chocolate beautifully.
- Extra fudgy (reduced flour): reduce the flour to 60g (1/2 cup) for a brownie that is almost truffle-like in density. Chill before slicing.
Troubleshooting & FAQ
My brownies came out cakey instead of fudgy. What went wrong?
My brownie top is flat and dull instead of glossy and crinkled. What happened?
The edges are dry and overbaked but the center is still underdone. What should I do differently?
My brownies are sticking to the pan even though I greased it. How do I get them out cleanly?
My batter looks broken or curdled after I added the chocolate mixture to the eggs. Is it ruined?
Storage & Make-Ahead
- Storage: Store brownies in an airtight container at room temperature for up to 4 days. For extra fudginess, press a sheet of plastic wrap directly onto the cut surface before sealing. Refrigerate for up to 1 week, though they will firm up slightly. Freeze individual squares wrapped tightly in plastic wrap and stored in a freezer bag for up to 3 months. Thaw at room temperature for 30 minutes.
- Make-Ahead: The baked and cooled brownies (uncut) can be wrapped tightly in plastic wrap and kept at room temperature up to 2 days ahead, or frozen up to 3 months. The dry ingredients (flour, cocoa, espresso powder, salt) can be pre-measured and combined in a bowl up to 3 days ahead. The batter itself should be baked immediately after mixing.
made these last week with my late wife’s old brownie pan – hadnt baked anything in months after she passed – and something about the one bowl method just felt right, you know, no fuss just results. they came out perfect and i swear the kitchen smelled like she was still there, so thanks for that.
oh my gosh these sound PERFECT, ive been trying to find a good brownie recipe that doesnt use regular sugar because ive got a foster right now (sweet pittie mix named Cocoa, hence the irony lol) whose previous owner had to give him up cause of his diet stuff and i want to bake treats everyone in the house can enjoy! the one bowl thing is huge for me bc honestly my kitchen is usually chaos with fosters running around, do you have any tips for keeping the batter from getting too warm when youre working with it or does the allulose help with that?
oh these sound amazing, and honestly theres something really special about finding recipes that work for different situations – reminds me of adapting things for my students who have dietary needs or restrictions. the one bowl method is huge too, tbh. ive found that with allulose brownies the key is not overbaking them even like 30 seconds because they can get kinda dry if you go past that fudgy sweet spot. would love to know how the crinkle top comes out with the allulose – does it get that same glossy finish or does it look a little different?