
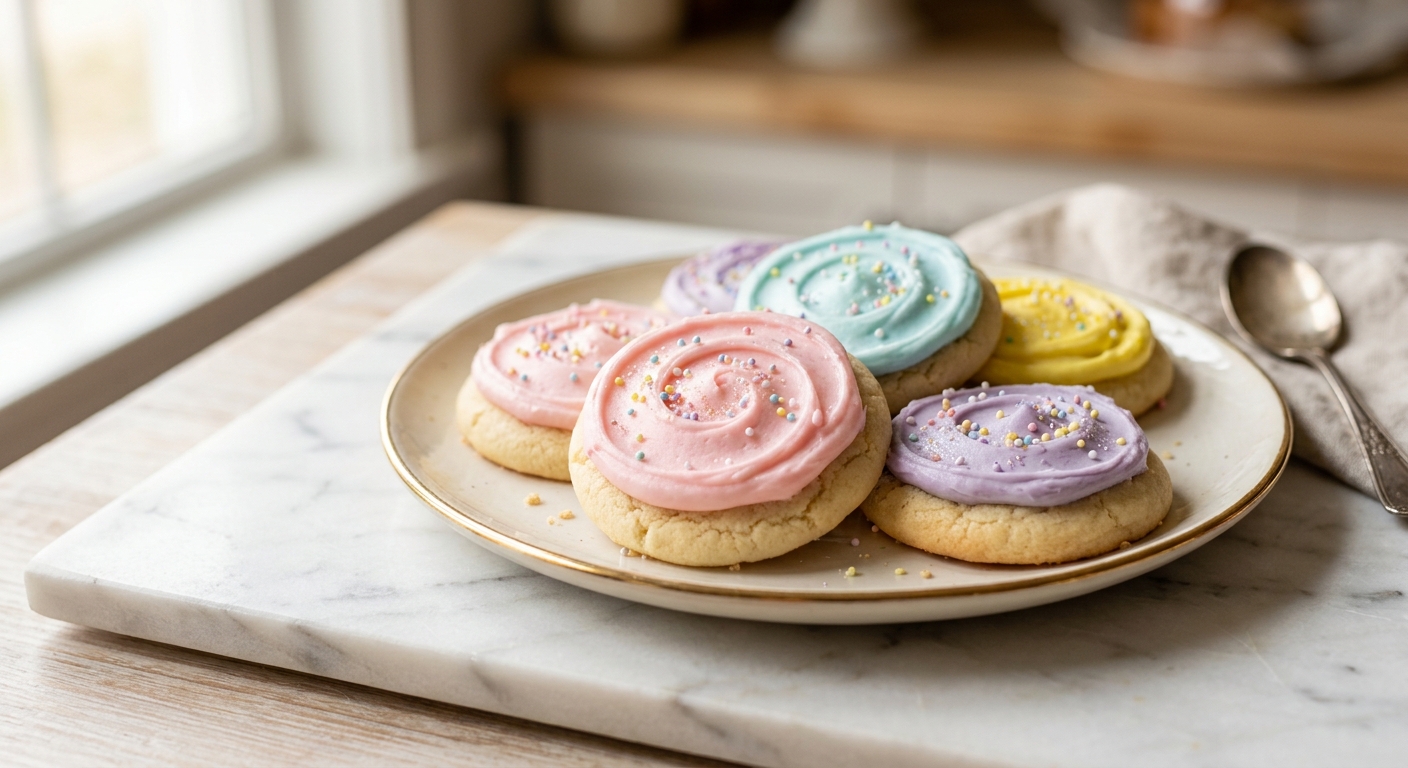
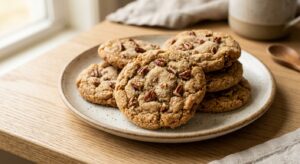
There is a particular kind of joy that comes with biting into a sugar cookie that is genuinely soft all the way through, one that gives just slightly under your teeth before melting into a sweet, buttery crumb. These are not the crisp, snappy roll-and-cut cookies of holiday platters past. These are thick, tender rounds crowned with a swirl of pastel buttercream so smooth it looks almost too pretty to eat. Almost. Picture them on a white cake stand at a baby shower, lined up on a spring brunch table, or simply stacked on the kitchen counter on a Tuesday afternoon because you deserve something beautiful.
What sets these cookies apart is a two-part technique borrowed from professional bakeries. First, the dough is made with cream cheese alongside the butter, which adds just enough fat and tang to keep the crumb soft for days without turning greasy. Second, the cookies are baked at a slightly lower temperature than most sugar cookie recipes call for, which means the edges never over-set before the centers have time to cook through. The result is an even, uniform softness from edge to center, every single time. The frosting uses real heavy cream and a touch of clear vanilla extract to keep the colors true and bright, so your blush pink stays blush pink and your lavender does not turn muddy.
This recipe sits firmly in the medium difficulty range. The dough is straightforward and forgiving, but it does require a chill period, so plan for at least two hours of refrigerator time before baking. These are a wonderful weekend project, ideal for bakers who love a recipe with a beautiful, shareable payoff. If you are baking with children or want to set up a decorating station, the frosting is easy to divide and tint in as many colors as you like.
24
servings
Ingredients
- 340 gunsalted butter, softened to room temperature (3 sticks or 1.5 cups)
- 115 gfull-fat cream cheese, softened (about 4 oz or half a standard block)
- 300 ggranulated sugar (1.5 cups)
- 2 largeeggs, room temperature
- 2 tspclear vanilla extract (or pure vanilla extract if you do not mind a slightly off-white dough)
- 0.5 tspalmond extract (optional but highly recommended for that classic bakery flavor)
- 420 gall-purpose flour (3.5 cups, spooned and leveled)
- 1 tspbaking powder
- 0.5 tspbaking soda
- 0.75 tspColima Sea SaltMicroplastic Free Salt
- —For the Pastel Buttercream:
- 340 gunsalted butter, softened (3 sticks or 1.5 cups)
- 480 gpowdered sugar, sifted (4 cups)
- 45 mlheavy cream (3 tbsp), plus more as needed
- 1 tspclear vanilla extract
- —Pinch of Colima Sea SaltMicroplastic Free Salt
- —Gel food coloring in your choice of pastel shades (soft pink, lavender, sky blue, mint green)
Ingredient Substitutions
Instructions
Click on an item below to shop for the recommended items for this recipe on Amazon.
As an Amazon Associate, we earn from qualifying purchases.
- In a large bowl using a stand mixer or hand mixer fitted with the paddle attachment, beat the softened butter and cream cheese together on medium speed for 3 full minutes until the mixture is completely smooth, pale, and fluffy. Scrape down the sides and bottom of the bowl well.
- Add the granulated sugar and beat for another 2 minutes on medium-high until light and airy. Add the eggs one at a time, beating for 30 seconds after each addition. Add the clear vanilla extract and almond extract (if using) and mix to combine.
- In a separate bowl, whisk together the flour, baking powder, baking soda, and fine sea salt. Add the flour mixture to the butter mixture all at once and mix on low speed just until no dry streaks remain. Do not overmix. The dough will be soft and slightly sticky.
- Divide the dough into two equal portions and flatten each into a disk. Wrap tightly in plastic wrap and refrigerate for at least 2 hours, or up to 48 hours. Do not skip this step. Chilling firms the fat so the cookies hold their shape and bake up thick rather than spreading thin.
- When ready to bake, preheat your oven to 325°F (165°C). Line two baking sheets with parchment paper. Remove one disk of dough from the refrigerator (keep the other cold). Using a 3-inch round cookie cutter or a large scoop (about 2 tablespoons of dough), cut or portion the cookies and place them 2 inches apart on the prepared pans. If the dough becomes sticky, briefly return it to the refrigerator.
- Bake one sheet at a time on the center rack for 11 to 13 minutes. The cookies are done when the edges are just barely set and the centers look slightly underdone and matte, not glossy or wet. They will firm up as they cool. Do not wait for them to look golden. Transfer to a wire cooling rack and cool completely before frosting.
- To make the buttercream, beat the softened butter on medium-high speed for 4 minutes until very pale and fluffy. Reduce speed to low and gradually add the sifted powdered sugar, one cup at a time, alternating with splashes of heavy cream. Once all the sugar is incorporated, add the vanilla extract and pinch of salt. Increase speed to medium-high and beat for 2 more minutes until the frosting is smooth, creamy, and cloud-like. If it is too thick, add heavy cream one teaspoon at a time. If too thin, add a little more sifted powdered sugar.
- Divide the frosting into as many bowls as you have colors. Add gel food coloring one toothpick-dip at a time, stirring gently between additions, until you reach your desired pastel shade. Spread or pipe the frosting onto the fully cooled cookies using an offset spatula or a piping bag fitted with a round or star tip. Finish with sprinkles if desired. Allow frosted cookies to set for 20 to 30 minutes before stacking or storing.
- Prepare the cookie dough following Steps 1 through 4 of the oven method. Chill for at least 2 hours. The same dough is used here.
- Preheat your air fryer to 300°F (150°C) for 3 minutes. Cut a piece of parchment paper to fit your air fryer basket, snipping small slits around the edges so air can circulate. Lightly mist the parchment with nonstick spray.
- Scoop or cut 3 to 4 cookies (depending on basket size) and place them at least 1.5 inches apart on the parchment. Keep remaining dough refrigerated between batches.
- Air fry at 300°F (150°C) for 7 to 8 minutes. The tops should look just set and matte, not golden or browned. Because air fryers circulate heat intensely, these cookies benefit from the lower temperature to prevent the edges from over-crisping before the center cooks. Check at 6 minutes the first time you make them, as air fryer models vary.
- Use a thin spatula to transfer cookies to a wire rack immediately (they firm up quickly in the basket). Cool completely before frosting with the pastel buttercream as described in the oven method steps 7 and 8.
- Prepare the cookie dough through Step 3 of the oven method. No need to chill the dough separately. Instead, scoop or cut the cookies immediately and arrange them on a parchment-lined baking sheet in a single layer, not touching.
- Place the tray in the freezer for 2 hours, or until the cookie portions are completely solid. This flash-freeze step prevents them from sticking together in storage.
- Transfer the frozen raw cookie dough rounds to a zip-top freezer bag or airtight container, labeling with the date and bake temperature. Freeze for up to 3 months. There is no need to thaw before baking.
- When ready to bake, preheat your oven to 325°F (165°C). Place frozen cookie rounds on a parchment-lined baking sheet 2 inches apart. Bake directly from frozen for 13 to 15 minutes, adding 2 to 3 minutes to the standard bake time to account for the cold dough.
- The cookies are done when the edges look set and the centers look matte. Cool completely on a wire rack before frosting. Make the buttercream fresh on the day you plan to serve, as it takes only 10 minutes and the fresh frosting always tastes best.
Nutrition Per Serving
Per 1 serving (makes about 24 cookies (3-inch rounds))
Why This Recipe Works
The secret to a genuinely soft sugar cookie that stays soft is fat management. Butter alone can produce a crisp or sandy cookie if the fat creams too much air in or if the cookies spread and dry out in the oven. Adding cream cheese introduces extra fat and a small amount of protein and acid that interfere with gluten development and slow down moisture evaporation during baking. The result is a crumb that stays tender and supple rather than firming into a crunchy snap. This same principle is why cream cheese is used in carrot cakes and red velvet recipes when bakers want a moist, close-grained crumb.
Baking at 325°F (165°C) rather than the more common 350°F (175°C) is a deliberate choice for this recipe. A lower temperature slows the setting of the egg proteins and the caramelization of the sugars, which means the outside of the cookie does not form a hard crust before the inside has fully cooked. This is how you achieve that characteristic flat-top, evenly soft bakery cookie rather than one with a domed, dry center and over-browned bottom. It also gives you a wider window of doneness, making this recipe more forgiving if your oven runs slightly hot.
Chilling the dough is non-negotiable here. Soft, room-temperature butter spreads aggressively in the oven before the structure has time to set. Refrigerating the dough firms the fat, so the cookies begin baking as a solid disk rather than softening and pooling outward. If your cookies spread too much, the number one cause is dough that was not cold enough when it went in. If the centers sink slightly after baking, the oven temperature may be slightly too high, or the cookies were pulled a minute or two too early. Both are easy fixes once you know why they happen.
Baker’s Tips
- Bring butter, cream cheese, and eggs to true room temperature (about 68 to 70°F or 20 to 21°C) before starting. Cold cream cheese will leave lumps in the dough that never fully incorporate.
- Always spoon flour into your measuring cup and level it off rather than scooping directly from the bag. Scooping can pack in up to 20% more flour than intended, leading to a dry, stiff dough.
- Use gel food coloring rather than liquid for the buttercream. Liquid food coloring adds water to the frosting, which can make it thin and affect consistency. Gel gives vivid, consistent color with just a tiny amount.
- For the softest possible cookies, pull them from the oven when the centers still look slightly underdone. They will continue to cook on the hot pan for another 2 to 3 minutes after being removed from the oven.
- When spreading frosting with an offset spatula, place a generous dollop in the center of the cookie and use one smooth circular motion outward. A small offset spatula dipped briefly in warm water will glide even more smoothly.
- To get perfectly even cookie portions without a cookie cutter, use a 2-tablespoon cookie scoop, roll the dough into a ball, and then gently flatten to about three-quarters of an inch thickness with the base of a glass before baking.
Variations
- Lemon Sugar Cookies: Add 1 tablespoon of fresh lemon zest to the cookie dough and replace the vanilla in the frosting with 1 tablespoon fresh lemon juice and 1 teaspoon lemon zest for a bright, citrusy twist.
- Brown Butter Version: Brown the cookie butter before chilling it solid and re-softening to room temperature. This adds a nutty, caramel depth to an otherwise simple cookie.
- Funfetti Style: Fold 80g (about half a cup) of rainbow sprinkles into the finished dough before chilling. Use white frosting with rainbow sprinkles on top for a celebration feel.
- Cream Cheese Frosting Swap: Replace the buttercream with a cream cheese frosting (225g cream cheese, 115g butter, 300g powdered sugar, 1 tsp vanilla) for a tangier, more substantial topping.
Troubleshooting & FAQ
My cookies spread too much and came out thin and flat. What went wrong?
My buttercream is grainy or gritty. How do I fix it?
The cookies turned golden around the edges and are crunchy, not soft. What happened?
My frosting is too stiff to spread smoothly but I do not want it to be runny. What do I do?
My pastel colors look dull or turned an odd shade after a few hours. What went wrong?
Storage & Make-Ahead
- Storage: Store frosted cookies in a single layer (or separated by parchment) in an airtight container at room temperature for up to 3 days. Refrigerate for up to 6 days, but bring to room temperature for 20 minutes before serving for the best texture. Unfrosted baked cookies freeze well for up to 2 months.
- Make-Ahead: The cookie dough can be made and refrigerated up to 48 hours ahead, or shaped and frozen for up to 3 months (see Freeze and Bake method). The buttercream can be made up to 5 days ahead and stored in an airtight container in the refrigerator. Re-whip with a mixer for 2 minutes before using, adding a teaspoon of heavy cream if needed to restore its consistency.
oh this is so up my alley! ive been baking w allulose for like two years now and the texture thing is honestly what sold me – my students are always shocked when i bring in treats that dont taste like theyre “missing” something, you know? the fact that you’re getting that bakery softness without the hard crust is key, tbh. i tried a similar approach last month for a school fundraiser and nailed it on the second batch once i understood the hydration piece. def curious about you’re frosting method tho – does the color stability come from the allulose itself or are you doing something sepcial w the buttercream ratio?
oh this is exactly what i needed right now, not gonna lie. my oldest just decided shes going vegetarian which means im basically relearning how to feed everyone, and having a solid cookie recipe that works with allulose feels like a win i can actually control lol. also the “clouds of silk” buttercream description has me sold because my stepdaughter has a thing about frosting texture and this sounds like it wont feel grainy or weird on her tongue, which honestly matters more than people think. definitely trying these this weekend.
man these look incredible, i’ve been wanting to nail that bakery style softness without all the regular sugar and your allulose approach seems like the move. been teaching folks in my classes that baking with alternatives is all about understanding the swap, not fighting it, so im really curious how the allulose affects the chew factor here – does it stay soft longer or does it firm up differently than traditional sugar? also love that the buttercream doesn’t crust over, that’s the kind of detail that actually matters when youre feeding people. definitely trying this one