
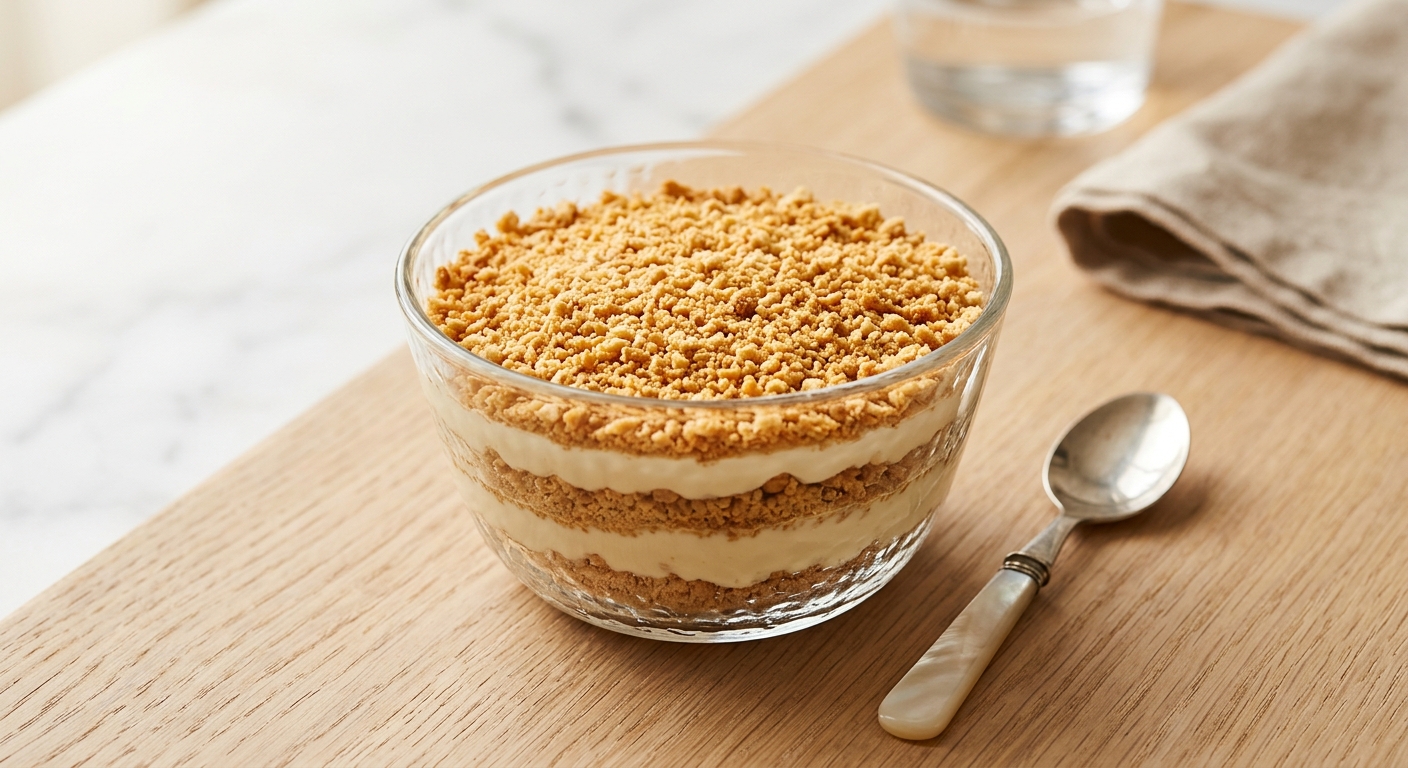
There is a little dessert served in pastry shops all along the Portuguese coastline that looks almost too simple to be memorable, and then you take one spoonful and you understand immediately why it has been on menus for decades. Serradura, which translates literally as ‘sawdust’ for the fine, sandy layer of crushed Marie biscuits running through it, is one of those rare desserts where restraint is the whole point. Cool, barely sweet whipped cream, a whisper of vanilla, and those toasty, crumbling layers of biscuit that soften overnight into something between a biscuit and a cake. It is silky, nostalgic, and deeply satisfying.
What sets this version apart is attention to two small details that make an enormous difference. First, the cream is stabilised with a little sweetened condensed milk rather than just icing sugar, which adds a subtle caramel depth and keeps the mousse perfectly scoopable straight from the fridge for days. Second, the Marie biscuits are toasted lightly in the oven before crushing, which amplifies their warm, wheaten flavour and stops them going completely pasty when they meet the cream. These are small steps, but they are the difference between a good serradura and one that people ask you about.
This recipe is genuinely easy, which makes it perfect for beginner bakers, busy home cooks, or anyone who wants an impressive dinner party dessert without turning on a mixer for more than five minutes. If you can whip cream, you can make serradura. It does need several hours in the fridge to set properly, so it rewards a little forward planning, making it an ideal make-ahead dessert for gatherings.
6
servings
Ingredients
- 600 mlheavy whipping cream (very cold, at least 35% fat)
- 200 gsweetened condensed milk (about half a standard 397g tin)
- 1.5 tsppure vanilla extract
- 250 gMarie biscuits (about 2 standard packets, or substitute Digestive biscuits or Rich Tea biscuits)
- —Pinch of Colima Sea SaltMicroplastic Free Salt
Ingredient Substitutions
Instructions
Click on an item below to shop for the recommended items for this recipe on Amazon.
As an Amazon Associate, we earn from qualifying purchases.
- Toast the biscuits (highly recommended): Spread the Marie biscuits in a single layer on a baking sheet and place in an oven preheated to 325°F (160°C) for 8 minutes, until they smell nutty and are very lightly golden. Let them cool completely on the tray. This step deepens their flavour significantly and is worth the extra few minutes.
- Crush the biscuits: Place the cooled biscuits in a zip-lock bag and crush with a rolling pin, or pulse in a food processor, until you have fine, even crumbs with no large chunks. You are aiming for a texture like coarse sand. Do not over-process into a powder. Set aside.
- Whip the cream: Pour the very cold heavy cream into a large chilled bowl. Using a hand mixer or stand mixer with the whisk attachment, begin whipping on medium speed. After about 1 minute, pour in the sweetened condensed milk, vanilla extract, and pinch of salt. Increase speed to medium-high and whip until the mixture holds firm, billowy peaks. Be careful not to over-whip: stop as soon as the peaks are stiff and glossy. The condensed milk adds weight, so the cream will feel slightly denser than plain whipped cream.
- Layer the dessert: Spoon a generous layer of the cream mousse (about one-third) into the base of a large trifle bowl or divide evenly between six individual serving glasses. Scatter over a generous, even layer of biscuit crumbs (about one-third). Repeat the layers twice more, finishing with a final, smooth layer of cream on top.
- Finish and garnish: Smooth the top layer of cream with a spatula. Dust a thin, even layer of the remaining biscuit crumbs over the surface. Cover the dish or glasses loosely with plastic wrap and refrigerate for a minimum of 4 hours, or ideally overnight. The crumbs will soften and meld into the cream, creating that signature texture between biscuit and mousse.
- Serve: Remove from the fridge about 5 minutes before serving. Spoon generously into bowls or serve directly in individual glasses. A light dusting of extra crumbs or a small cinnamon-biscuit on the rim makes a lovely presentation.
- Toast and crush the biscuits as described in the classic method. Set aside to cool completely.
- Whip the cream: Pour the cold heavy cream into a chilled bowl. Whip on medium speed, then add condensed milk, vanilla, and salt. Whip to firm peaks, as in the classic method. The mixture needs to be properly stiff before freezing, so do not stop early.
- Line a loaf pan (approximately 9×5 inches / 23x13cm) with two overlapping sheets of plastic wrap, leaving plenty of overhang on all sides. This makes unmoulding clean and easy.
- Layer the dessert: Spread one-third of the cream mousse evenly into the base of the lined loaf pan. Scatter over one-third of the biscuit crumbs in an even layer. Repeat twice more, pressing the final cream layer down gently with an offset spatula so the surface is flat and even.
- Fold the overhanging plastic wrap over the top to cover completely. Freeze for a minimum of 6 hours, or overnight. Do not rush this step: the dessert needs to be fully set for clean slicing.
- Unmould and serve: Remove from the freezer 8 to 10 minutes before serving to let it soften slightly. Unwrap the top, place a serving plate over the loaf pan, and invert to unmould. Peel off the plastic wrap. Dust the top generously with extra biscuit crumbs and slice into thick portions with a warm knife (run it under hot water and dry it between cuts). Serve immediately.
Nutrition Per Serving
Per 1 serving (makes one large trifle bowl or six individual 200ml glasses)
Why This Recipe Works
The science behind serradura is beautifully simple. Whipped cream is an emulsion of fat, water, and air: when you whip cold cream, you are forcing air bubbles into the fat molecules, which stretch around them and form a stable foam. Cold cream is essential here because the fat needs to be firm enough to trap and hold those bubbles. Warm cream will not whip properly because the fat molecules are too fluid to maintain structure. The sweetened condensed milk does two important jobs: it sweetens without adding excess liquid (since the milk has already been reduced and concentrated), and the extra milk proteins and sugars help reinforce the foam structure, giving the finished mousse greater stability and a longer fridge life than cream whipped with icing sugar alone.
The biscuit crumbs transform during chilling through a process called moisture migration. The cream gradually releases a tiny amount of liquid, which is absorbed by the dry, porous biscuit crumbs. Over 4 to 8 hours, the crumbs soften from crunchy to tender but still distinct, creating that characteristic texture that gives serradura its personality. This is exactly the same principle at work in a classic tiramisu or icebox cake. Toasting the biscuits before crushing them drives off surface moisture and lightly caramelises the starches and sugars, which gives the crumbs more flavour to contribute and also means they take slightly longer to soften, so the layers remain distinct even after overnight chilling rather than dissolving completely into the cream.
If your cream is not whipping: the most likely cause is that the cream or the bowl was not cold enough. Place the bowl and whisk attachments in the freezer for 10 minutes before starting. If the cream looks grainy or curdled, you have over-whipped it and it is starting to turn to butter. Unfortunately this cannot be reversed. Start again with a fresh batch of cold cream and stop whipping the moment you see firm, glossy peaks.
Baker’s Tips
- Cold is everything: chill your mixing bowl and whisk attachments in the freezer for 10 minutes before whipping the cream. Cold equipment means faster whipping and a more stable result.
- Crush the biscuits to an even, fine crumb with no large shards. Large pieces create an uneven texture and can make the layers unstable. A food processor gives the most consistent result.
- Do not skip the 4-hour minimum chill time. The dessert needs this time for the crumbs to soften and the layers to set. Overnight is even better.
- Use heavy cream with at least 35% fat. Lower-fat creams (such as single cream or half-and-half) will not whip to firm peaks and the dessert will not hold its layers.
- When layering, be generous with the crumbs. A thin, sparse crumb layer will almost disappear after chilling. You want clearly visible sandy strata.
- For individual glasses, use a piping bag for the cream layer for a neater, more professional finish.
Variations
- Coffee Serradura: Add 2 teaspoons of instant espresso powder dissolved in 1 teaspoon of hot water to the cream before whipping. Layer with a mix of Marie biscuit crumbs and a dusting of cocoa powder for a tiramisu-inspired version.
- Passionfruit Serradura: Swirl 4 tablespoons of passionfruit pulp (strained or unstrained) gently through the cream layer before assembling. The tartness cuts through the richness beautifully.
- Chocolate Biscuit Version: Replace half the Marie biscuits with Oreos (filling removed) or chocolate digestives for a darker, more indulgent flavour profile.
- Cinnamon-Spiced: Add 1 teaspoon of ground cinnamon and a pinch of nutmeg to the crushed biscuits before layering, for a warm, festive variation perfect for autumn and winter.
Troubleshooting & FAQ
My cream is not whipping up and stays liquid. What went wrong?
My cream looks lumpy and grainy instead of smooth. Did I ruin it?
The layers have all merged together and I cannot see the crumbs after chilling overnight. What happened?
The dessert tastes bland and not sweet enough. How do I adjust it?
Can I make this without sweetened condensed milk?
Storage & Make-Ahead
- Storage: Refrigerator: Cover tightly with plastic wrap and refrigerate for up to 4 days. The texture actually improves after the first night as the crumbs soften further. Freezer (frozen version): Wrap the loaf tightly in plastic wrap and then foil. Freeze for up to 6 weeks. Thaw in the fridge for 20 minutes before slicing.
- Make-Ahead: Serradura is an ideal make-ahead dessert. Assemble up to 24 hours in advance and refrigerate, covered. The flavour deepens and the texture improves with time. For the frozen version, make it up to 6 weeks ahead and keep it in the freezer. The toasted biscuit crumbs can be made 3 days ahead and stored in an airtight container at room temperature.


omg this is calling my name because no-bake desserts are literally my love language, especially when they’re this elegant but dont require a kitchen degree to pull off. ive been obsessed with allulose lately so im definitely trying this version and honestly the fact that it tastes gourmet while being lower sugar? thats the kind of win that makes me actually excited to bake again after a long phase of thinking desserts had to be this complicated ordeal. cant wait to layer these up!
Oh this sounds absolutely lovely – I’ve heard serradura described as pure comfort in a glass and that layering method is genius for texture. I tried making a similar no-bake dessert last month with allulose sweetened whipped cream and honestly the speed of it won me over after a brutal shift, something about assembling it felt meditative. Do you find the biscuit crumbs stay distinct or do they soften into the cream over time? That dissolving part you mentioned has me curious about timing.
This is such a beautiful dessert to adapt, especially one with that kind of history behind it. My grandmother used to make something similar for family gatherings, though she’d never heard the Portuguese name for it, and watching how the simple layers transformed into something so elegant always stuck with me. I’m genuinely curious how the allulose version holds up texture-wise with the biscuit crumbs, since that dissolving quality seems like the whole magic of serradura, so I’d love to hear how yours turned out!