
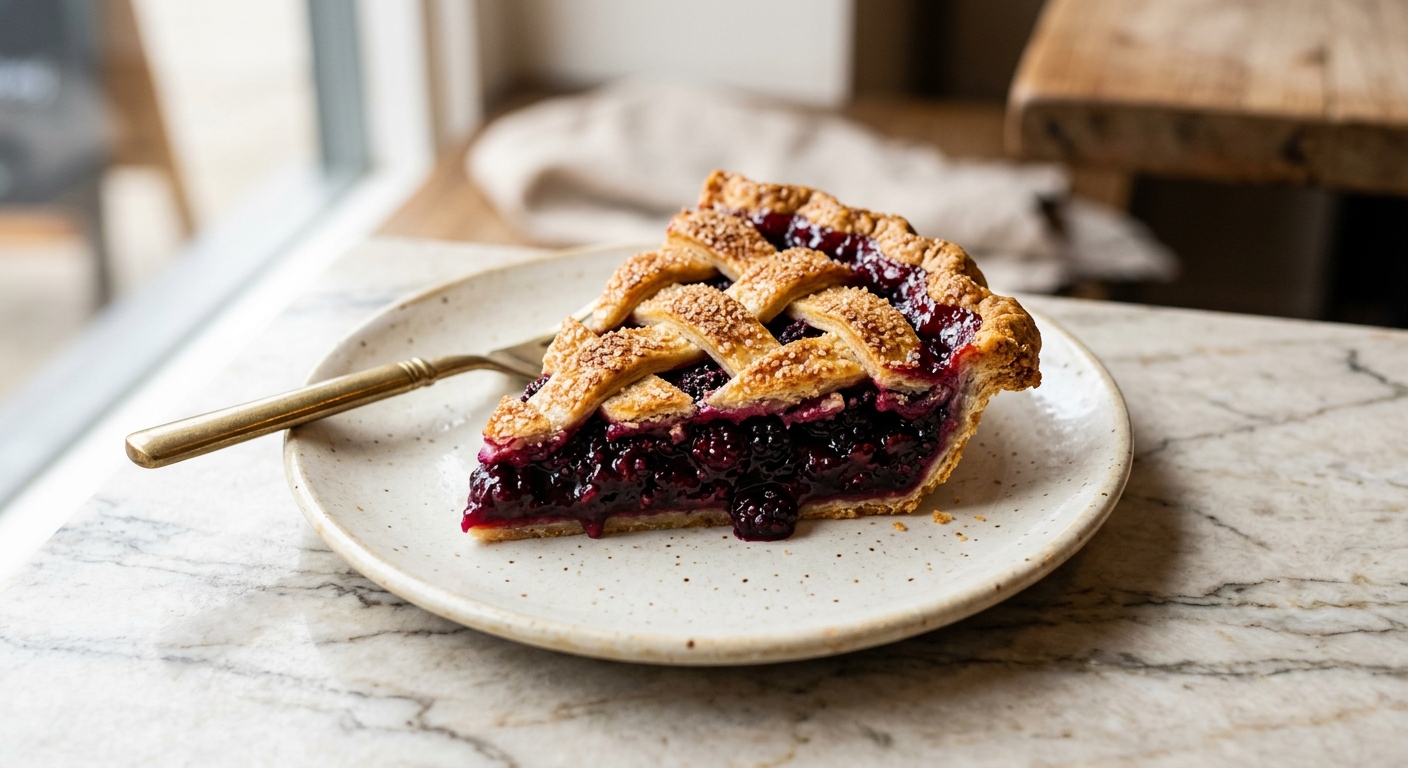
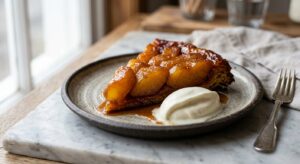
There is something quietly magical about a bramble pie. Maybe it is the way the filling bubbles up through the lattice strips in deep jewel-purple waves, or the faint wisp of steam that rises when you cut into it at the table. Blackberries have a wildness to them, a tartness that balances their sweetness and makes them one of the finest fruits you can ever tuck inside a pastry shell. This pie captures all of that, with a crust that shatters at the fork and a filling that is thick, glossy, and fragrant with lemon and a touch of cinnamon.
What sets this version apart is a combination of two small but meaningful choices. First, the all-butter crust is made with a portion of the butter frozen and grated directly into the flour, creating irregular fat pockets that produce an exceptionally flaky, layered result without requiring a food processor or professional technique. Second, the filling uses a mix of fresh and lightly macerated berries along with tapioca starch rather than cornstarch, which thickens to a beautifully clear, glossy gel instead of a cloudy, gluey paste. The result is a filling that holds its shape when sliced but still feels soft and luscious on the tongue.
This recipe is rated medium difficulty, primarily because of the lattice weave and the need to keep the pastry cold throughout. If you have made a pie crust before, you will feel right at home. If this is your first time, the detailed steps below will walk you through every fold and weave. This pie is perfect for late summer gatherings, Sunday dinners, or any occasion where you want something genuinely impressive that still feels rooted and homely.
8
servings
Ingredients
- Pastry
- 360 gall-purpose flour (about 3 cups, spooned and leveled), divided equally between base and lid
- 1 tspColima Sea SaltMicroplastic Free Salt
- 2 tspgranulated white sugar
- Filling
- 230 gunsalted butter, very cold (about 1 cup / 2 sticks), half cut into cubes and half frozen then grated
- 90 mlice-cold water (about 6 tbsp), plus more as needed
- 1 tbspapple cider vinegar
- 900 gfresh or frozen blackberries (about 7 to 8 cups), thawed and drained if frozen
- 150 ggranulated white sugar (about 3/4 cup)
- 35 ginstant tapioca starch (about 3 tbsp), also sold as tapioca flour
- 1 tbspfresh lemon juice
- 1 tspfinely grated lemon zest
- 0.5 tspground cinnamon
- 0.25 tspground allspice
- —Pinch of Colima Sea SaltMicroplastic Free Salt
- Egg Wash
- 1 largeegg, beaten with 1 tbsp milk
- Sprinkling On The Crust
- 1 tbspdemerara or coarse sugar
Ingredient Substitutions
Instructions
Click on an item below to shop for the recommended items for this recipe on Amazon.
As an Amazon Associate, we earn from qualifying purchases.
- Make the pastry. In a large bowl, whisk together the flour, salt, and 2 tsp sugar. Add the cubed cold butter and press the pieces between your fingers until most are the size of flattened peas. Then grate the frozen butter directly into the bowl using a box grater and toss quickly to coat the shreds in flour. The mix of sizes creates layers and flake. Drizzle in the apple cider vinegar, then add the ice water one tablespoon at a time, tossing with a fork after each addition. Stop when the dough just begins to clump together and holds when squeezed. Do not overwork it.
- Divide the dough into two portions, one slightly larger (for the base). Flatten each into a disc, wrap tightly in plastic wrap, and refrigerate for at least 1 hour. This rest relaxes the gluten and chills the butter back down, both essential for a flaky, tender crust.
- While the dough chills, make the filling. Combine the blackberries, 150g sugar, tapioca starch, lemon juice, lemon zest, cinnamon, allspice, and a pinch of salt in a large bowl. Toss gently and let macerate for 20 to 30 minutes. The berries will release their juices, which will dissolve the starch and ensure even thickening throughout the filling.
- Preheat your oven to 400°F (200°C) and place a rimmed baking sheet on the lowest rack to catch any drips. On a lightly floured surface, roll the larger dough disc into a circle about 13 inches wide and 3mm thick. Carefully drape it into a 9-inch deep-dish pie plate, pressing it gently into the corners without stretching. Leave a 1-inch overhang. Refrigerate the lined dish while you prepare the lattice.
- Roll the second disc into a rough rectangle, about 12 by 10 inches and 3mm thick. Using a pastry wheel or sharp knife and ruler, cut into 10 strips each about 2.5cm (1 inch) wide. Lay 5 strips evenly spaced across the pie in one direction. To weave, fold back every other strip halfway. Lay a perpendicular strip across the centre, then unfold the folded strips back over it. Fold back the strips that were not folded before, lay another perpendicular strip, and unfold. Repeat until the lattice is complete. Trim the strips flush with the edge of the base crust overhang. Fold the base overhang up over the lattice ends and crimp firmly to seal, using your fingers or a fork.
- Brush the entire lattice and crimped edge generously with the egg wash. Sprinkle with demerara sugar. Place the pie on the preheated baking sheet in the oven and bake at 400°F (200°C) for 20 minutes until the crust just begins to colour. Reduce the heat to 375°F (190°C) and continue baking for 35 to 40 more minutes, until the crust is deep golden brown and the filling is visibly bubbling through the lattice openings. If the edges brown too quickly, shield them with a strip of foil or a pie shield.
- Remove the pie from the oven and place it on a wire cooling rack. Allow it to cool for at least 2 hours before slicing. This is not optional. The tapioca needs time to fully set as the pie cools, and slicing too soon will result in a runny filling. The pie is excellent served just warm or at room temperature, with softly whipped cream or good vanilla ice cream.
- Prepare the pastry exactly as described in the oven method steps 1 and 2, dividing the dough into two discs and resting for at least 1 hour. Prepare the filling the same way, macerating the berries for 20 to 30 minutes.
- Roll each dough disc to about 3mm thickness. Cut 4 base circles large enough to line four 4-inch foil tart tins with a small overhang. Cut 4 slightly smaller lid circles or cut lattice strips for the tops. Line the tins with the base circles, pressing gently into the edges without stretching. Keep unbaked shells refrigerated while you prepare the tops.
- Fill each chilled pastry shell with the macerated blackberry mixture, dividing evenly. Leave a small gap at the top as the filling will bubble up. Lay your lattice strips or lid circles over the top, trim neatly, fold the overhang over, and crimp to seal. Brush each pie with egg wash and sprinkle with demerara sugar.
- Preheat your air fryer to 325°F (160°C) for 5 minutes. Place 2 pies at a time in the basket (do not crowd them, air circulation is what makes this work). Bake for 22 to 25 minutes until the crust is deeply golden and the filling is bubbling. Check at 18 minutes and tent loosely with a small piece of foil if the tops are colouring too fast.
- Remove carefully and cool on a wire rack for at least 45 minutes before eating. The filling sets more quickly in smaller pies but still needs time to firm up properly. Serve with whipped cream or clotted cream.
Nutrition Per Serving
Per 1 serving (makes one 9-inch deep-dish pie)
Why This Recipe Works
The grated frozen butter technique is the heart of this pastry. When butter is cut into flour in the traditional way, even careful handling can cause it to warm and begin to meld into the flour, producing a tender but not particularly flaky result. By freezing half the butter and grating it, you introduce very thin, cold shards of fat that coat larger flour clusters in layers. In the oven, those fat layers release steam and melt away rapidly, pushing the flour layers apart and creating the distinct, shattering flakiness you want. The addition of apple cider vinegar is a small but meaningful step: acid slows gluten development by interfering with the proteins in flour, which means even if you handle the dough a little longer than you should, it will still bake up tender rather than tough.
Tapioca starch is chosen over cornstarch because it behaves differently under heat. Cornstarch thickens to an opaque, slightly starchy gel that can become gluey or cloud the gorgeous deep purple of blackberry juice. Tapioca starch thickens to a clear, glossy gel with a cleaner, less starchy flavour, which allows the true colour and brightness of the fruit to come forward. It also holds up better if the pie is refrigerated and reheated. The macerating step is equally important: allowing the berries to sit with the sugar and starch for 20 to 30 minutes draws out the berry juices, which dissolve the starch granules and ensures even distribution throughout the filling before it ever touches the oven.
The two-temperature bake, starting high at 400°F (200°C) and then dropping to 375°F (190°C), serves a specific purpose. The initial blast of high heat sets the pastry structure quickly, encouraging the steam pockets to form before the butter fully melts out, which maximises flakiness. It also begins the colour development on the crust before the filling has had time to make the base soggy. Dropping the temperature for the remainder of the bake allows the filling to come fully up to temperature and the tapioca to activate properly without burning the crust. If the filling is not visibly bubbling before you pull the pie from the oven, the tapioca has not fully activated and the filling will be loose when cut.
Baker’s Tips
- Keep everything cold. If at any point during rolling or weaving the dough feels soft, greasy, or sticky, slide it onto a tray and refrigerate for 15 minutes before continuing. Cold butter is what makes the difference between a flaky crust and a dense one.
- Do not skip the full cooling time. Two hours minimum. The filling continues to thicken as it cools and will look alarmingly runny straight from the oven. Trust the process.
- If using frozen blackberries, thaw them completely in a colander over a bowl and discard the liquid before macerating. Using frozen berries without draining will add too much moisture and risk a watery filling.
- Dust your work surface and rolling pin lightly but use as little extra flour as possible. Too much flour worked into the dough toughens the crust.
- A pie shield or a simple collar of foil is your best friend for protecting the crimped edges. Slip it on after the first 20 minutes of baking when the edges have set their shape.
- When weaving the lattice, chill your cut strips for 10 minutes before starting the weave if your kitchen is warm. Cold strips are far easier to handle and will not tear.
- Always place your pie tin on a preheated rimmed baking sheet in the oven. This does two things: it catches any berry drips and protects your oven floor, and it gives the base of the pie a burst of direct heat that helps cook the bottom crust through properly.
Variations
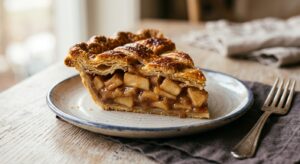
- Bramble and Apple: Replace 300g of blackberries with peeled, cored, and thinly sliced tart apples (such as Granny Smith). Increase cinnamon to 1 tsp and add 1/4 tsp nutmeg. This gives the filling more body and a wonderful autumn character.
- Blackberry and Lavender: Add 1 tsp dried culinary lavender to the filling with the spices. It pairs extraordinarily well with blackberries and makes for a very elegant pie. Start with a small amount as lavender can quickly become overpowering.
- Bramble and Elderflower: Replace the lemon juice with 2 tbsp elderflower cordial and omit the allspice. The floral notes lift the fruit beautifully and give a more delicate, summery result.
- Galette version: Rather than lining a pie tin, roll the base disc into a rough 14-inch circle, mound the filling in the centre leaving a 3-inch border, fold the edges up over the filling in rough pleats, and bake on a parchment-lined tray at 400°F (200°C) for 40 to 45 minutes. Far less fussy and equally delicious.
Troubleshooting & FAQ
My filling is runny even after the pie has cooled completely. What went wrong?
The bottom crust is soggy and undercooked, but the top looks done. How do I fix this?
My lattice strips tore while I was weaving. What can I do?
The crimped edges are browning too fast before the rest of the pie is done.
My pastry shrank when I put it in the tin and there is not enough overhang to crimp. What happened?
Storage & Make-Ahead
- Storage: Store the baked pie loosely covered at room temperature for up to 2 days, or refrigerate for up to 5 days. The crust softens slightly in the fridge, so allow it to come to room temperature for 30 minutes before serving, or warm individual slices in a low oven at 300°F (150°C) for 10 minutes. Freeze the fully baked and cooled pie, well-wrapped, for up to 3 months. Reheat from frozen at 350°F (175°C) for 25 to 30 minutes.
- Make-Ahead: The pastry discs can be made up to 3 days ahead and refrigerated, or frozen for up to 3 months (thaw overnight in the fridge before rolling). The filling can be mixed and refrigerated for up to 24 hours, though the berries will continue to macerate and soften. The fully assembled, unbaked pie can be frozen for up to 1 month; bake directly from frozen, adding 15 to 20 minutes to the bake time.

This sounds absolutely lovely – I’ve had the best luck with blackberry pie when I use allulose since it really lets that tart brightness come through without the cloying sweetness that can mute the berry flavor. The lattice crust detail is perfect too, those little gaps let some of the jammy filling peek through and caramelize at the edges. Would love to know what ratio you used for the filling, especially with a sugar alternative!
Oh Sage, yes to this completely – that tart brightness is so worth protecting, and I’ve found the same thing with allulose in berry pies. There’s something about how it gets out of the way and lets the fruit just sing. My mom used to make blackberry pie every August when they were in season, and now when I bake with allulose I feel like I’m actually honoring what she was doing all those years, you know? Just letting the berries be the star.
yo this is hitting different, been trying to get my kids in the gym to understand discipline and structure, right, and baking is basically the same thing – you follow the process, you get the results. made this exact pie last month with allulose for our community center fundraiser and people were asking for the recipe all night, that lattice crust is no joke but its worth the time investment. definitely gonna try this version with the blackberries.
yo marco thats such a real way to look at it – the discipline piece really does carry over, and honestly ive found the same thing with baking being this grounding ritual that just works. love that you’re bringing it to your comunity like that, those moments stick with people more than just the taste imo. the lattice takes patience but youre right, its worth every minute, especially when allulose keeps the filling from being overly sweet and lets those blackberries shine.
man you get it, thats exactly what im talking about. the lattice isnt just about looking clean, its about showing these kids that something takes time and focus and you cant rush it, but when you do it right the payoff hits. allulose changed the game for me too because yeah, it gets out of the way so the fruit is the star, not the sugar, and thats real – reminds me of good mentorship, you show up and support but dont overshadow the kid, you know. theyre gonna remember making this pie with their hands way more than they remember any speech i gave them.
oh marco this is so beautiful and honestly it made me tear up a little, those hands-on memories with the kids are everything – ive seen it with shelter volunteers too, how teaching someone to care for an animal the right way, patient and present, changes them in ways words just cant touch. the lattice work especially is such a perfect metaphor because it really does require that focus and those little moments of “wait, do this carefully” are where the real lessons stick. im really glad allulose is working so well for you because youre so right, it just lets the fruit shine and that mirrors what good mentoring is all about – stepping back and letting the real beauty come through.