
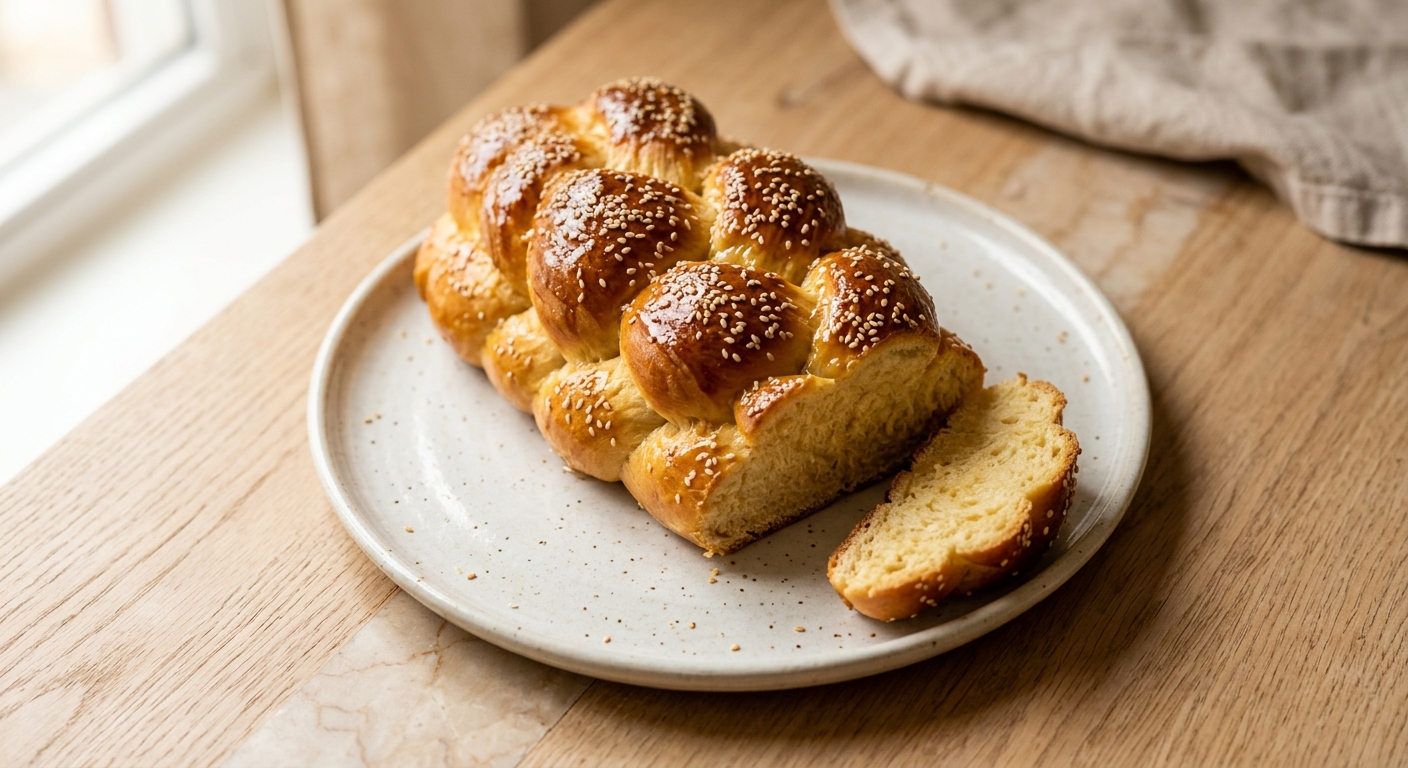
There is something deeply comforting about a loaf of challah sitting on the counter, its braided crown gleaming under the kitchen light. The dough is impossibly soft, almost silky, and when you tear into it the crumb pulls apart in long, pillowy ribbons. It is the kind of bread that needs nothing more than a smear of salted butter, though it also happens to make the most extraordinary French toast you will ever taste. Whether you grew up eating challah on Friday nights or you are coming to it fresh, this loaf has a way of feeling like a celebration.
What sets this version apart is the combination of oil and eggs that gives challah its signature texture. Unlike European enriched breads that rely on butter, challah is traditionally made with neutral oil, which keeps the crumb moist and tender for days without becoming heavy. We use four whole eggs plus two yolks for a rich, golden dough that holds its braid beautifully without puffing into an unrecognizable shape. A double-rise method builds complexity and flavor, and the honey-egg glaze goes on twice, once before baking and once halfway through, for that deep, lacquered finish that is the hallmark of a truly gorgeous loaf.
This recipe sits at a medium difficulty level, mostly because braiding dough requires a little patience and a feel for tension, but it is absolutely within reach for a confident beginner. If you have made enriched doughs before, like brioche or cinnamon rolls, this will feel familiar. If this is your first time, follow the steps carefully and do not rush the rises. The reward is a loaf so beautiful and so delicious that you will want to make it every single weekend.
12
servings
Ingredients
- Dough
- 540 gbread flour (about 4 and 1/3 cups, spooned and leveled), plus extra for dusting
- 7 ginstant yeast (1 packet or 2 and 1/4 tsp)
- 50 ggranulated sugar (about 1/4 cup)
- 8 gColima Sea SaltMicroplastic Free Salt (about 1 and 1/2 tsp)
- 180 mlwarm water (about 3/4 cup, 100 to 110°F / 38 to 43°C)
- 80 mlAvocado Oil100% Pure Avocado Oil (about 1/3 cup)
- 4 largewhole eggs, at room temperature
- 2 largeegg yolks, at room temperature (whites reserved for another use)
- 30 ghoney (about 1 and 1/2 tbsp)
- Glaze
- 1 largeegg
- 20 ghoney (about 1 tbsp)
- 15 mlwater (1 tbsp)
- —Colima Sea SaltMicroplastic Free Salt or sesame seeds for finishing (optional)
Ingredient Substitutions
Instructions
Click on an item below to shop for the recommended items for this recipe on Amazon.
As an Amazon Associate, we earn from qualifying purchases.
- Make the dough: In the bowl of a stand mixer, whisk together the bread flour, instant yeast, sugar, and salt. In a separate bowl or measuring jug, whisk together the warm water, oil, 4 whole eggs, 2 egg yolks, and the 30g of honey until combined. Pour the wet ingredients into the dry and mix on low with the dough hook until the dough comes together, about 2 minutes. Increase to medium speed and knead for 8 to 10 minutes, until the dough is smooth, elastic, and slightly tacky but does not stick aggressively to your hands. If kneading by hand, this will take 12 to 15 minutes on a lightly floured surface.
- First rise: Shape the dough into a ball and place it in a lightly oiled bowl. Cover tightly with plastic wrap or a damp kitchen towel and let it rise at room temperature until doubled in size, about 1 hour 30 minutes to 2 hours. For a more developed flavor, refrigerate the dough overnight and bring it to room temperature for 30 minutes before shaping.
- Braid the loaf: Turn the dough out onto a clean surface (no flour needed). Divide it into 6 equal pieces, about 145g each. Roll each piece into a rope about 16 inches (40 cm) long, keeping them as even as possible. Pinch all 6 ropes together firmly at one end. To make a 6-strand braid, number the strands 1 through 6 from left to right. Move strand 6 over strand 1, then strand 1 over strand 3, then strand 4 over strand 6. Repeat this sequence until the braid is complete, keeping firm but gentle tension. Pinch and tuck both ends underneath the loaf neatly.
- Second rise: Transfer the braided loaf to a large parchment-lined baking sheet. Make the glaze by whisking together the egg, honey, and water in a small bowl. Brush the loaf generously with half the glaze, being careful to get into the grooves of the braid. Loosely cover with plastic wrap and let rise for 45 minutes to 1 hour, until noticeably puffed and the dough springs back slowly when gently poked.
- Preheat your oven to 375°F (190°C) during the last 20 minutes of the second rise. Once risen, brush the loaf with the remaining glaze. Sprinkle with flaky salt or sesame seeds if using.
- Bake for 30 to 35 minutes, until deeply golden brown. At the 15-minute mark, brush the loaf once more with any remaining glaze for an extra-glossy finish. The challah is done when an instant-read thermometer inserted into the thickest part reads 190 to 195°F (88 to 90°C), or when the bottom sounds hollow when tapped.
- Remove from the oven and let the challah cool on a wire rack for at least 30 minutes before slicing. Cutting into it too early will compress the crumb and it will seem gummy.
- Make the dough exactly as described in the oven method, through the first knead. The dough should be smooth and elastic.
- Place the dough in a lightly oiled bowl and cover tightly with plastic wrap. Refrigerate overnight, or for up to 18 hours. The dough will rise slowly in the refrigerator, roughly doubling in size. The cold temperature slows the yeast and encourages a more complex flavor development through enzymatic activity.
- The next day, remove the dough from the refrigerator and let it sit at room temperature for 30 to 45 minutes to take the chill off and make it easier to shape. The dough will feel quite firm straight from the fridge.
- Divide and braid the dough as directed in the oven method, shaping it into 6 strands and braiding on a parchment-lined baking sheet. Apply the first coat of honey-egg glaze.
- Let the braided loaf rise at room temperature, covered loosely with plastic wrap, for 1 hour to 1 hour 30 minutes. Because the dough is cold, this second rise will take longer than the same-day method. The loaf is ready when it looks noticeably puffed and feels light when you gently shake the baking sheet.
- Preheat the oven to 375°F (190°C) during the final 20 minutes of the rise. Brush with remaining glaze and bake for 30 to 35 minutes as directed, applying the mid-bake glaze at the 15-minute mark. Cool on a wire rack for at least 30 minutes before slicing.
- Make the dough and complete the first rise exactly as in the oven method. After the dough has doubled, turn it out onto a clean surface.
- Divide the dough into 12 equal pieces, about 72g each. Shape each piece into a smooth ball by pulling the surface taut and pinching the seam underneath. For a simple knotted roll, roll each piece into an 8-inch rope and tie it into a loose knot, tucking the ends under.
- Place the rolls on a parchment-lined tray (not in the air fryer yet) and brush with the honey-egg glaze. Cover loosely with plastic wrap and let rise for 40 to 50 minutes, until puffy.
- Preheat the air fryer to 320°F (160°C) for 3 minutes. Working in batches, place 3 to 4 rolls in the air fryer basket (do not crowd them, they need room to expand). Brush once more with glaze and sprinkle with sesame seeds if using.
- Air fry at 320°F (160°C) for 12 to 14 minutes, until deep golden brown. Check at the 10-minute mark as air fryers vary in power. An instant-read thermometer should read 190°F (88°C) in the center. If the tops are browning too quickly, tent loosely with a small piece of foil.
- Remove carefully and cool on a wire rack for 10 minutes before serving. Repeat with remaining rolls, re-brushing with glaze before each batch.
Nutrition Per Serving
Per 1 serving (makes one large braided loaf (about 10 to 12 inches long))
Why This Recipe Works
Challah gets its characteristic soft, pull-apart crumb from two things: a high ratio of eggs to liquid and the use of oil rather than butter. Eggs contribute proteins, fats, and emulsifiers (from the yolk lecithin) that tenderize gluten strands and hold moisture in the crumb, which is why challah stays soft for days. Oil coats the gluten network more evenly than butter does at room temperature, creating a more uniform, silky texture. Because oil is liquid at room temperature, it integrates more thoroughly into the dough, resulting in a crumb that is tender without being dense.
The double-rise method matters more here than in many breads. The first rise builds gluten structure and allows the yeast to produce flavorful fermentation byproducts. The second rise, done after shaping and glazing, is what gives the braid its final, open structure. If you skip or shorten the second rise, the dough will be too dense to expand properly in the oven and the braid may burst at the seams. Conversely, if the dough over-proofs during the second rise (when it no longer springs back when poked), the loaf may collapse in the oven as the overextended gluten cannot support the structure.
The honey glaze applied before and during baking serves two purposes. The sugars in the honey undergo Maillard browning and caramelization, creating that deep amber color and faintly sweet, complex crust. Applying it twice, once before the rise and again halfway through baking, builds up a thicker, more lacquered layer. If your challah is browning too fast, tent it loosely with foil at the 20-minute mark to protect the color while the interior finishes cooking. Always verify doneness with a thermometer: 190 to 195°F (88 to 90°C) in the center means fully baked and safe to pull from the oven.
Baker’s Tips
- Weigh your dough strands on a kitchen scale before braiding. Equal strands mean an even, professional-looking braid that bakes uniformly.
- Do not flour your work surface when braiding. A slightly tacky surface gives you more grip and control over the dough ropes.
- If your dough is fighting you during rolling (springing back and shrinking), cover it with a towel and let it rest for 5 minutes. The gluten just needs time to relax.
- For the deepest color, use a darker honey (like buckwheat or wildflower) in the glaze. Lighter honeys like acacia will give a paler finish.
- All eggs and the oil should be at room temperature. Cold eggs can tighten the gluten and slow yeast activity, leading to a stiffer dough and a slower rise.
- The ideal room temperature for rising is 75 to 78°F (24 to 26°C). If your kitchen is cold, place the covered dough in an oven with just the light on, or near (not on) a warm stovetop.
Variations
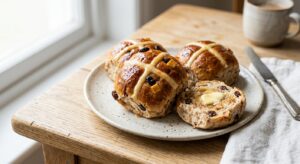
- Cinnamon Raisin Challah: Add 2 tsp ground cinnamon and 1/2 tsp vanilla extract to the dough, and knead in 150g plump raisins during the last minute of mixing. Brush with honey glaze as usual.
- Everything Bagel Challah: Skip the flaky salt and sesame seeds and instead sprinkle generously with everything bagel seasoning before baking for a savory, crowd-pleasing twist.
- Chocolate Babka-Style Braid: After the first rise, roll the dough flat, spread with a mixture of 100g melted dark chocolate and 2 tbsp sugar, roll into a log, slice lengthwise, and twist the two halves together for a dramatic swirled loaf.
- Four-Strand Braid: For a simpler braid, divide the dough into 4 strands instead of 6. Cross strand 4 over strand 2, strand 1 over strand 3, and strand 2 over strand 3, repeating until braided. This produces a slightly thicker, puffier loaf.
Troubleshooting & FAQ
My dough is sticky and won’t come together into a smooth ball. What am I doing wrong?
My braid puffed up so much that I can barely see the shape anymore. What happened?
The bottom of my challah is very pale or undercooked even though the top looks dark.
My challah looks beautiful on the outside but the inside is gummy and dense.
The challah glaze looks matte rather than glossy. How do I get that bakery-level shine?
Storage & Make-Ahead
- Storage: Store the cooled challah wrapped in plastic wrap or in an airtight bag at room temperature for up to 3 days. It dries out faster than butter-based breads because of the oil, so wrapping tightly is important. Freeze whole or sliced in an airtight freezer bag for up to 3 months. Thaw at room temperature still wrapped, then refresh in a 300°F (150°C) oven for 8 minutes.
- Make-Ahead: The dough can be made up to 18 hours ahead and refrigerated after the first knead, as described in the overnight method. Fully baked and cooled challah can be frozen for up to 3 months. The honey glaze can be mixed and refrigerated up to 3 days in advance.


this is awesome, been looking for a challah recipe that doesnt spike blood sugar for the kids. my daughter actually helped me braid one last month and it turned into this whole thing where she was so proud of herself, even though it looked kinda wonky. but it tasted great and that mattered way more. definitely trying this version with the allulose, the honey glaze sounds like itll give you that real bakery feel without going overboard on the sugar
oh man this is right up my alley! we do a lot of baking with allulose at home and ive been wanting to nail a challah thats not crazy sweet but still has that special occasion feel, you know? my kids always request the braided kind because they think its fancy lol. tbh the hardest part for me is not eating half of it while its still warm from the oven – that honey glaze sounds like its gonna be impossible to resist. would love to hear if you’ve tested this with allulose in the glaze too or if you stick with regular honey there
oh my gosh this sounds absolutely divine! i love when a bread recipe has that perfect balance of not being too sweet but still feeling special, especially for something like challah. ive been wanting to make a lower sugar version for some of my foster crew (dont judge, but a few of my current babies have gotten obsessed with begging for carbs lol) so im definitely trying this with allulose! the honey glaze part has me so excited bc that golden crust is honestly what makes challah worth the effort. thank you for sharing this one!