
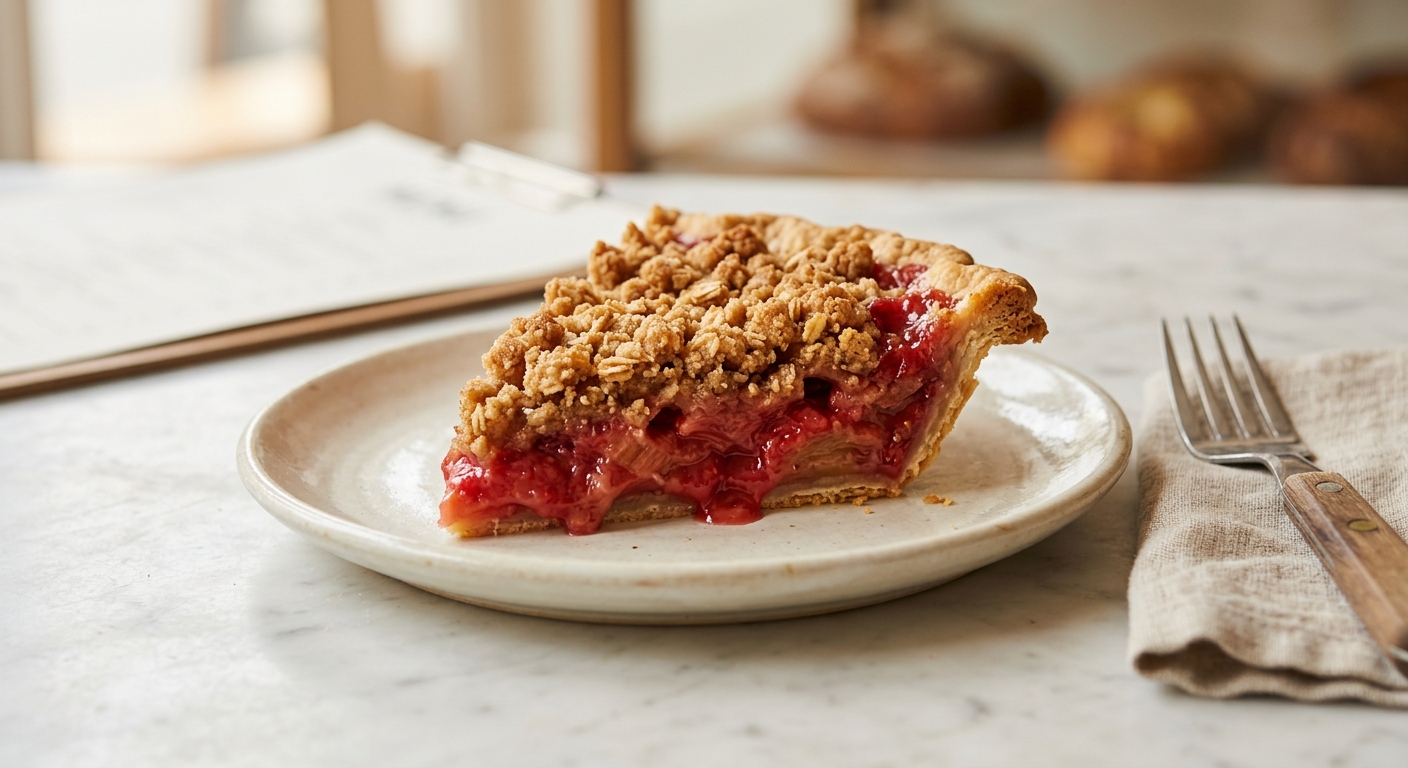
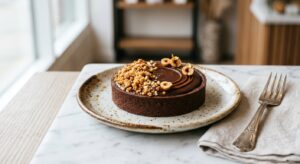
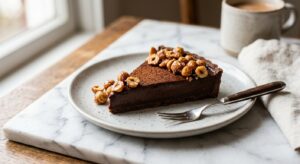
There is a particular kind of magic that happens when strawberries and rhubarb meet in a hot oven. The strawberries slump into jammy sweetness, the rhubarb softens into something almost floral and bracingly tart, and together they create a filling so vibrantly colored and deeply fragrant that you will find yourself hovering near the oven just to catch the smell. Add a golden, crumbly streusel on top instead of a second crust, and you have a pie that manages to feel both nostalgic and a little bit special every single time.
What sets this version apart is a two-part technique for the filling. The fruit is macerated with sugar before baking, drawing out excess juice that would otherwise make your bottom crust soggy. That released liquid is then briefly reduced on the stovetop into a concentrated syrup and stirred back into the fruit. This single step is the difference between a filling that holds a clean slice and one that floods your plate. The streusel uses rolled oats and cold butter rubbed together with brown sugar, a little flour, and a pinch of cinnamon, baking up into irregular, crunchy clusters that contrast beautifully with the soft, glossy fruit beneath.
This recipe sits comfortably in the medium difficulty range. The pie dough requires a little patience and a cold touch, but every step is clearly explained and fully achievable for a home baker who has made pastry once or twice before. It is ideal for late spring and early summer when rhubarb is at its peak and the first strawberries of the season are flooding the farmers market – though frozen fruit works beautifully year-round with just a small adjustment to the starch.
8
servings
Ingredients
- Crust (1 Tbsp)
- 180 gall-purpose flour, for the crust (about 1.5 cups, spooned and leveled)
- 15 ggranulated sugar
- Crust
- 0.5 tspColima Sea SaltMicroplastic Free Salt
- Crust (1/2 Cup Or 1 Stick)
- 115 gunsalted butter, very cold and cut into 1 cm cubes
- 45 mlice water, for the crust, plus more as needed (3 tbsp)
- 500 gfresh strawberries, hulled and halved or quartered if large (about 3.5 cups)
- 400 gfresh rhubarb, trimmed and cut into 2 cm pieces (about 3 cups or 3 to 4 thick stalks)
- Filling (3/4 Cup)
- 150 ggranulated sugar
- Filling (3 Tbsp Plus 1 Tsp)
- 35 gcornstarch
- 1 tbspfresh lemon juice
- 0.5 tsppure vanilla extract
- Streusel (3/4 Cup)
- 90 gall-purpose flour
- 75 gold-fashioned rolled oats
- Streusel (1/2 Cup)
- 100 gpacked light brown sugar
- Streusel
- 0.5 tspground cinnamon
- —Pinch of Colima Sea SaltMicroplastic Free Salt
- Streusel (6 Tbsp)
- 85 gunsalted butter, cold and cut into small pieces
Ingredient Substitutions
Instructions
Click on an item below to shop for the recommended items for this recipe on Amazon.
As an Amazon Associate, we earn from qualifying purchases.
- Make the pie dough: In a large bowl, whisk together 180g flour, 15g granulated sugar, and 0.5 tsp salt. Add the cold cubed butter and toss to coat. Using your fingertips or a pastry cutter, work the butter into the flour until you have a shaggy mixture with pieces ranging from coarse sand to flat, pea-sized chunks. Those larger chunks are what create flaky layers. Drizzle in 45ml ice water and use a fork to bring the dough together, adding 1 teaspoon of ice water at a time if needed, until the dough just holds together when pinched. Do not overwork it. Shape into a flat disc, wrap tightly in plastic wrap, and refrigerate for at least 1 hour or up to 2 days.
- Macerate the fruit filling: In a large bowl, combine the strawberries, rhubarb, 150g granulated sugar, and lemon juice. Toss to coat and let sit at room temperature for 30 to 45 minutes. The fruit will release a significant amount of pink, fragrant juice. This is exactly what you want. Drain the accumulated juices into a small saucepan, keeping the fruit in the bowl.
- Reduce the syrup: Set the saucepan of fruit juice over medium heat and simmer for 5 to 7 minutes, stirring occasionally, until reduced by about half and slightly syrupy. It should coat the back of a spoon. Remove from heat and let cool for 10 minutes. Meanwhile, sprinkle the cornstarch over the drained fruit and toss well. Pour the cooled reduced syrup back over the fruit, add the vanilla extract, and stir everything gently to combine. Set aside.
- Make the streusel: Combine 90g flour, 75g oats, 100g brown sugar, 0.5 tsp cinnamon, and a pinch of salt in a medium bowl. Add the 85g cold butter pieces and use your fingertips to rub the butter into the dry ingredients until the mixture clumps together in uneven, pebble-like pieces. You want a range of textures from sandy to large clusters. Do not aim for uniformity. Refrigerate the streusel until ready to use.
- Roll and line the pan: Remove the chilled dough from the refrigerator and let it sit for 5 minutes to soften slightly. On a lightly floured surface, roll from the center outward into a roughly 30 cm (12-inch) circle, rotating the dough a quarter turn after each roll to prevent sticking. Carefully drape the dough over your rolling pin and transfer to a 9-inch pie plate. Gently press it into the bottom and sides without stretching. Trim the overhang to about 2.5 cm (1 inch) and fold it under itself to form a thick edge. Crimp as desired. Refrigerate the lined pie plate for 20 minutes while you preheat the oven.
- Preheat your oven to 400°F (205°C) and place a large rimmed baking sheet on the lowest rack to catch any drips. Give the filling one final gentle stir, then pour it into the chilled pie shell. Scatter the streusel evenly over the filling, covering it generously all the way to the edges.
- Bake at 400°F (205°C) for 20 minutes, then reduce the oven temperature to 375°F (190°C) without opening the door and continue baking for another 30 to 35 minutes, until the streusel is deep golden brown and the filling is bubbling vigorously around the edges and through the streusel. Active, thick bubbling (not just a little shimmer) is the true sign that the starch has gelatinized and the filling will set. If the streusel is browning too quickly after the first 30 minutes, tent loosely with foil.
- Cool completely on a wire rack for at least 45 minutes to 1 hour before slicing. This resting time is non-negotiable. The filling continues to thicken as it cools and cutting too early will result in a runny, soupy slice, however delicious it may still taste. Serve at room temperature or very slightly warm with softly whipped cream or vanilla ice cream.
- Prepare the pie dough, macerate the fruit, reduce the syrup, and make the streusel exactly as described in steps 1 through 4 of the oven method. You will need a 7-inch or 8-inch metal pie dish that fits inside your air fryer basket. Do not use glass or ceramic in the air fryer.
- Roll the chilled dough to a 25 cm (10-inch) circle and line your 7-inch metal pie dish. Trim and crimp the edge, then refrigerate for 15 minutes while you preheat the air fryer to 320°F (160°C) for 5 minutes.
- Fill the pie shell with the prepared filling (you may have a small amount of leftover filling depending on your pan size – bake it in a small ramekin alongside the pie). Top generously with the cold streusel, pressing it very gently into the filling at the edges to prevent it blowing around in the circulating air. You can also place a small piece of parchment lightly over the streusel for the first 10 minutes to protect it.
- Carefully lower the pie dish into the air fryer basket. Bake at 320°F (160°C) for 30 to 35 minutes, checking at 25 minutes. The streusel should be deep golden brown and the filling should be actively bubbling up through and around the topping. If the streusel is browning too fast, lay a small piece of foil over the top for the remaining time.
- Remove from the air fryer and cool on a wire rack for at least 45 minutes before slicing. The pie will be piping hot and the filling needs time to set fully. The air fryer produces a wonderfully crisp bottom crust, so resist the urge to cut too soon.
- Make the toasted streusel crumble: Melt 85g butter in a wide skillet over medium heat. Add 90g flour, 75g oats, 100g brown sugar, 0.5 tsp cinnamon, and a pinch of salt. Cook, stirring constantly with a wooden spoon, for 6 to 8 minutes until the mixture is golden brown, fragrant, and resembles clumpy, toasted granola. Watch it carefully as it can go from golden to burnt quickly. Spread onto a sheet of parchment paper and let cool completely. It will crisp up further as it cools.
- Make the stovetop compote: Combine the strawberries, rhubarb, 150g granulated sugar, and lemon juice in a medium saucepan over medium heat. Bring to a simmer, stirring occasionally, for about 8 minutes until the rhubarb is fully tender. Whisk the cornstarch with 3 tbsp cold water until smooth, then pour it into the simmering fruit while stirring constantly. Cook for 2 more minutes until the filling thickens noticeably and becomes glossy and jam-like. Remove from heat, stir in the vanilla extract, and let cool to room temperature, then refrigerate until cold, about 1 hour.
- Make a quick no-bake crust layer (optional but recommended): In a small bowl, stir together 150g graham cracker crumbs (about 10 full crackers, crushed), 30g melted butter, and 15g sugar. Press about 2 tablespoons of the mixture into the bottom of each jar or glass.
- Assemble the jar pies: In eight 200ml (7 oz) mason jars or dessert glasses, layer as follows: 1 to 2 tablespoons of the graham cracker base (if using), then 3 to 4 tablespoons of the cold compote, then a generous handful of the toasted streusel crumble. Repeat the layers if your jar is tall enough, finishing with streusel on top. Add a small dollop of whipped cream if desired.
- Serve immediately for a crisp streusel texture, or refrigerate for up to 4 hours ahead and add the streusel topping only just before serving so it stays crunchy. The assembled jars without streusel keep refrigerated for up to 2 days.
Nutrition Per Serving
Per 1 serving (makes one 9-inch single-crust pie with streusel topping)
Why This Recipe Works
The macerating and syrup-reduction step is the heart of what makes this pie different from a soggy disappointment. Strawberries and rhubarb contain a tremendous amount of water, and if that water is released directly inside a pie crust during baking, it will soak through the pastry before the starch has a chance to thicken it. By drawing out the juice ahead of time, concentrating it, and then combining it with cornstarch before it goes into the pie, you give the thickener a head start. Cornstarch gelatinizes at around 203°F (95°C), and in a well-heated oven the filling needs to reach a full, rolling boil to fully activate it. This is why that vigorous, thick bubbling in the oven is your true doneness cue, not just color or time.
The two-temperature baking approach serves a specific purpose. Starting at 400°F (205°C) gives the bottom crust an initial burst of high heat before the filling can make it soggy. The direct heat from the hot baking sheet on the lower oven rack also conducts heat through the pie plate bottom, helping to cook the crust from below. Reducing to 375°F (190°C) allows the filling time to come fully up to temperature and bubble without burning the streusel. The oats in the streusel add more than texture: they absorb a small amount of the filling’s moisture at the edges, acting as a gentle buffer that helps keep the topping from becoming greasy or wet.
If your filling seems too runny after cooling, the most likely culprit is that it did not boil long enough in the oven or the pie was cut too soon. Cornstarch-thickened fillings continue to set as they cool because the gelatinized starch network tightens further. If your streusel turned out pale and soft rather than golden and crunchy, your oven temperature was too low or the streusel was not cold enough when it went on. Cold butter in the streusel steams during baking, creating those desirable crumbly, separated clusters. Warm or soft butter leads to a greasy, dense topping instead.
Baker’s Tips
- Keep everything cold. The single most important rule for flaky pie crust is cold butter, cold water, and a cold bowl if your kitchen is warm. If your butter starts to feel greasy or soft at any point during mixing, pop the bowl in the freezer for 10 minutes before continuing.
- Weigh your fruit after trimming and hulling. Strawberries in particular vary wildly in size, and a cup measurement can be off by quite a bit. The 500g and 400g weights in this recipe are your most reliable guides.
- Do not skip the resting and chilling time for the lined pie shell before baking. Chilling the dough after it is in the pan relaxes the gluten and reduces shrinkage. A crust that shrinks down the sides will leave you with a shorter, less impressive edge.
- Use a glass or ceramic pie plate if possible. These conduct heat more gently and evenly than dark metal pans and are less likely to produce an overly dark bottom crust.
- Protect the streusel with foil if it reaches your desired golden color before the filling is bubbling. Simply lay a loose sheet of foil over the top and continue baking until you see that active, thick bubbling throughout.
- Allow the full cooling time. We know it is hard. But a warm strawberry rhubarb pie is a runny strawberry rhubarb puddle on your plate. One hour at room temperature is the minimum, and two hours will give you a perfectly set, clean-cutting slice.
- If using a food processor for the dough: pulse the flour mixture 3 times to combine, then add butter and pulse 6 to 8 times until you see those pea-sized chunks. Drizzle water through the feed tube with the machine running just until the dough barely clumps. Immediately tip it out and finish by hand to avoid overworking.
Variations
- Ginger strawberry rhubarb: Add 1 tsp freshly grated ginger and 0.5 tsp ground ginger to the filling for a warming, spiced version that plays beautifully with the tartness of the rhubarb.
- Almond streusel: Replace 30g of the all-purpose flour in the streusel with 30g almond flour and add 30g sliced almonds. The result is richer, nuttier, and even more fragrant.
- Custard bottom layer: Whisk together 1 egg, 60ml heavy cream, 30g sugar, and 0.5 tsp vanilla. Pour this over the raw pie crust before adding the fruit filling. It bakes into a thin, creamy custard layer between the crust and fruit that makes each slice extraordinarily luscious.
- Rose water variation: Add 1 tsp rose water to the filling along with the vanilla for a subtly floral, elegant twist that pairs especially well with the strawberries.
- Mini hand pies: Roll the dough thinner and cut into 12 cm rounds. Fill each with a spoonful of prepared filling, fold in half, crimp, and bake at 375°F (190°C) for 20 to 25 minutes for portable, party-ready individual pies.
Troubleshooting & FAQ
My filling was watery and runny when I cut the pie. What went wrong?
My bottom crust was soggy and undercooked even though the top looked perfect.
My streusel spread out flat and turned greasy rather than staying crumbly.
The crust shrank down the sides of the pan and I lost my beautiful crimped edge.
The filling tastes too tart. Can I adjust it?
Storage & Make-Ahead
- Storage: Store leftover pie loosely covered at room temperature for up to 2 days, or refrigerate for up to 5 days. The streusel will soften slightly after day one. To re-crisp the topping, warm individual slices in a 325°F (165°C) oven for 10 to 12 minutes. The baked pie freezes well for up to 3 months: freeze uncovered until solid, then wrap tightly in plastic wrap followed by foil. Thaw overnight in the refrigerator and warm in a 350°F (175°C) oven for 20 minutes.
- Make-Ahead: The pie dough can be made up to 2 days ahead and refrigerated, or frozen for up to 3 months. The streusel can be mixed and refrigerated for up to 3 days or frozen for 1 month. The filling can be prepared through the syrup-reduction step up to 1 day ahead and refrigerated, but add the cornstarch only just before assembling to avoid a gummy texture. The fully assembled unbaked pie can be frozen solid and baked directly from frozen, adding 15 to 20 minutes to the bake time.

Oh Clarence and Terrence, this right here is what matters most, isn’t it? That moment when they taste something and realize they’re not missing a thing, that they’re still part of the tradition. I’ve found that rhubarb especially shines in lower sugar versions because it’s so tart naturally, the filling doesn’t need to apologize for anything. My mom and I used to make her version every June, and now when I bake it the old way for myself, I swear I can feel her in the kitchen with me, so I completely understand wanting to keep these summer rituals alive for the people you love.
You nailed it, Diane. That’s exactly what it’s about – keeping the tradition alive without the stuff that doesn’t matter anyway. Rhubarb’s got enough character on its own, you’re right. I’ve seen the same thing happen at the food bank when we give families recipes they can actually use, and the relief on their faces says everything. Your mom’s in that kitchen with you every time, I’m sure of it.
man this sounds incredible, my kids would lose their minds over that tart and sweet combo. been trying to nail some lower sugar versions of summery desserts so they dont feel deprived when theyre at other peoples houses, and strawberry rhubarb is such a classic move. definitely gonna give this a shot for the block party potluck next month, cant imagine people turning down homemade pie with that kind of streusel topping. thanks for putting recipes like this out there!
This is exactly the kind of work that matters, honestly – you’re setting them up to enjoy food without the guilt or the feeling of being left out, and that confidence carries into everything else they do. I’ve watched people rebuild so much more than just their bodies, and it always starts with believing they can still have the good stuff, you know? That block party is gonna be a win, and they’ll remember making pie with their dad way more than they’ll remember the sugar content.
this sounds like your hearts in exactly the right place, tbh. my grandkids got so excited when i made a lower sugar version of my own moms rhubarb pie last summer – they realized they wernt missing out on anything, just getting something different and special made for them. the tartness of the rhubarb really carries the whole thing even with less sugar, so you should find its easier than you’d think to get that balance right.
That’s the whole thing right there, Clarence. Kids pick up on whether something’s made with care or made out of obligation, and they know the difference. Sounds like your grandkids got both the pie and the message that they mattered enough for you to figure it out. That rhubarb tartness doing the heavy lifting is the smart move – same thing we’ve noticed at the food bank, honestly. The real flavors don’t need to apologize.