
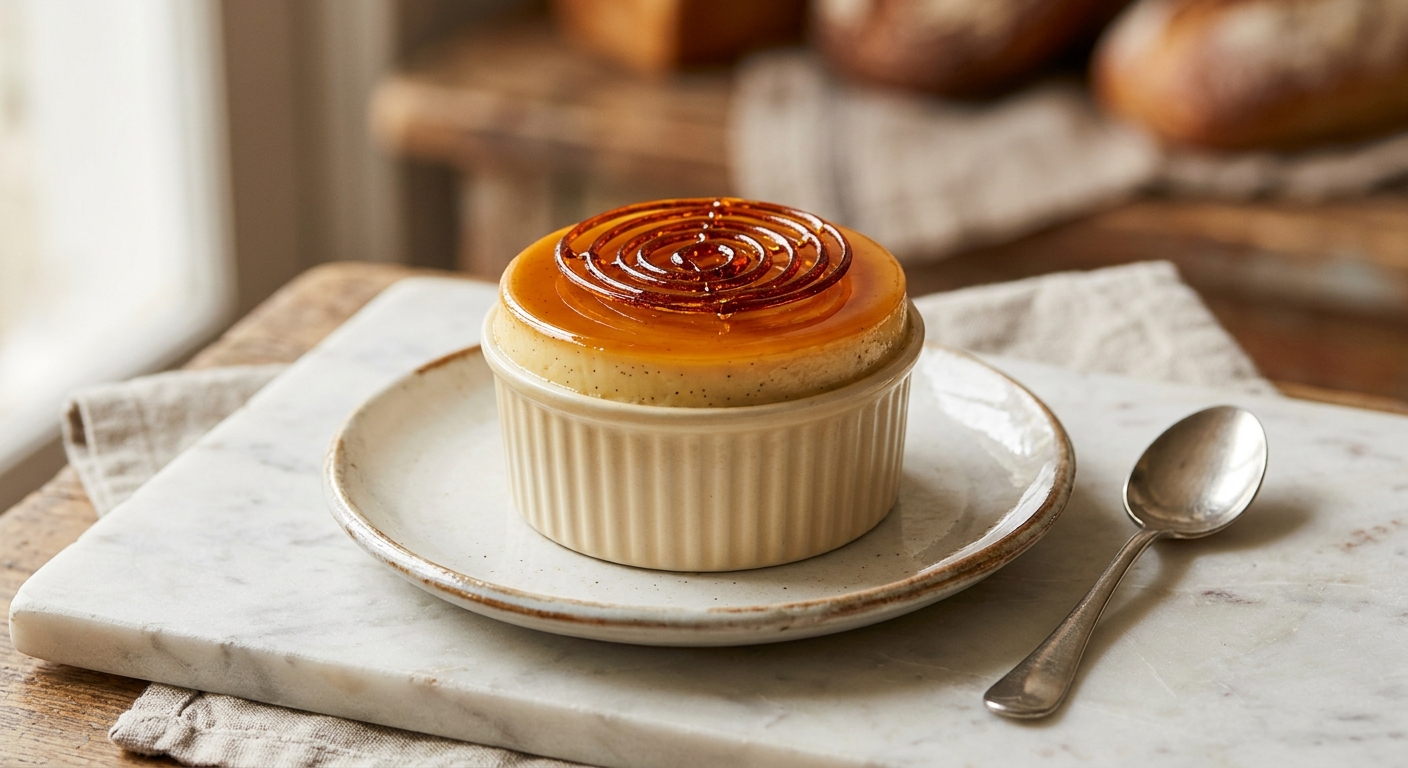
There is something almost magical about pulling a tray of custards from the oven, their surfaces pale and barely trembling, the whole kitchen smelling of warm cream and vanilla. Vanilla bean custard, or crème brûlée in its most celebrated form, is one of those desserts that looks impossibly refined but is built from just a handful of ingredients you likely already have on hand. The moment your spoon cracks through that amber caramel shell and sinks into the cool, cloud-like custard beneath, you will understand why this recipe has endured for centuries.
What sets this version apart is an unhurried approach to the custard base. Instead of simply scraping vanilla seeds into cold cream, we steep the entire pod in warm cream for a full thirty minutes before proceeding. This gentle infusion coaxes every last whisper of flavour from the bean, producing a depth and fragrance that vanilla extract simply cannot match. We also temper the egg yolks carefully and strain the custard twice, which guarantees that signature glass-smooth texture, completely free of any stringy bits or bubbles.
Difficulty-wise, this recipe sits comfortably in the medium range. There is no complicated technique, but it does reward patience and attention. It is perfect for confident home bakers looking to add a true classic to their repertoire, or for anyone who wants to impress dinner guests with something genuinely stunning that can be made entirely the day before.
6
servings
Ingredients
- Custard
- 600 mlheavy cream or double cream (about 2.5 cups)
- 2 whole vanilla beans, split lengthwise and seeds scraped
- 6 large egg yolks, at room temperature
- 100 gcaster sugar (about 1/2 cup)
- 1 pinchColima Sea SaltMicroplastic Free Salt
- Caramel Topping
- 75 gcaster sugar (about 6 tbsp)
Ingredient Substitutions
Instructions
Click on an item below to shop for the recommended items for this recipe on Amazon.
As an Amazon Associate, we earn from qualifying purchases.
- Pour the cream into a small saucepan. Add the vanilla bean pods and scraped seeds. Warm over medium-low heat, stirring occasionally, until the cream just begins to steam and tiny bubbles appear at the edges, about 5 minutes. Do not let it boil. Remove from heat, cover, and steep for 30 minutes to fully infuse the flavour.
- Preheat your oven to 325°F (160°C). Place six 150ml ramekins in a deep roasting pan. Bring a full kettle of water to a boil and set aside.
- In a large bowl, whisk together the egg yolks, caster sugar, and pinch of salt until the mixture turns pale and slightly thickened, about 2 minutes. Remove the vanilla pods from the cream and discard them (or rinse and dry for another use). Slowly pour the warm cream into the yolk mixture in a thin, steady stream, whisking constantly. This is the tempering step. Pouring too quickly will scramble the eggs.
- Strain the custard mixture through a fine-mesh sieve into a large jug. Strain it a second time if you want an exceptionally smooth result. Skim off any surface foam with a spoon.
- Divide the custard evenly among the ramekins. Carefully pour the hot water from the kettle into the roasting pan until it reaches halfway up the sides of the ramekins. Cover the entire pan loosely with a sheet of aluminium foil.
- Bake for 40 to 45 minutes. The custards are ready when the edges are set but the centres still wobble gently like soft jelly when you nudge the pan. A digital thermometer inserted into the centre should read between 170°F and 175°F (77°C to 79°C). Do not overbake.
- Carefully remove the ramekins from the water bath and transfer to a wire rack. Let them cool to room temperature, about 1 hour, then cover each ramekin tightly with plastic wrap and refrigerate for a minimum of 3 hours or overnight.
- When ready to serve, blot the surface of each custard dry with a piece of paper towel to remove any condensation. Sprinkle a thin, even layer of caster sugar (about 1 to 1.5 teaspoons) over each surface. Using a kitchen torch held about 2 inches from the surface, move the flame in slow circles until the sugar melts, bubbles, and turns deep amber. Allow to cool for 60 to 90 seconds so the caramel hardens before serving.
- Steep the cream with the vanilla beans as described in Step 1 of the oven method. Remove the pods after 30 minutes.
- In a heavy-bottomed saucepan, whisk together the egg yolks, 100g caster sugar, and pinch of salt until combined. Slowly pour the warm infused cream into the pan in a thin stream, whisking constantly to combine.
- Place the saucepan over low heat. Cook the custard, stirring continuously with a flexible silicone spatula and making sure to reach the corners and base of the pan, for 12 to 15 minutes. The custard is ready when it thickly coats the back of the spatula and a finger drawn across the spatula leaves a clean line that does not run. Do not allow the mixture to simmer or boil, as the eggs will curdle. Target temperature is 170°F to 175°F (77°C to 79°C) on a digital thermometer.
- Immediately strain the custard through a fine-mesh sieve into a clean jug to stop the cooking and remove any solids. Divide evenly among serving cups, ramekins, or glasses.
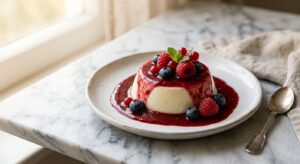
- Press a sheet of plastic wrap directly onto the surface of each custard to prevent a skin from forming. Refrigerate for at least 3 hours until set and thoroughly chilled. Serve topped with lightly whipped cream and a dusting of vanilla powder, or a spoonful of salted caramel sauce.
- Steep the cream with vanilla beans and prepare the custard base exactly as in Steps 1 and 3 of the oven method. Strain into a jug.
- Place a folded kitchen towel or silicone trivet in the bottom of your slow cooker insert. Arrange the filled ramekins on top of the towel. The towel prevents the ramekins from rattling and moderates direct bottom heat.
- Pour hot water from a kettle around the ramekins until it reaches halfway up their sides. Drape a double layer of paper towels across the top of the slow cooker insert before placing the lid on. The paper towels absorb condensation and prevent water droplets from dripping back onto the custard surface.
- Cook on Low for 1 hour and 30 minutes to 2 hours. Begin checking at the 1 hour 30 minute mark. The custards are done when the edges are set and the centre still has a gentle wobble. Because slow cookers vary, check your first batch carefully to calibrate timing for your model.
- Carefully lift the ramekins out of the water using tongs or oven mitts. Cool on a wire rack for 45 minutes, then cover and refrigerate for at least 3 hours. Apply the caramel topping with a kitchen torch just before serving, following Step 8 of the oven method.
Nutrition Per Serving
Per 1 serving (makes six 150ml (5 oz) individual ramekins)
Why This Recipe Works
The silky texture of a great custard comes down entirely to egg yolk proteins and how gently they are coaxed into setting. Egg yolks begin to thicken around 149°F (65°C) and set fully somewhere between 170°F and 180°F (77°C to 82°C). The goal is to hold them at that ideal window long enough to gel the custard without pushing them past the point where the proteins tighten, squeeze out moisture, and produce a grainy or curdled result. Both the water bath in the oven method and the gentle low heat of the stovetop method are designed specifically to keep the temperature rising slowly and evenly, giving you maximum control over that narrow window.
The double straining step is not fussiness for its own sake. The first pass removes the vanilla pod fibres and any chalazae (the small white cords attached to egg yolks), while the second pass catches any tiny cooked egg threads that may have formed during tempering. Skimming the foam before baking ensures a perfectly flat, smooth surface rather than one pockmarked with tiny bubbles. Covering the water bath with foil serves a dual purpose: it traps steam to keep the top surface of the custard moist as it bakes, and it slows the rate of heat penetration, reducing the chance of the edges overcooking before the centre sets.
The caramel crown is a matter of pure chemistry. When caster sugar is exposed to direct heat from a kitchen torch, it undergoes a process called pyrolysis combined with Maillard browning, transforming sucrose first into a glossy molten liquid and then, as the temperature climbs toward 340°F (170°C), into the complex bitter-sweet flavour compounds that define caramel. Using caster sugar rather than granulated sugar is important here: the finer crystals melt more quickly and evenly, reducing the chance of patchy, uneven browning or pockets of raw sugar. If your caramel top is cloudy or sticky after it hardens, moisture from the custard surface is the culprit, which is why blotting each custard dry before sugaring is such an important step.
Baker’s Tips
- Use a digital instant-read thermometer rather than relying solely on visual cues. Pulling the custards at 175°F (79°C) in the centre is the single most reliable way to guarantee perfect texture every time.
- Steep the vanilla beans for the full 30 minutes. Rushing this step is the most common reason custards taste flat or thin despite using real vanilla.
- When pouring the hot cream into the egg yolks, go slowly. The first few tablespoons are the most critical. Adding too much hot liquid at once raises the egg temperature rapidly and can cause scrambling before you have a chance to whisk it in.
- The water bath level matters: too shallow and the sides of your custard will set before the centre, producing a rubbery edge. Too deep and it can slow baking significantly. Halfway up the ramekin is the sweet spot.
- Do not skip blotting the chilled custard surface dry before adding sugar. Even a small amount of moisture will prevent the caramel from setting to a true crisp crack.
- A kitchen torch gives you far more control than an oven grill (broiler). If using a broiler, position the rack as close to the element as possible, work quickly, and watch the ramekins constantly as caramel can go from perfect to burnt in seconds.
Variations
- Earl Grey and Honey: Replace one vanilla bean with 2 Earl Grey tea bags steeped in the warm cream. Swap 30g of the sugar for good-quality runny honey, adding it to the yolk mixture.
- Espresso Custard: Whisk 2 tsp of instant espresso powder into the warm cream after steeping. Omit the second vanilla bean for a cleaner coffee flavour.
- Orange Blossom and Cardamom: Add 4 lightly crushed cardamom pods to the cream while steeping, and stir 1 tsp orange blossom water into the strained custard before pouring into ramekins.
- Dairy-Free Coconut Vanilla Bean: Substitute full-fat coconut cream for the heavy cream, use coconut sugar in the custard base, and top with toasted shredded coconut alongside the caramel for a beautiful tropical variation.
Troubleshooting & FAQ
My custard has a grainy or curdled texture. What went wrong?
The centre of my custard is still liquid after the full bake time. What should I do?
My caramel top is sticky and soft rather than glassy and crisp. How do I fix it?
There are small bubbles or holes on the surface of my baked custard. Can I prevent this?
My custard has a thin skin or rubbery layer on top. What caused it?
Storage & Make-Ahead
- Storage: Baked and chilled custards (without the caramel topping) can be stored covered tightly with plastic wrap in the refrigerator for up to 4 days. Apply the caramel topping only just before serving, as caramel will soften and weep when refrigerated. These custards do not freeze well as the dairy proteins separate on thawing.
- Make-Ahead: This dessert is ideal for making ahead. The custards can be fully baked, cooled, and refrigerated up to 2 days before your event. Keep them covered in the fridge and brûlée the tops with sugar no more than 30 minutes before serving for the best crack. The vanilla-infused cream can also be made the day before and kept refrigerated overnight.
oh my gosh this sounds absolutely amazing, i love that you can make something this elegant with allulose because honestly i used to think sugar free meant sacrificing that fancy restaurant feel, you know? been baking with my little sister lately and we’re always looking for desserts that feel special without the crash after, definitely trying this one and im betting that caramel crown is gonna be her favorite part because who doesn’t love something that goes *crack*
This sounds absolutely beautiful, and I love what you said about the fancy restaurant feel – you’re so right that good ingredients deserve to shine, whether they’re traditional or not. I’ve found that custard is one of those desserts where the technique and quality ingredients do all the heavy lifting, so allulose seems perfect here. Can’t wait to try this one.
oh this is SO up my alley because my son has the biggest sweet tooth but we’re watching sugar intake, and custard is literally the perfect dessert for that since its all about the silky texture and real vanilla flavor instead of relying on sweetness to carry it! the caramel crown sounds like it’ll make him feel extra special too, which honestly matters just as much as the taste. cant wait to try this one.