
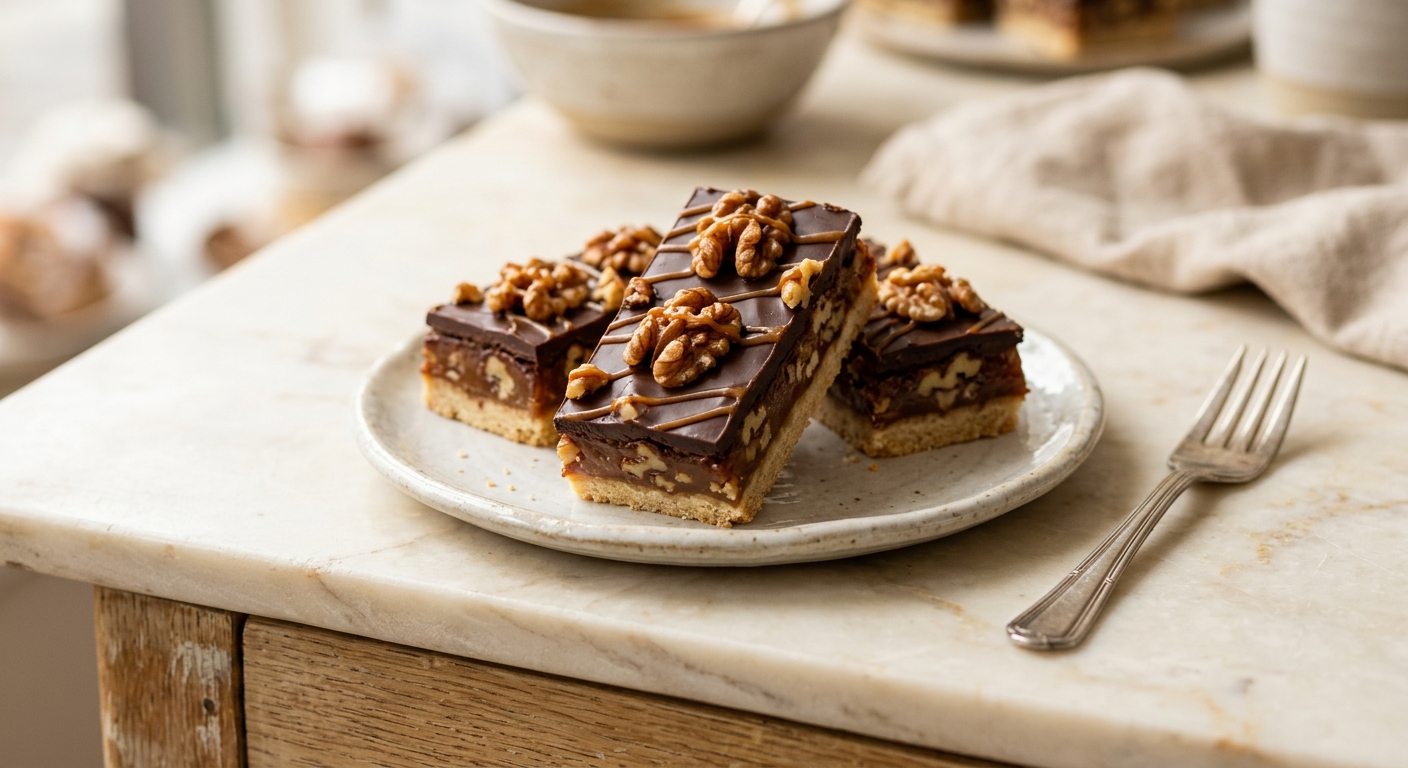
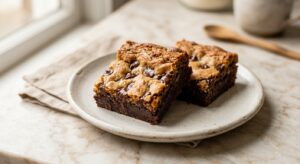
There is something deeply satisfying about a turtle candy – that combination of chewy caramel, toasty nuts, and bittersweet chocolate that somehow tastes greater than the sum of its parts. These Chewy Caramel and Walnut Turtle Bars capture every bit of that magic in a format that’s far easier to make and share. Picture a tray of golden, caramel-streaked bars with jagged chocolate drizzles and chunky walnuts peeking through, the kind of thing that disappears from a dessert table before you’ve even set down the serving knife.
What sets this recipe apart is the homemade caramel layer, made from scratch on the stovetop in under ten minutes. Rather than using store-bought caramel candies or sweetened condensed milk shortcuts, we build a true butter caramel with heavy cream and brown sugar that stays soft and chewy at room temperature – never sticky-hard like taffy, never runny like a sauce. The shortbread base is pressed (not rolled), made extra rich with brown butter, and just sturdy enough to support the caramel without crumbling when you slice. The dark chocolate drizzle is the finishing touch: added once the bars are cool, it sets into a firm contrast against the yielding caramel.
These bars sit firmly in the medium difficulty range – the caramel requires your attention and a candy thermometer, but no special skills. If you have made caramel even once before, you will feel right at home. They are ideal for holiday cookie tins, bake sales, or any time you want a dessert that looks genuinely impressive with a reasonable amount of effort. The recipe yields 24 bars and keeps beautifully, making them a perfect make-ahead treat.
24
servings
Ingredients
- Brown Butter Base (about 1 Cup / 2 Sticks)
- 230 gunsalted butter
- Caramel
- 200 glight brown sugar, packed (about 1 cup)
- 1 tsppure vanilla extract
- 0.5 tspColima Sea SaltMicroplastic Free Salt
- 280 gall-purpose flour (about 2 1/4 cups, spooned and leveled)
- 200 gwalnut halves and pieces (about 2 cups), toasted
- 200 ggranulated sugar (about 1 cup)
- 90 gunsalted butter, cut into cubes (about 6 tbsp)
- 180 mlheavy cream, at room temperature (about 3/4 cup)
- 100 glight brown sugar, packed (about 1/2 cup)
- 30 mllight corn syrup (about 2 tbsp)
- 0.5 tspColima Sea SaltMicroplastic Free Salt
- 1 tsppure vanilla extract
- Finishing (optional But Highly Recommended)
- 170 gdark chocolate (60 to 70% cacao), roughly chopped or use chips (about 1 cup)
- —Colima Sea SaltMicroplastic Free Salt
Ingredient Substitutions
Instructions
Click on an item below to shop for the recommended items for this recipe on Amazon.
As an Amazon Associate, we earn from qualifying purchases.
- Preheat your oven to 350°F (175°C). Line a 9×13-inch baking pan with parchment paper, leaving an overhang on the two long sides to help lift the bars out later. Lightly grease the parchment.
- Make the brown butter shortbread base: In a medium saucepan over medium heat, melt 230g of butter, swirling occasionally, until it turns golden amber and smells nutty, about 5 to 7 minutes. Watch closely after it foams – it can go from golden to burnt quickly. Pour immediately into a large mixing bowl and let cool for 5 minutes. Whisk in 200g brown sugar, 1 tsp vanilla, and 0.5 tsp fine sea salt. Stir in 280g flour until a cohesive, slightly crumbly dough forms. Press the dough evenly into the prepared pan using the bottom of a flat measuring cup or your fingers. The layer should be about 1/4 inch thick. Bake for 20 to 22 minutes, until the edges are golden and the center is set and no longer glossy. Remove from the oven and let cool for 10 minutes.
- Toast the walnuts: While the base bakes, spread the walnut pieces in a single layer on a small baking sheet. Toast in the same oven for 7 to 9 minutes, until fragrant and lightly golden. Watch carefully – walnuts can turn bitter if over-toasted. Remove and let cool slightly, then roughly chop any very large pieces.
- Make the caramel: In a medium heavy-bottomed saucepan, combine 200g granulated sugar, 100g brown sugar, 30ml corn syrup, and 60ml water (about 4 tbsp). Stir gently just to combine, then stop stirring. Cook over medium heat until the mixture reaches 240°F (115°C) on a candy thermometer, about 8 to 10 minutes. The mixture will bubble vigorously – do not stir. Once it hits temperature, remove from heat and carefully add 90g cubed butter, stirring until melted. Then slowly pour in 180ml heavy cream (it will bubble up dramatically – stand back and go slowly). Stir in 0.5 tsp salt and 1 tsp vanilla. Return to medium heat and cook, stirring constantly, until the caramel reaches 240°F (115°C) again and has thickened slightly, about 3 to 4 minutes.
- Assemble and bake the bars: Scatter the toasted walnuts evenly over the par-baked shortbread base. Pour the hot caramel evenly over the walnuts – use a spatula to spread it gently to the edges. Return the pan to the 350°F oven and bake for 8 to 10 minutes, just until the caramel is bubbling at the edges. This brief second bake helps the caramel bond to the base and develop a slightly firmer, chewier set. Remove from the oven.
- Cool and add the chocolate drizzle: Let the bars cool completely in the pan on a wire rack, at least 45 minutes. Do not try to rush this – cutting warm caramel bars results in a sticky, messy situation. Once fully cool, melt 170g dark chocolate in a heatproof bowl set over a saucepan of barely simmering water (or in 30-second microwave bursts, stirring between each). Using a spoon or a piping bag, drizzle the melted chocolate over the surface in a zigzag pattern. Sprinkle with flaky sea salt if using. Let the chocolate set for 15 to 20 minutes at room temperature (or 5 minutes in the refrigerator) before lifting the bars out using the parchment overhang and cutting into 24 squares.
- Line a 9×13-inch baking pan with parchment paper as described in the oven method. Toast the walnuts in a dry skillet over medium heat, stirring constantly, for 4 to 5 minutes until fragrant. Set aside.
- Make the no-bake base: Pulse 200g (about 2 cups) graham cracker crumbs and 40g (about 1/2 cup) quick-rolled oats in a food processor until the oats are finely ground. Melt 115g (1/2 cup) unsalted butter and stir it into the crumb mixture along with 50g (1/4 cup) brown sugar and a pinch of salt until the mixture resembles wet sand. Press very firmly and evenly into the prepared pan. Refrigerate for 20 minutes to firm up.
- Make the same caramel as described in the oven method steps 4. Allow the finished caramel to cool slightly, stirring occasionally, for about 8 minutes – you want it pourable but not scorching hot. It should register around 120°F (49°C) when you pour it over the base.
- Assemble: Scatter the toasted walnuts over the chilled crust. Pour the cooled (but still pourable) caramel evenly over the walnuts. Tap the pan gently on the counter to help the caramel settle into the gaps. Refrigerate uncovered for 45 minutes until the caramel is fully set and no longer tacky on top.
- Add the chocolate layer: Melt 170g dark chocolate as described in the oven method. Pour the melted chocolate directly over the set caramel and spread it into an even layer with an offset spatula for full coverage (or drizzle as before, if you prefer). Sprinkle with flaky sea salt. Refrigerate for 20 to 30 minutes until the chocolate is fully set. Lift from the pan and cut into 24 bars using a sharp knife warmed under hot water and wiped dry between cuts.
- Bake the brown butter shortbread base and toast the walnuts exactly as described in the oven method steps 1 through 3. Allow the base to cool for 10 minutes.
- Make the microwave caramel: In a large, deep microwave-safe bowl (it needs to hold at least 2 quarts – the mixture bubbles up aggressively), combine one 14-oz (396g) can of sweetened condensed milk, 100g (1/2 cup) packed brown sugar, 90g (6 tbsp) unsalted butter cut into pieces, and 30ml (2 tbsp) light corn syrup. Stir to combine.
- Microwave on HIGH for 2 minutes. Remove and stir thoroughly – the mixture will be partially melted and starting to bubble at the edges. Return to the microwave and cook in 1-minute bursts, stirring well between each, for a total of 6 to 8 minutes of additional cooking time. The caramel is ready when it is deep golden, thickened, and holds a ribbon when you lift the spoon. It should reach about 230 to 235°F (110 to 113°C) if you have a thermometer. Stir in 1 tsp vanilla and 0.5 tsp fine sea salt.
- Assemble and finish: Scatter the toasted walnuts over the baked shortbread base. Pour and spread the microwave caramel evenly over the walnuts. Note: this caramel will be slightly firmer and more opaque than the stovetop version once set, similar in texture to a soft toffee. Allow to cool completely at room temperature, about 45 minutes. Once cool, add the chocolate drizzle and flaky salt as described in the oven method step 6. Let the chocolate set, then cut into 24 bars.
Nutrition Per Serving
Per 1 serving (makes one 9×13-inch pan, cut into 24 bars)
Why This Recipe Works
The brown butter in the shortbread base is doing more than just adding flavor – it actually removes water from the butter before baking. Standard butter is about 16 to 18% water, and that water creates steam in the oven, which can make a shortbread base slightly puffy and tender to the point of crumbling. By cooking out that moisture first, brown butter produces a denser, crisper, more structurally sound base that holds up cleanly under the weight of caramel and walnuts without becoming soggy. The nutty, toffee-like aroma it develops is the Maillard reaction at work, the same browning reaction that gives roasted coffee and seared steak their complexity.
The two-stage caramel approach – cooking to 240°F (soft-ball stage) before adding cream, then returning to 240°F – is key to achieving that ideal chewy-but-soft texture. The first cook dissolves the sugars and begins caramelization. Adding cold fat and cream drops the temperature dramatically, which is why your cream must be at room temperature: a cold pour can cause violent spattering and seizing. The second cook to 240°F drives off excess water from the cream and sets the caramel’s final texture. Corn syrup plays a structural role here too: it introduces glucose molecules that physically interfere with sucrose crystals trying to form, preventing the grainy, gritty texture that plagues homemade caramel.
If your caramel seems too soft after cooling and the bars feel messy to cut, it likely did not reach 240°F in the second cook – use a reliable candy thermometer and trust the temperature over visual cues. If the caramel seizes or turns grainy, it was likely stirred during the first cook (before the cream was added) or the cream was too cold. A seized caramel can sometimes be rescued by adding a small splash of warm water and gently heating while stirring, but it is better to start fresh than to risk the texture of the finished bars.
Baker’s Tips
- Use a heavy-bottomed saucepan (stainless steel or enameled cast iron) for the caramel. Thin-bottomed pans create hot spots that scorch the sugar unevenly and make it nearly impossible to reach the right temperature without burning.
- A candy thermometer is not optional here – it is strongly recommended. The difference between 230°F and 245°F is the difference between a gooey caramel sauce and a properly set chewy bar.
- Warm your heavy cream gently before adding it to the caramel. Cold cream hitting hot caramel causes violent bubbling and can lower the temperature enough to cause crystallization. Room temperature cream is the minimum; slightly warm cream is even better.
- Press the shortbread base firmly and evenly. Use the flat bottom of a measuring cup or drinking glass to compact it well – a loosely pressed base will crumble when you cut the bars.
- For the cleanest cuts, use a sharp chef’s knife run briefly under hot water and wiped dry between each cut. Score the bars lightly before fully cutting through – this helps guide straight lines.
- Do not skip the parchment overhang. Trying to cut caramel bars directly in the pan leads to broken edges and frustration. The overhang lets you lift the entire slab onto a cutting board for clean, even slices.
- Bring butter and cream to room temperature before starting. Cold ingredients added to a hot caramel increase the risk of seizing and uneven texture.
Variations
- Salted Bourbon Turtle Bars: Stir 1 tablespoon of bourbon into the caramel along with the vanilla. The alcohol cooks off slightly but the flavor remains warm and complex. Increase the flaky salt on top.
- Pecan and Milk Chocolate: Swap walnuts for toasted pecans and use milk chocolate for the drizzle. This is the most classic turtle flavor profile and is universally crowd-pleasing.
- Espresso Dark Chocolate Turtle Bars: Add 1 teaspoon of instant espresso powder to the shortbread base along with the flour, and use a 70% dark chocolate for the drizzle. The coffee deepens the chocolate and cuts through the sweetness beautifully.
- Holiday Peppermint Version: Drizzle with white chocolate instead of dark and sprinkle crushed candy cane over the top before the chocolate sets. Great for Christmas tins.
Troubleshooting & FAQ
My caramel turned grainy and crystallized instead of being smooth. What happened?
The caramel is too soft and runny after cooling. My bars are falling apart.
My caramel violently bubbled up and spattered when I added the cream. Is it ruined?
My shortbread base crumbled when I tried to cut the bars.
The chocolate drizzle looks streaky and dull instead of glossy. What went wrong?
Storage & Make-Ahead
- Storage: Store bars in an airtight container at room temperature, layered between sheets of parchment paper, for up to 5 days. Refrigerate for up to 2 weeks – the caramel firms up slightly when cold, so let them sit at room temperature for 10 minutes before serving. Freeze in a single layer on a baking sheet, then transfer to a zip-top freezer bag, for up to 3 months. Thaw at room temperature for 20 to 30 minutes.
- Make-Ahead: The shortbread base can be baked up to 2 days ahead, cooled, wrapped tightly in plastic wrap, and stored at room temperature. The caramel can be made up to 3 days ahead, stored in a jar in the refrigerator, and gently rewarmed in a small saucepan over low heat until pourable before assembling. Fully assembled and chocolate-drizzled bars can be made up to 3 days ahead.

omg yes the bar form is genius, no unwrapping required when youre stress eating at 10pm (not that ive done that lol). ive been baking with allulose for a couple years now and honestly the caramel layer is where it really shines, it gets that perfect chewy texture thats so hard to replicate with other sweeteners. also theres something about the ritual of making homemade caramel that feels therapeutic, like i was training for a marathon and would stress bake these kinds of things on long run recovery days and it genuinely helped with the mental side of things. definitely gonna make these because walnuts + dark chocolate is just pure comfort, excited to
oh these sound absolutely wonderful! i’ve always loved that turtle candy combo and the bar form is such a smart move, no mess and you’re right they probably vanish in seconds lol. ive been wanting to try baking with allulose so im curious how the caramel turns out with it – does it get that same chewy texture or does it behave diferently? my book club goes through sweets like crazy and id love to have something a little easier on the blood sugar for them. the brown sugar shortbread base sounds like it’d be so buttery and good.
These sound incredible, and I love how the bar format makes them shareable (or not, no judgment!). I’ve been experimenting with allulose in my own baking and found that the caramel layer is actually where it really shines, since that subtle sweetness doesn’t compete with the deeper vanilla and butter notes the way some sweeteners do. Definitely going to try this recipe as a way to introduce friends to low-sugar baking without them even realizing it.