
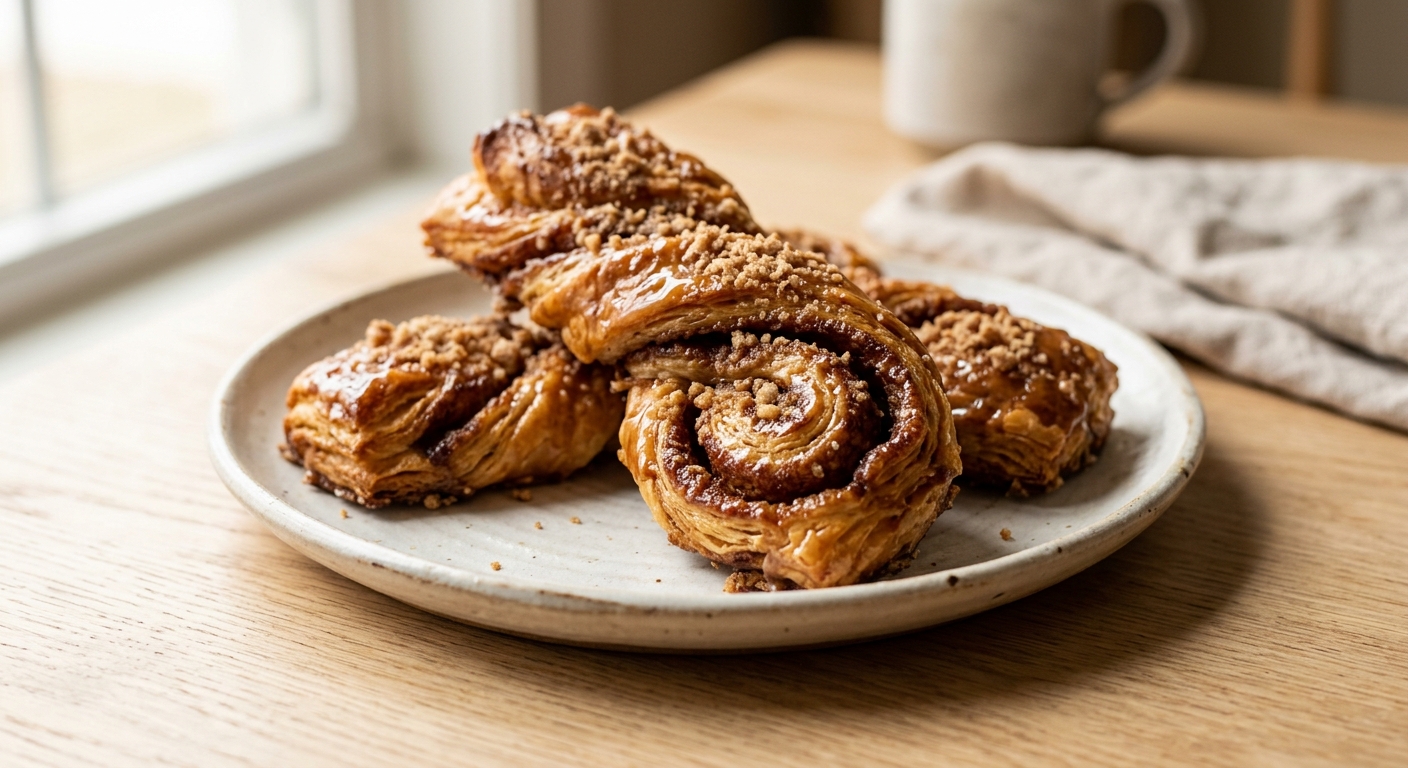
There is something almost magical about pulling a tray of golden, twisted pastries from the oven, watching the maple glaze pool into every crevice as it melts on contact with the warm dough. These cinnamon twists have that irresistible pull-apart quality, the kind that makes it genuinely difficult to stop at one. Each strip of dough is generously spread with softened butter, dark brown sugar, and a hefty measure of cinnamon before being twisted into a loose spiral that bakes up into a beautifully layered, almost laminated interior. The maple glaze is the finishing touch that tips them from lovely to extraordinary.
What sets this recipe apart is the enriched dough: it uses both butter and a splash of heavy cream alongside the eggs, giving the final twist a tender, brioche-adjacent crumb that stays soft for days. The dough is just stiff enough to hold its shape through the twisting process, but relaxed enough to stay pillowy after baking. Using real maple syrup in the glaze rather than imitation adds a complex, almost caramel-like depth that pairs beautifully with the cinnamon filling. The glaze is also applied in two stages, once while the twists are hot and again after they cool slightly, to build up a lacquered, shiny finish.
These twists sit comfortably at an intermediate difficulty level. If you have made a yeasted dough before, you will feel right at home. If this is your first time working with yeast, this is a wonderfully forgiving starting point because the dough is quite easy to handle and the shaping step, while impressive looking, is simply a matter of folding and twisting. They are ideal for a leisurely Saturday morning bake, a holiday brunch spread, or any occasion where you want to make something genuinely special without spending all day in the kitchen.
12
servings
Ingredients
- Filling
- 420 gall-purpose flour (about 3 and 1/2 cups, spooned and leveled), plus more for dusting
- 7 ginstant yeast (1 standard packet or 2 and 1/4 tsp)
- 50 ggranulated sugar (about 1/4 cup)
- 1 tspColima Sea SaltMicroplastic Free Salt
- 120 mlwhole milk (about 1/2 cup), warmed to 110°F (43°C)
- 60 mlheavy cream (about 1/4 cup), warmed to room temperature
- 2 largeeggs, at room temperature
- 57 gunsalted butter (4 tbsp), softened to room temperature
- 1 tsppure vanilla extract
- 85 gunsalted butter (6 tbsp), very soft
- 150 gpacked dark brown sugar (about 3/4 cup)
- 2.5 tspground cinnamon
- 0.25 tspground nutmeg
- —Pinch of Colima Sea SaltMicroplastic Free Salt
- Glaze
- 120 gpowdered sugar (about 1 cup, sifted)
- 60 mlpure maple syrup (about 1/4 cup, Grade A dark or Grade B)
- 15 mlheavy cream or whole milk (1 tbsp)
- 0.25 tsppure vanilla extract
- —Pinch of Colima Sea SaltMicroplastic Free Salt
Ingredient Substitutions
Instructions
Click on an item below to shop for the recommended items for this recipe on Amazon.
As an Amazon Associate, we earn from qualifying purchases.
- Make the dough: In the bowl of a stand mixer fitted with the dough hook, whisk together the flour, instant yeast, granulated sugar, and salt. In a small bowl or measuring cup, combine the warmed milk, warmed heavy cream, eggs, and vanilla extract. Pour the liquid mixture into the flour mixture and mix on low speed for 2 minutes until a shaggy dough forms. Increase speed to medium and mix for 3 minutes.
- Add the softened butter one tablespoon at a time while the mixer runs on medium speed, waiting about 20 seconds between each addition. Once all the butter is incorporated, increase speed to medium-high and knead for 5 to 7 minutes until the dough is smooth, elastic, and slightly tacky but not sticky. It should pull away cleanly from the sides of the bowl. If it clings, add flour one tablespoon at a time.
- Shape the dough into a smooth ball, place it in a lightly oiled bowl, and cover tightly with plastic wrap or a damp kitchen towel. Let rise in a warm place (ideally 75 to 80°F / 24 to 27°C) for 60 to 75 minutes, until doubled in size. While the dough rises, mix together the softened filling butter, dark brown sugar, cinnamon, nutmeg, and pinch of salt in a small bowl until it forms a smooth paste. Set aside at room temperature.
- Preheat your oven to 350°F (175°C). Line two large rimmed baking sheets with parchment paper. Once the dough has doubled, gently punch it down and turn it out onto a lightly floured surface. Roll it into a large rectangle roughly 18 by 12 inches (45 by 30 cm). Spread the cinnamon filling evenly over the entire surface, leaving a 1/2-inch border on one long edge.
- Fold the dough in half lengthwise by bringing the unfilled long edge up to meet the filled edge, pressing gently to seal. You now have a long rectangle about 18 by 6 inches. Using a sharp knife or a pizza cutter, cut the dough crosswise into 12 strips, each about 1.5 inches wide. Take each strip, hold both ends, and gently twist in opposite directions 3 or 4 times. Place the twisted strips onto the prepared baking sheets, spacing them about 2 inches apart, and tuck the ends underneath to secure the twist.
- Cover the shaped twists loosely with plastic wrap and let them rest for 20 to 25 minutes at room temperature. They will puff slightly. Bake for 18 to 22 minutes, rotating the pans halfway through, until the twists are deep golden brown on top and the filling is bubbling at the edges. The internal temperature should read about 190°F (88°C).
- While the twists bake, whisk together the sifted powdered sugar, maple syrup, heavy cream, vanilla, and pinch of salt until smooth and pourable. The glaze should coat a spoon but still drip off slowly. Transfer the hot twists to a cooling rack set over a sheet of parchment paper. Immediately spoon or brush half the glaze over the hot twists. Wait 5 minutes, then apply the remaining glaze. Serve warm or at room temperature.
- Prepare the dough and filling exactly as described in the oven method steps 1 through 3, including the full first rise. The dough and filling steps are identical regardless of cooking method.
- Once the dough has doubled, punch it down and roll out on a lightly floured surface to an 18 by 12-inch rectangle. Spread the filling evenly, fold lengthwise, and cut into 12 strips as described in oven method step 4 and 5. Twist each strip and tuck the ends under.
- Lightly spray the air fryer basket with nonstick cooking spray. Arrange 3 to 4 twists in the basket in a single layer, leaving at least 1 inch between each one. Do not overcrowd. Cover loosely with a small sheet of plastic wrap and rest the shaped twists in the basket for 20 minutes at room temperature to puff slightly.
- Remove the plastic wrap. Air fry at 325°F (160°C) for 9 to 11 minutes, checking at the 8-minute mark. The twists should be deep golden brown on top and no longer doughy in the center. Because air fryers vary, check your first batch carefully to calibrate timing for your model. Transfer to a cooling rack and repeat with remaining twists.
- Prepare the maple glaze as described in the oven method. Glaze the twists in two stages, once while still hot and again after 5 minutes, using the same technique. Because the air fryer exterior is slightly crispier, the first glaze application soaks in beautifully. Serve warm.
- Prepare the dough through the end of kneading (oven method steps 1 and 2). Instead of placing it in a warm spot to rise, cover the bowl tightly with plastic wrap and refrigerate immediately for 10 to 14 hours (overnight). The cold will slow the yeast so the dough rises slowly and steadily in the fridge. It will roughly double in size by morning.
- The next morning, remove the dough from the refrigerator and let it sit on the counter, still covered, for 30 minutes to take the chill off. Meanwhile, prepare your filling and line your baking sheets with parchment. Preheat the oven to 350°F (175°C).
- Turn the cold dough out onto a lightly floured surface. It will be slightly stiffer than if it had risen at room temperature, which actually makes it easier to roll and cut cleanly. Roll to an 18 by 12-inch rectangle, spread the filling, fold, cut, and twist exactly as described in oven method steps 4 and 5.
- Place the shaped twists on the prepared baking sheets and cover loosely with plastic wrap. Allow them to rest and proof at room temperature for 35 to 45 minutes, until they look noticeably puffier. Because the dough is coming from cold, this rest is a little longer than in the same-day method, so be patient.
- Bake at 350°F (175°C) for 18 to 22 minutes, rotating pans halfway through, until deep golden and bubbling. Prepare the maple glaze while the twists bake, then apply in two stages as described in the oven method step 7. The overnight dough will produce twists with a slightly more complex, yeasty flavor that many bakers prefer.
Nutrition Per Serving
Per 1 serving (makes 12 individual twisted pastries)
Why This Recipe Works
The enriched dough is the foundation of everything here. Enriched doughs, those containing fat, eggs, and dairy beyond just water and flour, produce a significantly more tender crumb than a lean yeasted dough because the fat coats the gluten strands, limiting their development and keeping the final texture soft and pillowy. Adding butter gradually during kneading (rather than all at once) allows the gluten network to build first before the fat is introduced. If you add all the fat too early, it waterproofs the flour proteins before they have a chance to hydrate and link up, and you will end up with a dense, greasy dough. The addition of heavy cream alongside the milk pushes the fat content higher still, which is the secret to a texture that stays genuinely soft even at room temperature on day two.
The two-stage glaze application is not just aesthetic, it is functional. The first application goes on while the twists are piping hot, which thins the glaze slightly and allows it to seep down into the crevices and spirals of the twist, essentially flavoring the interior as well as the exterior. By the time the second application goes on five minutes later, the twist has cooled enough that the glaze sits on the surface and sets into that glossy, slightly crackled finish you see in bakery windows. Using real maple syrup rather than powdered maple flavoring matters here because maple syrup contains naturally occurring organic compounds that give it complexity, slight bitterness, and a caramel undertone that powdered flavoring simply cannot replicate.
The folding and twisting technique creates natural layers within each pastry. When you fold the dough over the filling, you create two dough layers sandwiching a filling layer. When you twist that strip, you force those layers to spiral around each other, which creates pockets and striations in the crumb after baking. This is why the interior looks so layered and dramatic when you pull a twist apart. If the dough springs back aggressively while you are trying to twist it, let the strips rest for 5 minutes uncovered so the gluten relaxes, then try again. A well-rested dough will hold its twist without snapping back.
Baker’s Tips
- Warm your milk to exactly 110°F (43°C) using a thermometer. Milk that is too hot (above 120°F / 49°C) will kill the yeast, and milk that is too cold will result in a very sluggish, slow rise.
- Butter must be genuinely soft for the filling, almost like a thick paste. If it is too firm, it will tear the dough when you try to spread it. If you forgot to soften it, microwave it in 3-second bursts until just pliable but not melted.
- Flour your rolling pin and work surface lightly but consistently. Too much flour worked into the dough at this stage will tighten it and make the final texture drier. Use just enough to prevent sticking.
- Use a bench scraper or pizza cutter rather than a serrated knife to cut the strips. A back-and-forth sawing motion with a knife will compress and distort the layers. A single straight downward cut preserves the lamination.
- If your kitchen is cold (below 68°F / 20°C), create a warm proofing environment by turning your oven on to its lowest setting for 2 minutes, then turning it off. Place the covered dough inside with the oven light on. This enclosed warmth is often enough to get a good rise.
- Do not skip rotating the baking pans halfway through baking. Ovens have hot spots, and a 180-degree rotation ensures even browning across all 12 twists.
- Grade A dark maple syrup (sometimes labeled Grade B in older labeling systems) has a stronger, more robust maple flavor than the lighter Grade A varieties and is ideal for glazes and baked goods where you want the maple to really come through.
Variations
- Orange cardamom version: Replace the cinnamon in the filling with 1.5 tsp cinnamon plus 1 tsp ground cardamom, and add 1 tsp fresh orange zest. Swap the maple syrup in the glaze for 3 tbsp freshly squeezed orange juice plus 1 tbsp honey.
- Cream cheese stuffed twists: Beat 115g (4 oz) softened cream cheese with 2 tbsp sugar and 1/2 tsp vanilla. Spread over half the dough rectangle before adding the cinnamon filling on top, then fold and twist as directed. The cream cheese layer creates pockets of rich, slightly tangy filling.
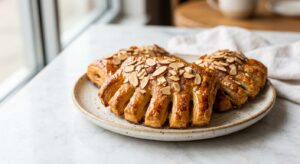
- Pecan crunch topping: Before baking, brush the shaped twists with a beaten egg (egg wash) and press a small handful of roughly chopped toasted pecans onto the tops. The nuts caramelize beautifully alongside the filling during baking.
- Apple butter filling: Replace 2 tablespoons of the softened butter in the filling with 3 tablespoons of thick apple butter for an autumn-forward version. Reduce the brown sugar to 100g since apple butter adds its own sweetness.
Troubleshooting & FAQ
My dough is not rising at all. What went wrong?
My filling leaked out completely during baking and burned on the pan. How do I prevent this?
The twists look golden on top but are still doughy in the center. What happened?
My dough is very sticky and hard to work with. Should I keep adding flour?
My maple glaze soaked in completely and there is no glossy finish. What can I do?
Storage & Make-Ahead
- Storage: Store cooled twists in an airtight container at room temperature for up to 2 days, or refrigerate for up to 5 days. To refresh, microwave individual twists for 15 to 20 seconds or warm in a 300°F (150°C) oven for 5 minutes. Freeze unglazed, fully baked twists for up to 2 months, wrapped individually in plastic wrap and stored in a zip-top freezer bag. Thaw at room temperature and glaze fresh before serving.
- Make-Ahead: The dough can be prepared through the first rise, then punched down, covered tightly, and refrigerated for up to 24 hours before shaping. Alternatively, the twists can be fully shaped and placed on the baking sheet, then covered and refrigerated overnight before the second proof and baking (allow an extra 20 minutes of proofing time after removing from the fridge). The glaze keeps, covered, at room temperature for up to 1 day or refrigerated for up to 3 days. Whisk briefly before using.


oh your grandkids are so lucky, baking together is one of those moments that sticks with people forever ngl. i love that you used allulose – ive found it works beautifully in cinnamon recipes because the warmth of the spices kinda mask any aftertaste. the maple glaze here sounds like itd be perfect for sharing, and theres something about twists vs rolls that makes them feel a little more special somehow, like you went the extra mile. hope you make these with them again soon.
oh man these look incredible, the maple glaze detail really got me – theres something about real maple that just hits different than the fake stuff. my grandkids actually helped me bake cinnamon rolls last month and we used allulose in the filling and they couldnt even tell the difference, so im definately trying you’re version this weekend. that enriched dough sounds like itll have such a nice texture, do you have any tips for getting the spirals nice and even when you roll them out?
Oh, what a beautiful memory you’re creating with your grandkids, Clarence – those early morning baking sessions are the kind of ordinary moments that stay with people forever. For even spirals, I’ve found that chilling the dough for at least 30 minutes before rolling really helps it cooperate, and using a bench scraper or ruler to gently mark where you want to cut can take the guesswork out of spacing. The fact that your grandkids couldn’t taste the difference with allulose is exactly what I love about this recipe, and I have a feeling they’re going to go absolutely wild for that real maple glaze when it soaks into those warm twists.