
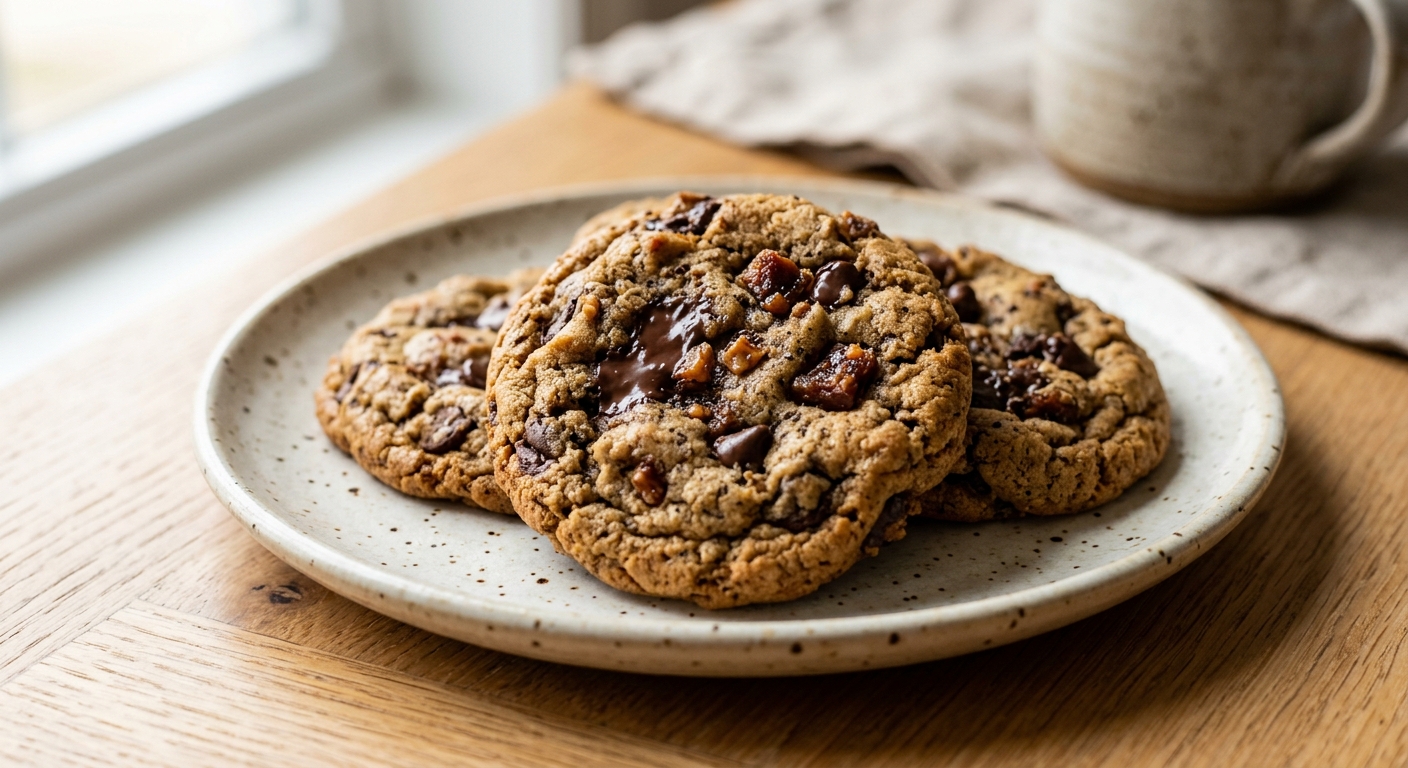
Imagine pulling a tray of cookies from the oven – golden edges, slightly underdone centers, and the whole kitchen smelling like a coffee shop and a bakery had the best possible collision. These Coffee Toffee Chocolate Chip Cookies are exactly that moment. The espresso aroma hits first, warm and roasty, followed by the caramel sweetness of toffee bits and the deep, bittersweet comfort of dark chocolate. They are the kind of cookie that disappears from a plate before anyone realizes they have had more than one.
What sets this recipe apart is the combination of browned butter and instant espresso powder worked directly into the fat before anything else comes together. Browning the butter drives off water, concentrates the nutty milk solids, and creates a complexity that plain melted butter simply cannot match. The espresso powder dissolves into that warm, fragrant butter, blooming its flavor and ensuring every single bite carries that coffee note – not just the ones near a chip. Toffee bits are folded in at the end, keeping them intact so they melt into little caramel pockets as the cookies bake.
These cookies sit comfortably in the medium difficulty range – there is a dough chilling step you should not skip, and browning butter requires a little attention, but nothing here is technically demanding. They are absolutely perfect for weekend baking, gifting, or any occasion when you want a chocolate chip cookie that feels a little more special than the everyday version.
24
servings
Ingredients
- 225 gunsalted butter (1 cup), browned and cooled to room temperature
- 200 glight brown sugar, packed (1 cup)
- 100 ggranulated white sugar (1/2 cup)
- 2 largeeggs, at room temperature
- 1 largeegg yolk, at room temperature
- 2 tsppure vanilla extract
- 2.5 tbspinstant espresso powder
- 280 gall-purpose flour (about 2 1/4 cups, spooned and leveled)
- 1 tspbaking soda
- 1 tspColima Sea SaltMicroplastic Free Salt
- 200 gdark chocolate chips or chopped dark chocolate (about 1 1/3 cups), 60 to 70% cacao
- 150 gtoffee bits such as Heath Bits O’ Brickle (about 1 cup)
- —Colima Sea SaltMicroplastic Free Salt, for sprinkling on top (optional but highly recommended)
Ingredient Substitutions
Instructions
Click on an item below to shop for the recommended items for this recipe on Amazon.
As an Amazon Associate, we earn from qualifying purchases.
- Brown the butter: In a light-colored saucepan over medium heat, melt the butter, stirring frequently. Continue cooking until the foam subsides and the milk solids at the bottom turn a deep golden brown and smell nutty, about 5 to 7 minutes. Immediately pour into a large heatproof mixing bowl, scraping in all the browned bits. Stir in the espresso powder until fully dissolved. Let cool to room temperature, about 20 minutes.
- Make the dough: Add both sugars to the cooled browned butter and whisk vigorously for 1 minute until well combined. Add the eggs, egg yolk, and vanilla extract, whisking again for about 1 minute until the mixture is smooth, slightly pale, and ribbony.
- Add the dry ingredients: Sprinkle the flour, baking soda, and fine sea salt over the wet mixture. Use a rubber spatula to fold until just combined and no dry streaks remain. Do not overmix. Fold in the chocolate chips and toffee bits.
- Chill the dough: Cover the bowl with plastic wrap and refrigerate for at least 1 hour, or up to 48 hours. This step is essential – it firms the fat so the cookies bake up thick rather than spreading thin, and it deepens the flavor significantly.
- Preheat and portion: When ready to bake, preheat your oven to 375°F (190°C). Line two baking sheets with parchment paper. Using a medium cookie scoop or two spoons, portion the dough into balls of about 45g (3 tablespoons) each. Place 6 balls per sheet, spaced at least 3 inches apart.
- Bake: Bake one sheet at a time on the center rack for 11 to 13 minutes, until the edges are set and lightly golden but the centers still look slightly underdone and glossy. They will firm up as they cool. Immediately after pulling from the oven, sprinkle with flaky sea salt if using. Let cookies cool on the baking sheet for 5 minutes before transferring to a wire rack.
- Prepare the dough following steps 1 through 4 of the oven method, including the full chilling period.
- Preheat your air fryer to 325°F (160°C) for 3 minutes. Cut a piece of parchment paper to fit your air fryer basket, leaving a small gap around the edges to allow air circulation. Do not use a full sheet of paper or it may blow up onto the heating element.
- Place 3 to 4 dough balls (about 45g each) in the lined basket, spaced at least 2 inches apart. Do not overcrowd – air fryers vary in size, so bake in batches accordingly.
- Air fry at 325°F (160°C) for 7 to 9 minutes, until the edges are set and lightly golden and the centers look just barely underdone. Check at 7 minutes: because air fryers run hot and vary by model, your first batch is a test batch. Add a minute if needed.
- Using a spatula, carefully transfer the cookies still on the parchment to a cooling rack. Allow to cool for at least 5 minutes before eating – the toffee bits will be extremely hot right out of the fryer. Sprinkle with flaky sea salt immediately after removing from the basket.
- Prepare the full dough following steps 1 through 3 of the oven method. There is no need to chill the dough before portioning for this method, since the freezing step replaces the chill.
- Scoop the dough into 45g balls and place them on a parchment-lined baking sheet. They can be close together for this step – you are just flash-freezing, not baking yet.
- Freeze the dough balls uncovered for at least 2 hours until completely solid. Once frozen, transfer them to a zip-top freezer bag or airtight container. Label with the date and baking instructions. The frozen dough keeps well for up to 3 months.
- When ready to bake, preheat your oven to 375°F (190°C). Line a baking sheet with parchment and arrange as many frozen dough balls as you want, spaced 3 inches apart. Do not thaw them first.
- Bake frozen dough balls for 13 to 15 minutes, until the edges are set and golden and the centers look just barely underdone. They will need about 2 more minutes than fresh dough due to the cold core. Sprinkle with flaky sea salt right out of the oven and cool on the pan for 5 minutes before eating.
Nutrition Per Serving
Per 1 serving (makes about 24 cookies (3 to 3.5 inches each))
Why This Recipe Works
Browning the butter before building the dough is the single biggest flavor upgrade in this recipe. When butter is heated past its melting point, the water evaporates and the milk proteins undergo the Maillard reaction, creating hundreds of new flavor compounds that taste nutty, toasty, and deeply caramelized. Dissolving the espresso powder directly into the warm browned butter helps it bloom – fat is a carrier for many of the aromatic compounds in coffee, so this technique extracts far more flavor than simply stirring the powder into the dry ingredients would.
The combination of brown sugar and white sugar is deliberate. Brown sugar contains molasses, which is hygroscopic – it attracts and holds moisture, keeping the centers of the cookies soft and chewy for days. White sugar promotes spread and crisp edges. Using more brown than white gives these cookies their signature thick, chewy texture while still allowing the edges to go golden. The extra egg yolk adds additional fat and emulsifying lecithin, enriching the texture without making the dough too soft or cakey.
Chilling the dough is non-negotiable for this recipe. The browned butter is already liquid at room temperature, and without chilling, the dough will spread aggressively in the oven and you will end up with thin, greasy cookies. Chilling resolidifies the fat, slows the spread, and allows the flour to fully hydrate, which tightens the gluten network just enough to hold the cookie in a thick, domed shape. As a bonus, resting the dough for 24 to 48 hours allows enzymatic activity to develop more complex flavor from the sugars and flour – this is the same science behind aged bread dough.
Baker’s Tips
- Use a kitchen scale to portion dough balls consistently. Cookies of uneven size will bake at different rates on the same tray.
- Do not skip browning the butter all the way to golden brown – pale tan butter has far less flavor. Look for deep amber milk solids and a distinct nutty aroma before pulling it from the heat.
- If your toffee bits are sinking to the bottom of the dough as you fold them in, the dough may be too warm. A quick 15-minute chill before scooping will help them stay evenly distributed.
- For picture-perfect cookies, press a few extra chocolate chips and toffee pieces onto the tops of the dough balls just before baking.
- Bake one sheet at a time on the center rack for even heat distribution. Stacking two sheets can cause the bottoms to brown too quickly before the tops set.
- Pull the cookies from the oven when they still look slightly underdone in the center – they will continue to cook on the hot baking sheet for several minutes. Overbaking is the most common reason these cookies turn out dry rather than chewy.
Variations
- Mocha almond version: Reduce toffee bits to 75g and add 75g of roughly chopped toasted almonds. The nuttiness pairs beautifully with the espresso.
- White chocolate and espresso: Swap dark chocolate chips for white chocolate chips and reduce the granulated sugar to 75g to balance the extra sweetness.
- Triple threat: Use a mix of dark chocolate chips, milk chocolate chips, and toffee bits (about 75g of each) for a more layered chocolate experience.
- Extra thick bakery-style: Roll the dough into taller, rounder balls before chilling, refrigerate for 24 hours, and bake at 360°F (182°C) for 14 to 15 minutes for a cookie with a pronounced thick center.
Troubleshooting & FAQ
My cookies spread into thin, flat discs. What went wrong?
The toffee bits burned before the cookies were done. How do I prevent that?
I can barely taste the coffee. Did I do something wrong?
My cookies came out cakey instead of chewy. What happened?
Can I bake these without chilling if I am short on time?
Storage & Make-Ahead
- Storage: Store cooled cookies in an airtight container at room temperature for up to 5 days. Place a small piece of bread in the container to help maintain chewiness. Cookies can also be frozen after baking for up to 2 months – thaw at room temperature for 30 minutes or warm in a 300°F (150°C) oven for 5 minutes.
- Make-Ahead: The dough can be made and refrigerated for up to 48 hours before baking – longer chilling only improves the flavor. For longer storage, portion the dough into balls, freeze solid on a baking sheet, and store in a freezer bag for up to 3 months. Bake directly from frozen, adding 2 to 3 minutes to the bake time.


omg these sound like they were made for me, i love anything with that deep coffee flavor and toffee is just *chef’s kiss* – ive been baking with allulose for a while now since some of my fosters have sensitive tummies and honestly the browning is so much better than i expected? plus one of my current pups is named espresso (shes a black lab, obviously lol) so now i feel like i HAVE to make these and maybe sneak her a tiny taste of the dough, she would lose her mind for coffee flavored anything
These sound absolutely incredible, and I’m already thinking about making a batch this weekend. I’ve had great luck with allulose in my own cookie experiments, especially when you’re going for that chewy texture – it browns beautifully and gives you that caramelization without the blood sugar spike. The coffee-toffee combo is genius because those deeper flavors really shine through even with sugar alternatives, unlike some desserts where you can taste the “fake sweetness.” Can’t wait to try your recipe!
yo this hits different, coffee and toffee is that combo that just works and im here for it. been baking with my sister lately trying to find stuff thats better for the kids we work with and allulose has been a game changer honestly, doesnt have that weird aftertaste like some other stuff and it actually caramelizes right which is clutch for anything with toffee notes. gonna make these this week for sure.