
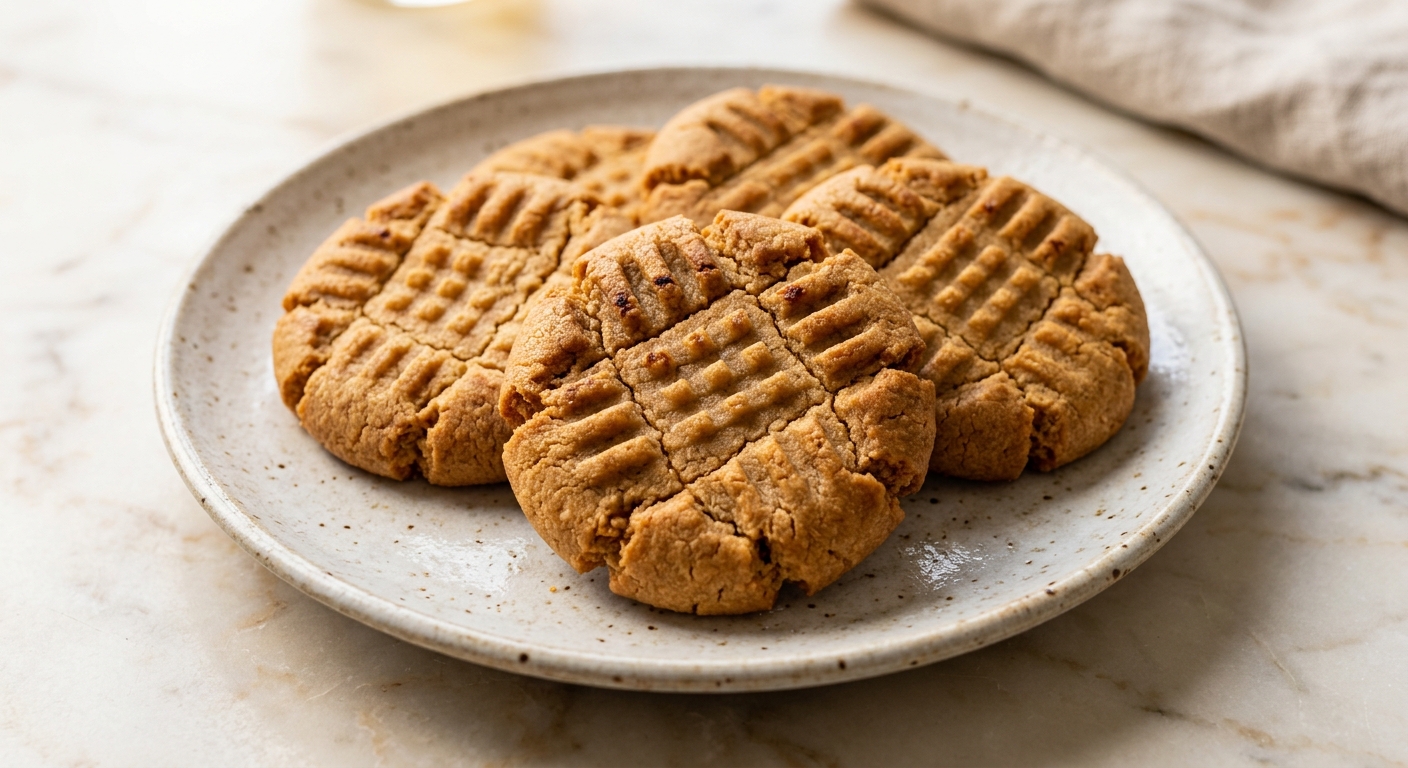
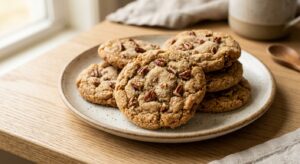
There is something deeply comforting about a peanut butter cookie still warm from the oven, its surface marked with the gentle ridges of a fork pressed twice in opposite directions. That crosshatch is not just decorative – it is a small ritual, a signal that something homemade and honest is on the way. The smell alone, that roasted, nutty sweetness filling the kitchen, is worth turning on the oven for.
What sets this version apart is the combination of creamy peanut butter and a touch of brown sugar alongside the granulated, which deepens the flavor with a hint of molasses and keeps the centers wonderfully soft even after the cookies cool. A brief rest on the baking sheet after pulling them from the oven lets them firm up without drying out, and a generous pinch of flaky salt on top before baking brings every roasted note in the peanut butter into sharp, satisfying focus.
This is an easy, one-bowl recipe that comes together in about 15 minutes of active work. No stand mixer required, no dough chilling, and no special equipment beyond a baking sheet and a fork. It is perfect for beginner bakers, weeknight cravings, bake sales, and anyone who believes that the simplest cookies are often the best ones.
24
servings
Ingredients
- 260 gcreamy peanut butter (about 1 cup), commercial style such as Jif or Skippy recommended
- 100 ggranulated sugar (about 1/2 cup), plus extra for rolling
- 110 gpacked light brown sugar (about 1/2 cup)
- 115 gunsalted butter (1/2 cup or 1 stick), softened to room temperature
- 1 largeegg, room temperature
- 1 tsppure vanilla extract
- 190 gall-purpose flour (about 1 1/2 cups, spooned and leveled)
- 1 tspbaking soda
- 0.5 tspColima Sea SaltMicroplastic Free Salt
- —Colima Sea SaltMicroplastic Free Salt (such as Maldon), for topping
Ingredient Substitutions
Instructions
Click on an item below to shop for the recommended items for this recipe on Amazon.
As an Amazon Associate, we earn from qualifying purchases.
- Preheat your oven to 350°F (175°C). Line two large rimmed baking sheets with parchment paper and set aside.
- In a large bowl, beat the softened butter, peanut butter, granulated sugar, and brown sugar together with a hand mixer on medium speed (or vigorously by hand with a wooden spoon) for about 2 minutes, until the mixture is pale, fluffy, and well combined.
- Add the egg and vanilla extract. Mix on medium speed for another 30 to 60 seconds until fully incorporated and the mixture looks smooth and creamy.
- Add the flour, baking soda, and fine sea salt all at once. Mix on low speed (or stir by hand) just until no dry streaks remain. Do not overmix. The dough will be soft but not sticky.
- Pour a small amount of granulated sugar into a shallow bowl. Using a cookie scoop or two spoons, portion the dough into balls of about 30g each (roughly 1.5 tablespoons). Roll each ball briefly in the sugar to coat lightly, then place 2 inches apart on the prepared baking sheets.
- Press each dough ball gently with a fork in one direction, then rotate the fork 90 degrees and press again to create the classic crosshatch pattern. The cookie should be about 1/2 inch thick after pressing. Sprinkle a few flakes of sea salt over each pressed cookie.
- Bake one sheet at a time on the middle rack for 11 to 13 minutes, until the edges are just set and the centers still look slightly underdone and matte rather than shiny. The cookies will firm up as they cool.
- Remove from the oven and let the cookies rest on the baking sheet for 5 minutes before transferring to a wire cooling rack. They are fragile when hot and will hold together beautifully once cooled.
- Prepare the dough exactly as directed in the oven method through step 5, including rolling the dough balls in sugar.
- Preheat your air fryer to 325°F (165°C) for 3 minutes. Cut a piece of parchment paper to fit the air fryer basket, leaving the sides open for airflow. Do not block the vents.
- Place 4 to 6 sugar-coated dough balls in the basket, spacing them at least 1.5 inches apart. Press with a fork in the classic crosshatch pattern and add a pinch of flaky salt to each.
- Air fry at 325°F (165°C) for 7 to 8 minutes. The tops will look just barely set and slightly underdone – this is correct. Do not go to 9 minutes or they will dry out. Every air fryer runs slightly differently, so check at 6 minutes on your first batch.
- Carefully slide the parchment with the cookies onto a flat surface and let cool for 5 to 7 minutes before handling. They will be very soft straight out of the basket but will firm to a perfect chewy texture as they cool. Repeat with remaining dough.
- In a medium saucepan over medium heat, combine 100g granulated sugar, 110g packed light brown sugar, and 60ml (1/4 cup) whole milk. Stir constantly and bring the mixture to a full rolling boil. Boil for exactly 1 minute while stirring, then remove from the heat immediately.
- Working quickly, stir in 260g creamy peanut butter, 1 teaspoon vanilla extract, and 1/4 teaspoon fine sea salt until the mixture is smooth and glossy. The warmth of the sugar syrup will melt everything together.
- Stir in 180g (2 cups) quick-cooking oats until fully coated. The mixture will thicken quickly as the oats absorb the syrup. Let it sit in the pot for 2 minutes to cool slightly.
- Line a baking sheet with parchment paper. Using a cookie scoop or two spoons, drop mounds of about 2 tablespoons each onto the parchment, spacing them 1 inch apart. They will not spread.
- Press each mound lightly with a fork in the crosshatch pattern to honor the classic look, and finish with a pinch of flaky salt. Refrigerate uncovered for at least 30 minutes until firm before eating. Store refrigerated.
Nutrition Per Serving
Per 1 serving (makes about 24 cookies (2 dozen))
Why This Recipe Works
Peanut butter cookies have a reputation for being finicky – too dry, too crumbly, spreading too thin – but understanding the role of each ingredient makes the difference. The combination of granulated and brown sugar is intentional: granulated sugar promotes spread and crispness at the edges through caramelization, while the molasses in brown sugar is hygroscopic (it attracts and holds moisture), which keeps the centers chewy and soft even days later. Creamy commercial peanut butter is specifically recommended here because its emulsified, stabilized formula (where the oils do not separate) incorporates evenly into the dough. Natural peanut butter, with its looser oil content, can make the dough greasy and cause uneven spreading.
The fork press serves a practical purpose beyond tradition. Peanut butter cookie dough is denser and fattier than most drop cookie doughs, which means it does not spread as readily in the oven on its own. Pressing the dough ball flat ensures even baking all the way through, preventing a raw, gummy center inside what looks like a fully baked exterior. The crosshatch pattern also increases surface area, giving more of the cookie contact with the hot pan and promoting those slightly crisped ridges that contrast so beautifully with the soft interior.
Pulling the cookies when they still look underdone is the single most important step. Peanut butter cookies continue cooking from residual heat for several minutes after leaving the oven, and the starches and proteins continue to set as they cool. If the cookies look perfectly done in the oven, they will be overbaked and dry once cooled. Trust the process, leave them on the hot pan for 5 minutes, and resist the urge to move them too soon. If your cookies turn out dry despite correct bake time, the most likely culprits are over-measuring the flour (always spoon and level, never scoop) or natural peanut butter with insufficient fat content.
Baker’s Tips
- Use a cookie scoop for uniform dough balls – even sizing means all cookies bake at the same rate, so no underbaked centers or overbaked edges on the same tray.
- Bring butter and egg to room temperature before starting. Cold butter will not cream properly, and cold eggs can cause the fat to seize and the dough to look curdled.
- Do not skip rolling the dough balls in granulated sugar before pressing. That thin sugar coating caramelizes against the hot pan, creating a subtly crisp, sparkly exterior that is a hallmark of a great peanut butter cookie.
- If your fork sticks to the dough while pressing, dip the tines in a little granulated sugar between presses. This also adds a decorative shimmer to the surface.
- Always bake one sheet at a time on the center rack for the most even heat distribution. Baking two sheets simultaneously, even with rotation, often leads to one batch overbaking on the bottom.
- The dough should be soft but not tacky. If it feels sticky and is not holding its shape when rolled, refrigerate for 20 minutes. If it feels too stiff to roll smoothly, your butter may have been too cold – let the dough rest at room temperature for 10 minutes.
- For extra-chewy cookies, slightly underbake by 1 minute and let them cool completely on the pan before moving. For crispier cookies, bake the full 13 minutes and transfer to a rack immediately.
Variations
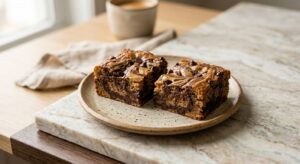
- Peanut butter chocolate chip: fold 150g (about 3/4 cup) semi-sweet or dark chocolate chips into the finished dough before scooping.
- Honey-roasted peanut butter cookies: swap the granulated sugar for an equal weight of honey-roasted peanut butter and reduce the added sugars by 25g each for a sweeter, more caramelized cookie.
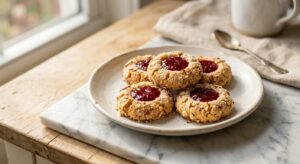
- Peanut butter and jam thumbprints: skip the fork press and instead press a deep well into each dough ball with your thumb. Fill with 1/2 teaspoon of raspberry or strawberry jam before baking.
- Double peanut crunch: press 3 to 4 whole roasted peanuts into each cookie alongside the fork crosshatch for extra texture and a more dramatic look.
- Brown butter version: melt the butter in a small saucepan over medium heat, swirling until golden and nutty-smelling. Cool to room temperature until solid again before creaming. This adds a deep, toffee-like dimension to the cookie.
Troubleshooting & FAQ
My cookies came out dry and crumbly. What went wrong?
My cookies spread too much and went flat and greasy. Why?
The fork press cracked and broke my dough balls. How do I fix that?
My cookies look underdone in the middle even after the full bake time. Are they safe to eat?
Can I double this recipe, and will it change the results?
Storage & Make-Ahead
- Storage: Store baked cookies in an airtight container at room temperature for up to 5 days. They actually improve on day 2 as the flavors meld. For longer storage, freeze baked cookies in a zip-top bag for up to 2 months. Thaw at room temperature for 20 minutes. You can also freeze unbaked dough balls (before the sugar roll and fork press) for up to 3 months; bake from frozen, adding 2 to 3 minutes to the bake time.
- Make-Ahead: The dough can be made up to 3 days ahead and stored tightly covered in the refrigerator. Let it sit at room temperature for 15 minutes before scooping and pressing, as chilled dough can crack when pressed with a fork. Dough balls can also be frozen on a baking sheet, then transferred to a freezer bag for up to 3 months.
This is such a beautiful thread about baking as a grounding practice! I love that you both found that meditative quality in the fork pressing, and Gail, the idea of baking together during a tough week at the shelter really resonates with me – there’s something powerful about creating something nourishing together when things feel heavy. I’d be curious if either of you have noticed people gravitating toward these kinds of recipes when life gets chaotic, because I feel like the “one bowl, no chilling” aspect makes them accessible exactly when someone might need that win the most.
aw bea i totally get that meditative feeling, there’s something so grounding about that deliberate fork pressing rhythm. i baked these classic pb cookies with my coworker elena last month during a rough week at the shelter, and we needed that quiet repetitive work – just our hands and the dough and those little crosshatches coming to life. plus with allulose you dont have to worry about them spreading weird, they hold that pattern so beautifully. its such a kind gesture making them for your neighbor, people like you remind me why i believe in the goodness of folks who bake for others.
omg these look so good, i made something simlar last week with allulose for my neighbor and the fork press detail is *chef’s kiss* – there’s something about that ritual that makes baking feel almost meditative, you know? tbh i love how quick these are, perfect for when you need something warm and comforting without all the fuss. definitely saving this one!