
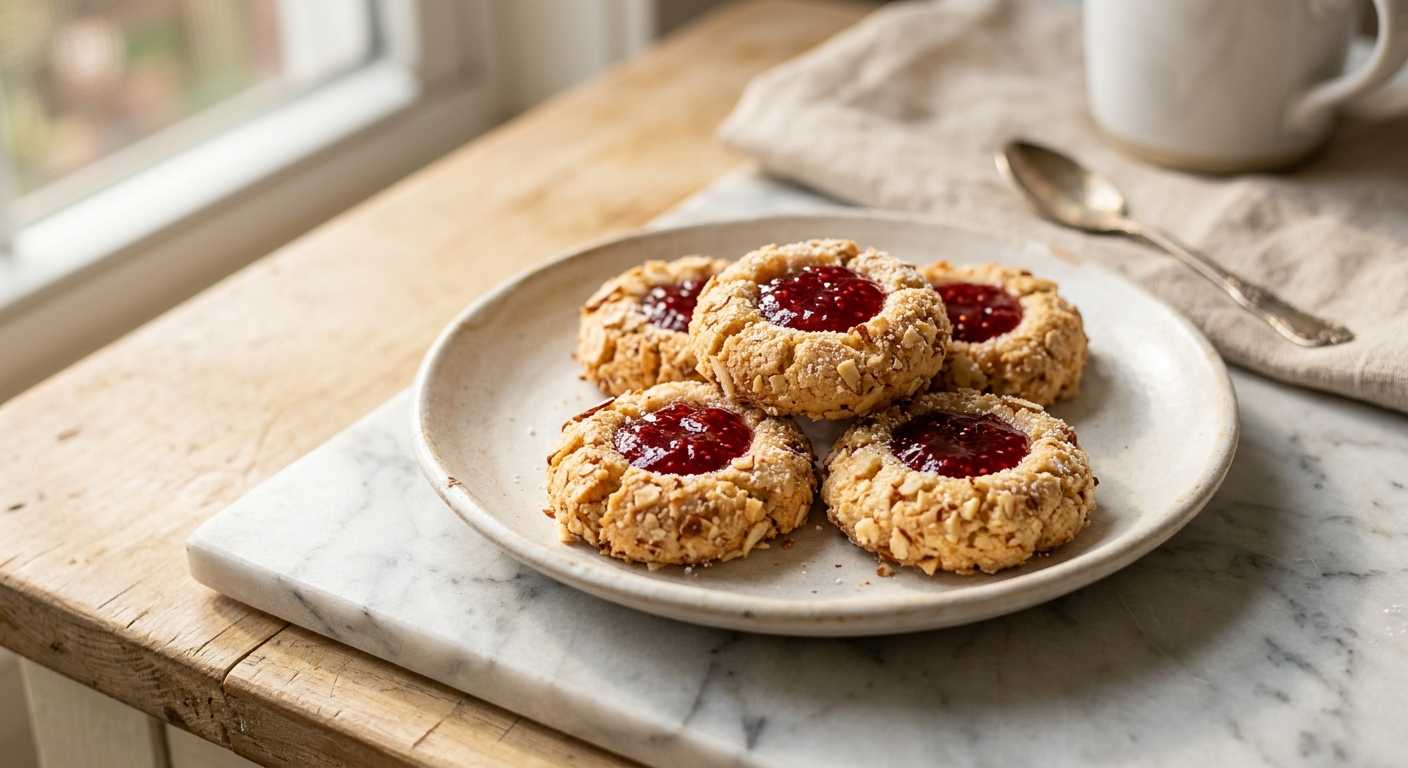
There is something quietly wonderful about a thumbprint cookie. The slight give of the shortbread as you press your thumb into each round, the way the jam catches the light once it sets, the faint crunch of chopped almonds on the outside before you reach that melt-in-your-mouth center. These cookies look like they came from a proper European bakery, but they are genuinely straightforward to make at home, and the results are nothing short of lovely. Whether you go with tart raspberry jam, bright apricot, or a deep cherry preserve, every single one is a little gem.
What sets this version apart is the double hit of almond flavor: almond extract in the dough itself, and finely chopped almonds pressed into the outside of every cookie before baking. The dough is built on a classic butter-and-egg-yolk base, which keeps the texture tender and rich without being crumbly or dry. Rather than re-pressing the thumbprint halfway through baking (a step many recipes skip), this recipe calls for a gentle second press at the midpoint, which keeps the well defined and prevents the jam from overflowing as it bubbles. The jam is added in two stages, once before baking and once right after, so you get a deeply flavored base with a glossy, fresh-looking top.
These fall firmly into the easy-to-medium category. The dough comes together in one bowl with a hand mixer or stand mixer, and no chilling is strictly required, though a short rest in the fridge does make rolling easier. They are ideal for holiday cookie boxes, afternoon tea, or any time you want to bake something that looks impressive without a complicated technique. If you are new to shortbread-style cookies, this is a wonderful place to start.
24
servings
Ingredients
- 225 gunsalted butter, at room temperature (1 cup / 2 sticks)
- 100 ggranulated sugar (1/2 cup)
- 2 large egg yolks, at room temperature
- 1 tsppure almond extract
- 0.5 tsppure vanilla extract
- 270 gall-purpose flour (2 1/4 cups, spooned and leveled)
- 0.25 tspColima Sea SaltMicroplastic Free Salt
- 150 gblanched almonds, very finely chopped (about 1 1/3 cups) – not almond flour
- 80 gjam of your choice, such as raspberry, apricot, or cherry (about 1/4 cup), divided
Ingredient Substitutions
Instructions
Click on an item below to shop for the recommended items for this recipe on Amazon.
As an Amazon Associate, we earn from qualifying purchases.
- Make the dough: Beat the room-temperature butter and sugar together in a large bowl using a hand mixer or stand mixer fitted with the paddle attachment. Beat on medium speed for 2 to 3 minutes until pale and fluffy. Scrape down the sides of the bowl.
- Add the egg yolks one at a time, beating well after each addition. Mix in the almond extract and vanilla extract. The mixture may look slightly curdled at this point – that is normal and will come together once the flour is added.
- Add the flour and salt all at once and mix on low speed until the dough just comes together with no dry streaks. Do not overmix. The dough will be soft but not sticky. Wrap it in plastic wrap and refrigerate for 20 minutes. While the dough chills, preheat your oven to 350°F (175°C) and line two large baking sheets with parchment paper. Place the finely chopped almonds in a shallow bowl.
- Scoop the dough into 1-tablespoon portions (about 20g each) and roll each into a smooth ball between your palms. Roll each ball in the chopped almonds, pressing gently so they adhere on all sides. Place cookies about 2 inches apart on the prepared baking sheets.
- Use your thumb or the back of a round 1/2-teaspoon measuring spoon to press a well into the center of each cookie. Press firmly enough to create a deep, defined well without cracking the sides. If the dough does crack slightly, just press it back together with your fingertips. Fill each well with about 1/2 teaspoon of jam (about half your total jam).
- Bake for 7 minutes, then remove the pans from the oven. The cookies will have puffed slightly and the wells may have closed a little. Use the back of the measuring spoon to gently re-press each well. Return to the oven and bake for another 6 to 8 minutes, until the edges and almond coating are lightly golden. The centers should look set but the jam will still be bubbling.
- Remove from the oven and immediately top up each cookie with a small additional amount of the remaining jam (about 1/4 teaspoon each) while everything is still hot. This gives a glossy, fresh-looking finish. Let cookies cool on the pan for 5 minutes before transferring to a wire rack to cool completely. The jam will firm up as the cookies cool.
- Prepare the dough exactly as in the oven method through the chilling step. Cut a piece of parchment paper to fit the base of your air fryer basket, trimming it so it does not block the edges where air circulates.
- Preheat your air fryer to 325°F (163°C) for 3 minutes. Meanwhile, scoop, roll, and coat the dough balls in chopped almonds as described in the oven method. Press the thumbprint wells and fill with the first half of the jam.
- Place 6 to 8 cookies in the air fryer basket, spaced about 1 inch apart. Do not stack them. Air fry at 325°F (163°C) for 8 to 9 minutes, checking at 7 minutes. The cookies are done when the almond coating is golden and the edges look set. Because air fryers circulate heat intensely, they can go from golden to overdone quickly, so keep a close eye on the first batch to calibrate your machine.
- At the halfway point (about 4 minutes), pause the air fryer and re-press the wells with the back of a measuring spoon, then close and continue cooking. This step is especially important in the air fryer, as the dry heat causes the dough to puff and close more aggressively than in a conventional oven.
- Remove the basket from the air fryer and immediately top each cookie with a small spoonful of the remaining fresh jam. Let the cookies cool in the basket for 3 minutes before transferring to a wire rack. Repeat with the remaining dough, letting the basket cool slightly between batches.
- Prepare the full dough as written in the oven method. Roll the dough into balls and coat in chopped almonds, but do NOT press the thumbprint wells yet and do NOT add jam at this stage.
- Arrange the coated dough balls on a parchment-lined baking sheet so they are not touching. Freeze uncovered for 1 hour until solid, then transfer to a zip-top freezer bag or airtight container. Label with the date. They keep for up to 2 months.
- When ready to bake, preheat your oven to 350°F (175°C). Remove as many frozen dough balls as you need and place them on a parchment-lined baking sheet. Let them sit at room temperature for 10 minutes while the oven preheats.
- Press the thumbprint wells into the slightly thawed dough balls, working firmly as the cold dough will be stiffer than fresh. Fill each well with about 1/2 teaspoon of jam.
- Bake from frozen at 350°F (175°C) for 15 to 17 minutes, re-pressing the wells and adding any remaining jam in the final 2 minutes of baking. The extra bake time compared to fresh dough ensures the centers cook through fully. Cool as normal on a wire rack.
Nutrition Per Serving
Per 1 serving (makes about 24 cookies)
Why This Recipe Works
The decision to use only egg yolks rather than whole eggs is deliberate and important. Yolks are rich in fat and emulsifiers, which create a tender, almost melt-in-your-mouth crumb without any chewiness. The proteins in egg whites can make cookies tougher, especially in a low-moisture shortbread-style dough where there is little liquid to relax those proteins. By excluding the whites, you get a finer, more delicate texture that is classic to this style of European butter cookie.
Creaming the butter and sugar properly is the structural foundation of this recipe. During creaming, air bubbles are beaten into the fat, and these tiny pockets expand in the oven’s heat to give the cookie a slight lift and a tender crumb rather than a dense, greasy result. This is why room-temperature butter is non-negotiable: cold butter will not aerate properly, and melted butter will not trap air at all. The relatively modest amount of sugar compared to the butter keeps the dough from spreading too aggressively during baking, which is why the thumbprint wells hold their shape.
The two-stage jam technique (filling before and after baking) solves a common thumbprint problem: jam that has been in the oven the whole time can become overly thick, sticky, or even slightly caramelized in an unpleasant way. Adding most of the jam before baking allows it to meld into the cookie and develop flavor, while the small addition of fresh jam right out of the oven creates a glossy, bright top layer that looks gorgeous and tastes vibrant. If your jam ever looks dull or sticky after baking, this finishing touch is the fix.
Baker’s Tips
- Weigh your flour rather than measuring by volume. Spooning flour into a cup can pack it, leading to a dry dough that cracks when you press the wells.
- For very finely chopped almonds, pulse them 8 to 10 times in a food processor, stopping before they turn to almond flour. You want a sandy, uneven texture, not a paste.
- If the dough feels too soft to roll after chilling, it simply needs more time in the fridge. Different kitchens run at different temperatures. 20 minutes is a minimum; 45 minutes is fine.
- Use a thumb or a small round tool like the back of a 1/2-teaspoon measuring spoon. A round tool creates a neater, more consistent well than a thumb alone.
- Do not overfill the wells before baking. Half a teaspoon is plenty. Too much jam will overflow and burn onto the parchment, and the cookie edge will become sticky and chewy.
- Raspberry jam with seeds gives a more rustic, artisan look. Seedless jam or jelly gives a glassier, more polished finish. Both are delicious.
Variations
- Brown butter version: Brown the butter before using (melt over medium heat until golden and nutty-smelling, then cool to room temperature until solid again). The cookies will have a deeper, more complex flavor that pairs beautifully with fig or plum jam.
- Chocolate-dipped: Once the cookies are fully cooled, dip the bottoms in melted dark chocolate and place on parchment until set. A light sprinkle of flaky sea salt on the chocolate is wonderful.
- Citrus almond: Add the finely grated zest of 1 lemon or orange to the dough along with the extracts. Pairs especially well with apricot or blood orange marmalade.
- Pistachio thumbprints: Replace the chopped almonds coating with finely chopped unsalted pistachios and use raspberry or rose jam for a striking color contrast.
Troubleshooting & FAQ
My cookies spread flat and the wells disappeared entirely during baking.
The almond coating is falling off the cookies.
My jam is crystallizing or turning grainy after the cookies cool.
The dough is cracking badly when I press the thumbprint wells.
My cookies came out dry and crumbly, not tender.
Storage & Make-Ahead
- Storage: Store cooled cookies in a single layer (or with parchment between layers) in an airtight container at room temperature for up to 4 days. Refrigerate for up to 1 week, though the almond coating may soften slightly. Freeze baked cookies for up to 2 months and thaw at room temperature for 30 minutes before serving.
- Make-Ahead: The dough can be made up to 3 days ahead and stored wrapped in plastic wrap in the refrigerator. Let it sit at room temperature for 10 minutes before rolling, as it will be quite firm when cold. For longer storage, freeze shaped unbaked dough balls as described in the Freeze-and-Bake method above.


omg these sound absolutely perfect for fostering!! i always bake treats for the pups adoption days and their new families, and having a recipe that everyone can actually enjoy together is such a gift – like theres nothing better than watching a shy rescue pup relax while someones munching on a cookie and just being present with them, you know? definitely adding this to my rotation, especially since so many of my fosters have dietary stuff going on and i love being able to offer something special that works for everyone 🙂
these look amazing man, ive been trying to find stuff the kids will actually eat without feeling like theyre missing out and almond cookies always hit different. might try these for my daughters birthday next month, shes gotten pretty particular about sweets lately so having something that tastes this good matters more than usual.
oh these look absolutely stunning! i love that you can actually taste the almond without it being overwhelming, and i have to say finding desserts the whole family can enjoy together has been such a game changer for us. my kiddo has a sweet tooth like nobody’s business but we’re always conscious about sugar, so discovering allulose based recipes like yours has been genuinely life changing. cant wait to try these – do you think crushed pistachios would work just as well in place of almonds? either way im sure theyll disappear just as fast as you describe haha