
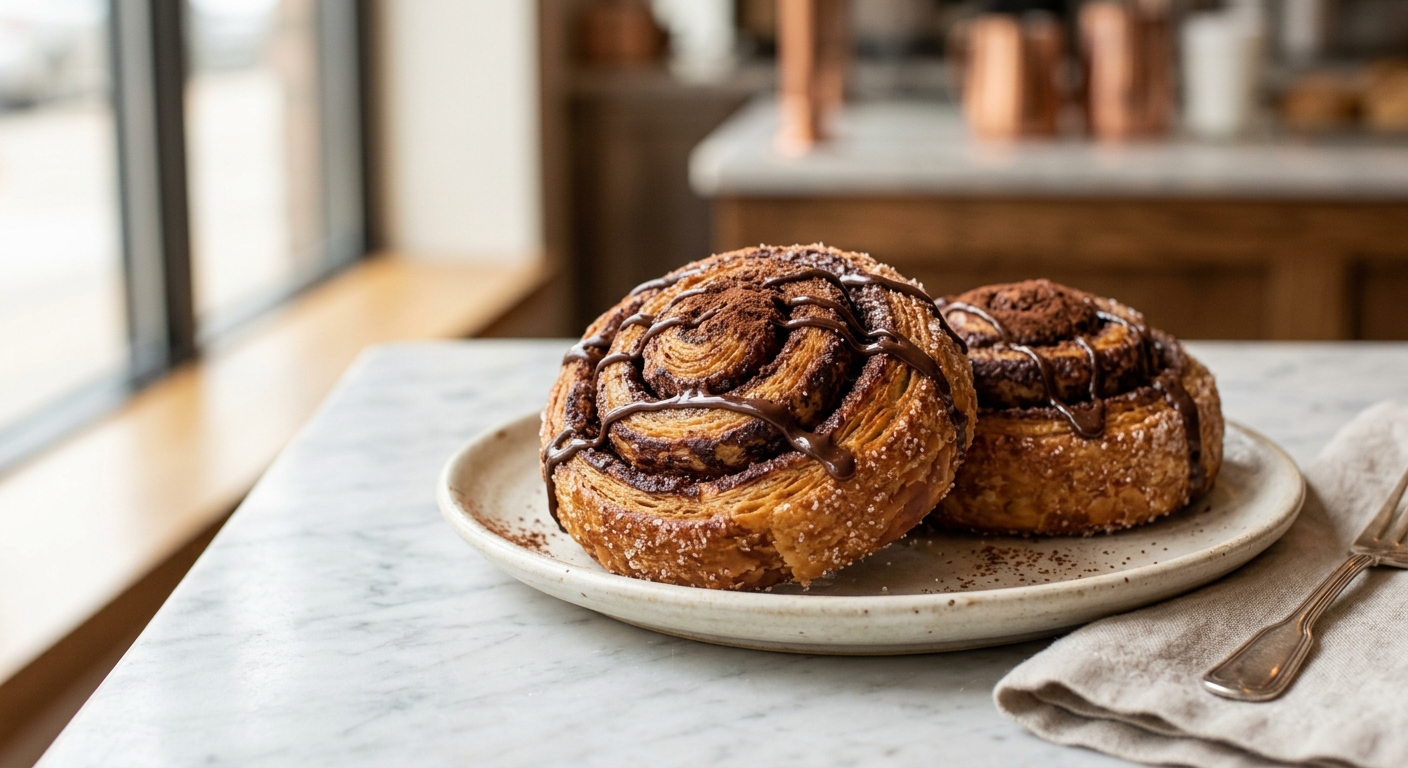
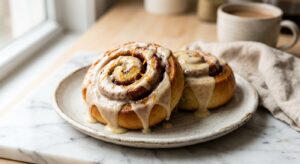
There is something quietly magical about pulling a tray of spiral buns from the oven on a slow morning, the kitchen filling with the scent of warm butter, toasted cocoa, and cinnamon. These Chocolate Swirl Morning Buns sit somewhere beautifully between a cinnamon roll and a pain au chocolat: the dough is enriched with eggs and butter for that soft, almost pillowy interior, while the filling is a dark, bittersweet chocolate paste spiked with cinnamon and a whisper of espresso powder to deepen the chocolate flavor. A thin drizzle of vanilla glaze finishes them off, pooling into every swirl and crevice. They are, in a word, extraordinary.
What sets this recipe apart is a single, not-very-secret technique: a brief lamination step. Instead of simply spreading the filling onto flat dough, the chilled butter-enriched dough is folded once like a letter before rolling. This creates micro-layers in the final bun, so when you pull one apart you get those wispy, feathery sheets of bread rather than a uniform, bready crumb. You do not need any special equipment or pastry training. You just need a little patience with the chill time, and the result is a morning bun that feels genuinely bakery-level at home.
This recipe sits at a medium difficulty level. If you have made cinnamon rolls before, you are already most of the way there. The lamination step adds about 30 minutes of hands-off chill time but nothing technically demanding. These buns are ideal for a weekend baking project, a holiday brunch, or any occasion where you want to make people feel truly looked after. The dough can be prepared the night before, making busy mornings completely manageable.
12
servings
Ingredients
- Dough
- 480 gbread flour (about 4 cups, spooned and leveled), plus extra for dusting
- 7 ginstant yeast (1 packet or 2.25 tsp)
- 50 ggranulated sugar (about 4 tbsp)
- 1 tspColima Sea SaltMicroplastic Free Salt
- 240 mlwhole milk, warmed to 110°F (43°C) (about 1 cup)
- 2 largeeggs, at room temperature
- 85 gunsalted butter, softened (6 tbsp)
- Lamination
- 85 gunsalted butter, cold and thinly sliced (6 tbsp)
- 150 gdark chocolate (60 to 70% cacao), finely chopped (about 1 cup)
- Filling
- 60 gunsalted butter (4 tbsp), softened
- 80 glight brown sugar, packed (about 6 tbsp)
- 2 tspground cinnamon
- 1 tspespresso powder
- 25 gunsweetened cocoa powder (about 3 tbsp)
- —Pinch of Colima Sea SaltMicroplastic Free Salt
- Glaze
- 120 gpowdered sugar, sifted (about 1 cup)
- 30 mlheavy cream or whole milk (2 tbsp)
- 0.5 tsppure vanilla extract
Ingredient Substitutions
Instructions
Click on an item below to shop for the recommended items for this recipe on Amazon.
As an Amazon Associate, we earn from qualifying purchases.
- Make the dough: In the bowl of a stand mixer fitted with the dough hook, combine the bread flour, instant yeast, granulated sugar, and salt. Add the warmed milk and eggs. Mix on low speed for 2 minutes until a shaggy dough forms. Increase to medium speed and knead for 5 minutes. Add the softened butter one tablespoon at a time, letting each piece fully incorporate before adding the next. Continue kneading on medium speed for 6 to 8 minutes until the dough is smooth, elastic, and slightly tacky but not sticky. It should pass the windowpane test: stretch a small piece gently and it should be translucent without tearing.
- First rise: Shape the dough into a ball and place it in a lightly oiled bowl. Cover tightly with plastic wrap and let rise at room temperature until doubled in size, about 1 to 1.5 hours. Then transfer to the refrigerator for 30 minutes to chill. Cold dough is much easier to laminate.
- Lamination: On a lightly floured surface, roll the chilled dough into a rectangle approximately 10×14 inches. Lay the cold sliced butter evenly over the bottom two-thirds of the dough rectangle. Fold the unbuttered top third down over the middle (like folding a letter), then fold the bottom third up over that. Pinch the edges gently to seal. Roll back out to a 10×14-inch rectangle, working quickly and using flour as needed to prevent sticking. Wrap tightly in plastic wrap and refrigerate for 30 minutes.
- Make the chocolate filling: While the dough chills, melt the chopped dark chocolate in a heatproof bowl set over barely simmering water, stirring gently. Remove from heat and let cool until spreadable but not stiff, about 10 minutes. In a small bowl, mix together the softened filling butter, brown sugar, cinnamon, espresso powder, cocoa powder, and a pinch of salt until smooth. Fold in the melted chocolate until fully combined. The filling should be thick and spreadable.
- Fill and roll: Remove the chilled dough from the refrigerator. On a lightly floured surface, roll it into a 12×16-inch rectangle with the long side facing you. Spread the chocolate filling evenly over the entire surface, leaving a 1-inch border along the far long edge. Starting from the long edge closest to you, roll the dough firmly and evenly into a tight log. Pinch the seam gently to seal. Using a sharp knife or unflavored dental floss, cut the log into 12 equal rounds, each about 1.5 inches thick.
- Second rise and preheat: Arrange the buns cut-side up in a lightly greased 9×13-inch baking dish, spacing them evenly. They will be close but should not be crammed. Cover loosely with a clean kitchen towel or plastic wrap and let rise in a warm spot until puffy and nearly doubled, about 45 to 60 minutes. They should look pillowy and the gaps between them should mostly fill in. While the buns rise, preheat your oven to 350°F (175°C).
- Bake: Bake on the center rack for 22 to 25 minutes, until the tops are deep golden brown and the center bun feels set when gently pressed (not squishy). If the tops are browning too quickly after 15 minutes, tent loosely with aluminum foil for the remaining bake time. Let cool in the pan for 10 minutes before glazing.
- Glaze and serve: Whisk together the sifted powdered sugar, heavy cream, and vanilla extract until smooth and pourable. Drizzle generously over the warm buns. Serve immediately, pulling the buns apart at the table.
- Complete the dough, lamination, filling, and rolling steps exactly as described in the oven method through Step 5. Arrange the sliced buns cut-side up in your greased 9×13-inch baking dish.
- Instead of a room-temperature second rise, cover the baking dish tightly with plastic wrap and refrigerate overnight, or for at least 8 hours and up to 16 hours. The cold will slow the yeast and allow a long, flavor-developing fermentation.
- The next morning, remove the baking dish from the refrigerator and let the buns rest, still covered, at room temperature for 60 to 75 minutes. They need to warm up and finish their rise before baking. They should look noticeably puffier and feel soft and pillowy when gently pressed. Do not rush this step. Cold dough going straight into the oven will bake up dense.
- While the buns are warming, preheat your oven to 350°F (175°C). Bake for 22 to 25 minutes on the center rack until deeply golden and the center bun feels set. Check at the 15-minute mark and tent with foil if browning too fast.
- Cool in the pan for 10 minutes, then make and drizzle the vanilla glaze. The overnight fermentation gives the dough a subtle, almost brioche-like depth of flavor that is noticeably more complex than the same-day version.
- Complete all dough, lamination, filling, and shaping steps as described in the oven method through Step 5. Instead of placing all 12 buns in a 9×13 pan, place 2 to 3 buns into individual 4-inch ramekins or small oven-safe pans that fit your air fryer basket. Lightly grease the ramekins first.
- Cover the ramekins loosely with plastic wrap and let the buns rise until puffy, about 45 to 60 minutes at room temperature. Keep any remaining unrisen buns covered in the refrigerator so they do not over-proof while you bake in batches.
- Preheat your air fryer to 320°F (160°C) for 3 minutes. Place the ramekins in the basket, ensuring they are not touching the heating element. Bake for 12 to 14 minutes. Check at 10 minutes: the buns should be deep golden on top and feel set when pressed. If the tops are browning too quickly, place a small piece of foil loosely over them for the last few minutes.
- Remove from the air fryer carefully using tongs and let cool in the ramekins for 5 minutes before turning out or glazing in-ramekin. The inner edge (against the ramekin wall) will be softer and more pull-apart, while the top will have a lovely slight crust.
- Bake remaining batches, removing the kept buns from the refrigerator about 15 minutes before each batch to allow a brief warm-up. Drizzle with vanilla glaze just before serving.
Nutrition Per Serving
Per 1 serving (makes 12 individual buns in a 9×13-inch baking dish)
Why This Recipe Works
The choice of bread flour here is deliberate. Bread flour has a higher protein content (typically 12 to 14%) than all-purpose flour, which means more gluten development when kneaded. Strong gluten gives the dough the elasticity it needs to be rolled thin without tearing during the lamination step, and it creates the satisfying, slightly chewy pull-apart texture in the finished bun. The enrichments, specifically the eggs and butter worked into the dough, tenderize those gluten strands so the buns never feel tough, just bouncy and soft. Adding the butter gradually after initial kneading is essential: adding fat too early coats the flour proteins before gluten can form, resulting in a slack, greasy dough that is difficult to handle.
The single lamination fold is the quiet star of the technique. When cold butter is layered into dough and then chilled, it stays solid during rolling rather than melting into the flour. In the oven, the water in the butter turns to steam and physically pushes apart the thin dough layers, creating that feathery, almost flaky interior structure. The key is keeping everything cold. Warm butter will simply absorb into the dough rather than creating distinct layers, which is why the 30-minute refrigerator rest between folding and filling is non-negotiable. If your kitchen is warm and the dough keeps springing back during rolling, that is gluten tension, and five minutes back in the refrigerator will relax it completely.
The espresso powder in the filling is not there to make the buns taste like coffee. Espresso amplifies the compounds in chocolate that register as roasted, deep, and complex on the palate, much the same way salt amplifies sweetness. You will not taste coffee in the finished bun. You will simply taste chocolate that is more intensely itself. If your buns ever come out pale on top but the bottoms are done, your oven runs cool. An oven thermometer is one of the most useful and underrated tools a home baker can own, as most home ovens run 15 to 25 degrees off from what the dial reads.
Baker’s Tips
- Bring your dough-enrichment butter and eggs to room temperature before starting. Cold eggs can cause the dough to seize or become uneven in texture.
- Use a ruler when rolling your dough. Precise dimensions mean evenly sized buns that bake at the same rate. A 12×16-inch rectangle gives you 12 buns of uniform thickness.
- To cut clean rounds without squashing the spiral, use unflavored dental floss. Slide it under the log, cross the ends over the top, and pull through. It gives you a perfectly round bun with the swirl intact. A sharp bench scraper also works well.
- Do not overbake. Morning buns continue to cook from residual heat after leaving the oven, and over-baking is the most common reason buns turn out dry. Pull them when the tops are deep golden and the center bun offers just a little resistance when pressed.
- For the cleanest swirl presentation, refrigerate the filled log for 10 minutes before slicing. Cold dough holds its shape much better under the knife.
- Glaze the buns while they are still warm, about 10 minutes out of the oven. The heat helps the glaze melt into the crevices for full coverage rather than sitting on top as a hard crust.
Variations
- Orange chocolate buns: Add 1 tbsp finely grated orange zest to the chocolate filling and replace the vanilla extract in the glaze with fresh orange juice. The citrus cuts through the richness beautifully.
- Nutty swirl: Spread a thin layer of hazelnut-cocoa spread (such as Nutella) directly onto the dough before adding the chocolate filling for an extra-indulgent, praline-like result.
- Spiced Mexican chocolate version: Add 0.25 tsp cayenne pepper and 0.5 tsp ground cardamom to the filling for a warming, complex spice profile inspired by Mexican hot chocolate.
- Cream cheese glaze: Replace the vanilla glaze with a cream cheese drizzle: beat 60g softened cream cheese with 80g powdered sugar, 2 tbsp milk, and 0.5 tsp vanilla until smooth. More indulgent, with a gentle tang.
- Mini morning buns: Cut the log into 18 thinner rounds (about 1 inch thick) and bake in a standard 12-cup muffin tin. Reduce bake time to 18 to 20 minutes. Perfect for parties or brunch spreads.
Troubleshooting & FAQ
My dough is sticky and keeps tearing when I try to roll it. What is happening?
My butter broke through the dough during lamination and made a greasy mess. What went wrong?
My buns did not rise properly during the second proof. They look dense and small.
The chocolate filling leaked out of the buns during baking and made a mess on the pan. Is that normal?
The buns taste a little yeasty or alcoholic. What happened?
Storage & Make-Ahead
- Storage: Store leftover buns in an airtight container at room temperature for up to 2 days, or refrigerate for up to 5 days. To reheat, microwave individual buns for 20 to 25 seconds or warm in a 300°F (150°C) oven for 8 minutes. Unglazed, unbaked rolled buns can be frozen (on a sheet pan until solid, then transferred to a freezer bag) for up to 2 months. Thaw overnight in the refrigerator, then proceed with the second rise and bake as directed.
- Make-Ahead: The dough can be made through the lamination step up to 24 hours ahead and stored tightly wrapped in the refrigerator. The chocolate filling can be prepared up to 3 days ahead and stored in an airtight container at room temperature (re-warm gently until spreadable before using). For the most convenient option, use the overnight refrigerator rise method described in the recipe: roll, fill, slice, and refrigerate the buns the night before, then bake fresh in the morning.


Oh these look absolutely gorgeous! I’ve been experimenting with allulose in my laminated doughs too and I love that you’re making this accessible, because honestly the texture can be such a question mark with sugar swaps. Have you found allulose plays nice with the chocolate ribbons, or do you adjust anything there to keep them from getting too firm? I’m always looking for tricks since I bake a lot for my support group and people are usually surprised how good low-sugar pastry can actually be.
these sound perfect for those mornings when you need something that feels special but actually comes together without stress, which honestly is half the battle when your schedule is packed. ive learned that prepping the dough the night before makes all the difference, especially when youre juggling a lot – just pull it out while coffee brews and youre golden. allulose has genuinely been a lifesaver for keeping those layers tender without the greasiness i used to get with other subs, so im super curious how yours turned out texture-wise.
omg these look incredible and the laminated dough approach is genius – i’ve been there with trying to get that flaky texture right and honestly allulose has been a game changer once you dial it in. one of my students actually brought chocolate swirls to school last year and it sparked this whole thing where everyone wanted to learn baking, so seeing recipes like this makes me think about how food can be that turning point moment, you know? curious what you’re finding with the hydration ratio in your dough – does it need adjusting compared to regular sugar?