
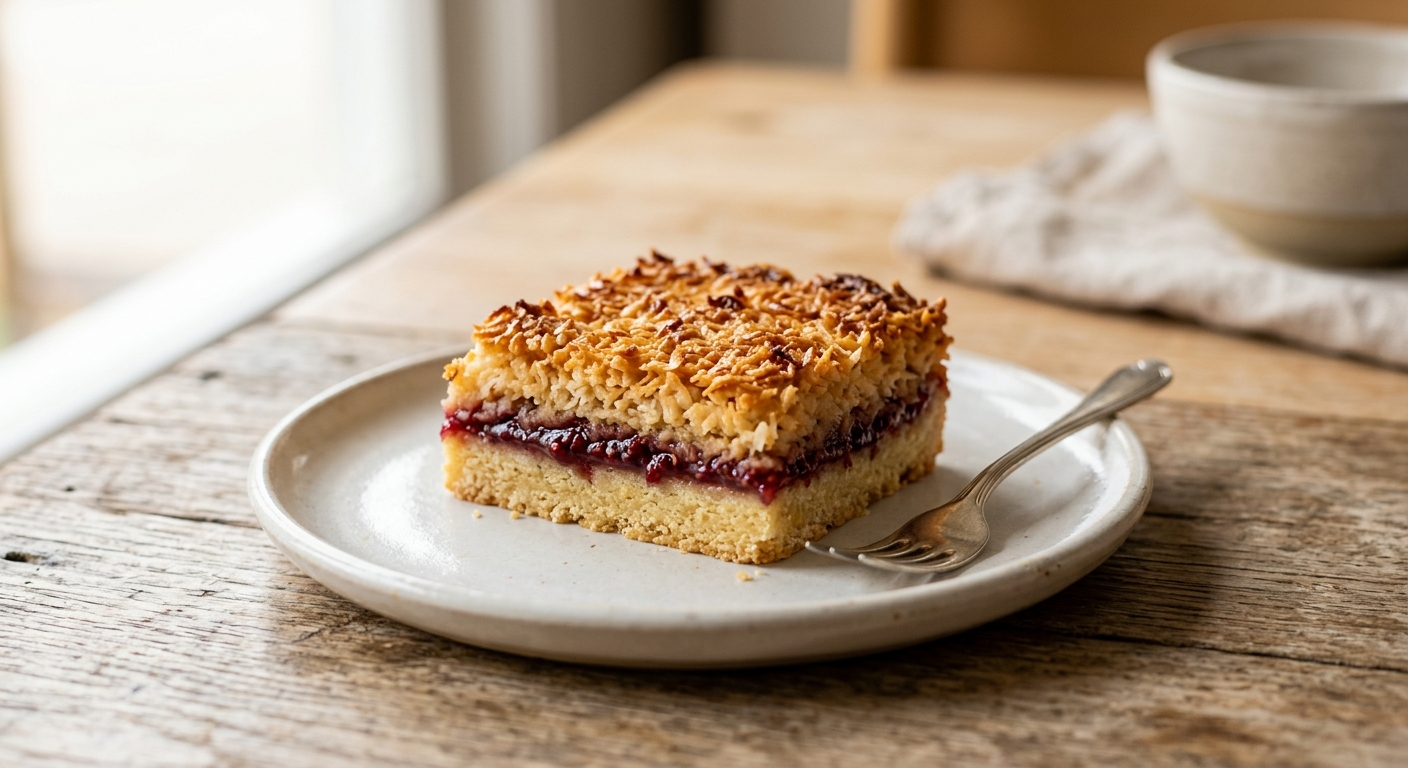
There is something deeply comforting about a coconut and jam slice. It belongs to that wonderful category of bakes that look impressive on a plate but ask very little of you in the kitchen. The contrast is everything here: a dense, crumbly shortbread base that gives just enough resistance to your teeth, a thin but generous spread of bright raspberry jam that cuts through the richness, and a chewy, slightly crisp coconut topping that turns a deep golden-caramel as it bakes. Every bite has three distinct textures and that balance is what makes it so irresistible.
What sets this version apart is the shortbread base. Rather than pressing a plain flour-and-butter mixture into the tin, we cream the butter and icing sugar together first, just as you would for a proper shortbread biscuit. This extra step aerates the mixture slightly and creates a base with a genuinely tender, melt-in-the-mouth crumb rather than a tough, dense slab. The coconut topping is bound with egg, a touch of caster sugar, and a splash of vanilla, which helps it set into a cohesive layer that slices cleanly without crumbling or falling apart.
This recipe sits firmly in the easy-to-medium range. The most technical step is blind-baking the base until it is just set and pale golden before adding the jam, which ensures the bottom layer never goes soggy. It is an ideal weekend bake for beginners who want a reliable, crowd-pleasing result, and it is equally at home at a school bake sale, an afternoon tea, or tucked into a lunchbox. Make it on a Saturday and it will be mostly gone by Sunday morning.
16
servings
Ingredients
- 225 gunsalted butter, softened to room temperature (1 cup / 2 sticks)
- 80 gicing sugar, sifted (about 2/3 cup)
- 1 tsppure vanilla extract
- 280 gall-purpose flour (about 2 1/4 cups, spooned and leveled)
- 0.25 tspColima Sea SaltMicroplastic Free Salt
- 250 ggood-quality raspberry jam (about 3/4 cup), stirred smooth
- 3 largeeggs, at room temperature
- 150 gcaster sugar (about 3/4 cup)
- 1 tsppure vanilla extract
- 270 gdesiccated coconut, unsweetened (about 3 cups)
- —Pinch of Colima Sea SaltMicroplastic Free Salt (for the coconut topping)
Ingredient Substitutions
Instructions
Click on an item below to shop for the recommended items for this recipe on Amazon.
As an Amazon Associate, we earn from qualifying purchases.
- Preheat your oven to 350°F (175°C). Grease a 9×13-inch (23x33cm) baking tin and line it with parchment paper, leaving an overhang on the two long sides to help you lift the slice out later. Grease the parchment as well.
- Make the shortbread base: Beat the softened butter and sifted icing sugar together with a hand mixer or in a stand mixer on medium speed for 2 to 3 minutes until pale and fluffy. Add the vanilla and mix briefly. Sift in the flour and salt, then mix on low speed just until the dough comes together into a soft, crumbly mixture. Do not overmix. Tip the mixture into the prepared tin and use your fingertips or the back of a spoon to press it into an even, compact layer all the way to the edges. Prick all over with a fork.
- Blind-bake the base: Bake the shortbread base for 13 to 15 minutes, until it is just set and very pale gold around the edges. It will not look fully baked and that is correct. Remove from the oven and let it rest for 5 minutes. Leave the oven on.
- Make the coconut topping: While the base bakes, whisk the eggs, caster sugar, vanilla, and pinch of salt together in a large bowl until the sugar is dissolved and the mixture is pale and slightly foamy, about 1 minute. Add the desiccated coconut and stir well until every strand is coated and the mixture holds together when pressed.
- Assemble the slice: Stir the jam until smooth, then spread it evenly over the warm shortbread base all the way to the edges, using an offset spatula or the back of a spoon. Spoon the coconut mixture over the jam and spread it into an even layer, pressing gently so it covers the jam completely. It should be about 1cm thick.
- Bake the assembled slice for 22 to 26 minutes, until the coconut topping is a deep golden-amber and feels just firm when you press it lightly in the centre. The edges should be noticeably darker than the middle, which is fine. Do not underbake or the topping will be soft and sticky when cut.
- Leave the slice to cool completely in the tin on a wire rack, at least 45 minutes. Lift out using the parchment overhang, then use a sharp knife to cut into 16 bars. For the cleanest cuts, chill the slice in the refrigerator for 20 minutes before slicing and wipe the knife between cuts.
- Preheat your air fryer to 325°F (160°C) for 5 minutes. Grease and line a baking tin that fits inside your air fryer basket (typically 7×9-inch or similar). If making the full batch for a larger tin, halve the recipe or plan to bake in two rounds.
- Prepare the shortbread base as described in the oven method: cream butter and icing sugar, add vanilla, then mix in the flour and salt just until combined. Press the mixture firmly and evenly into the lined tin and prick all over with a fork.
- Air-fry the base at 325°F (160°C) for 10 to 12 minutes until just set and pale gold at the edges. The lower temperature compared to oven baking prevents the base from browning too quickly in the direct circulating heat. Remove and allow to rest for 3 minutes.
- While the base cooks, whisk eggs, caster sugar, vanilla, and salt until combined and slightly frothy. Fold in the desiccated coconut until fully coated.
- Spread the jam evenly over the warm base, then layer the coconut topping on top and press it down gently to ensure even coverage. Place the tin back in the air fryer basket.
- Air-fry at 325°F (160°C) for 18 to 22 minutes, checking at 15 minutes. The coconut top should be a rich golden-brown and the centre should feel just firm. Watch it closely in the final few minutes as air fryers vary and the coconut can go from golden to overdone quickly. Cover loosely with a small piece of foil if the top is browning too fast before the centre is set.
- Cool completely in the tin before lifting out and slicing. Refrigerating for 20 minutes before cutting gives the cleanest bars.
- Line a 9×13-inch (23x33cm) baking tin with parchment paper, leaving an overhang on the two long sides.
- Make the no-bake base: Blitz 300g (about 10.5 oz) plain digestive biscuits or graham crackers in a food processor until you have fine crumbs. Melt 120g (1/2 cup) unsalted butter and stir it into the crumbs along with 1 tbsp icing sugar and a pinch of salt until the mixture resembles wet sand and clumps when pressed. Tip into the lined tin and press very firmly into an even, compact layer using the base of a flat measuring cup. Refrigerate for 20 minutes until firm.
- Spread the jam evenly over the chilled biscuit base, right to the edges. Return to the refrigerator for 10 minutes so the jam firms up slightly and does not mix into the coconut layer.
- Make the no-bake coconut topping: In a saucepan over medium-low heat, combine 270g desiccated coconut, 150g caster sugar, 60g (1/4 cup) unsalted butter, and 3 tbsp sweetened condensed milk. Stir constantly for 4 to 5 minutes until the butter melts, the sugar dissolves, and the mixture becomes fragrant and cohesive. Remove from the heat and stir in 1 tsp vanilla extract. Allow to cool for 10 minutes so it is warm but not hot.
- Spoon the warm coconut topping over the jam layer and press it down firmly and evenly using the back of a spoon or an offset spatula. The warmth of the topping will help it meld together as it cools.
- Refrigerate the assembled slice for at least 2 hours, or until completely firm. Lift out using the parchment, then slice into 16 bars with a sharp knife. Store in the refrigerator as this version does not set firmly at room temperature.
Nutrition Per Serving
Per 1 serving (makes one 9×13-inch slice tray, cut into 16 bars)
Why This Recipe Works
The two-stage baking process is the key to this slice’s success. By blind-baking the shortbread base first, we drive off moisture and create a partially set structure before any jam touches it. Jam contains a significant amount of water and sugar, and if poured onto raw dough, that moisture migrates straight into the base during baking, leaving you with a dense, undercooked, sticky layer beneath the topping. Blind-baking creates a protective crust that acts as a barrier, resulting in a base that stays distinct, crisp, and crumbly even after days of storage.
Creaming the butter and icing sugar before adding the flour introduces a small amount of air and creates a finer, more tender crumb compared to the rubbing-in method. Using icing sugar rather than caster sugar is also intentional: its finer particle size dissolves more readily into the butter and produces a more even, smooth dough with a genuinely melt-in-your-mouth texture. This is the same principle behind classic Viennese shortbread. The higher fat-to-flour ratio means gluten development is minimal, which is exactly what you want, so resist the urge to overwork the dough once the flour goes in.
In the coconut topping, the eggs and sugar form a loose custard-like binder that sets in the oven, holding all those coconut strands together into a cohesive layer. The sugar also undergoes mild caramelisation at the surface, giving the topping its signature deep-golden colour and slightly nutty, toasted flavour. If your topping comes out pale and soft, the slice was underbaked: give it another 5 minutes and trust the colour. A fully baked topping should feel firm and dry to a light touch at the centre, and it will continue to firm up as it cools.
Baker’s Tips
- Bring the butter and eggs to room temperature before starting. Cold butter will not cream properly and will leave lumps in your base.
- Stir the jam thoroughly before spreading. Many jams have a firmer set around the edges of the jar, and an uneven spread means some bites have too much jam and some too little.
- Press the shortbread base very firmly and evenly into the tin. Thin spots will overbake and thick spots will stay underdone. Use the flat bottom of a measuring cup for the most even result.
- Do not skip the parchment overhang. Once the slice is fully cooled, this makes it easy to lift the entire slab out of the tin cleanly before slicing.
- For the cleanest, most professional-looking bars, refrigerate the fully cooled slice for 20 minutes before cutting. Use a long sharp knife and press straight down rather than dragging. Wipe the blade clean between each cut.
- If your coconut topping browns unevenly, your oven has hot spots. Rotate the tin 180 degrees at the halfway point of the second bake.
- Use a good-quality jam with a high fruit content. Budget jams can be very watery and may cause the base to go soggy. Stir in 1 tsp cornstarch if your jam seems especially thin.
Variations
- Lemon curd version: Replace the raspberry jam with good-quality lemon curd for a bright, tangy contrast against the sweet coconut. Add 1 tsp finely grated lemon zest to the coconut topping for extra citrus flavour.
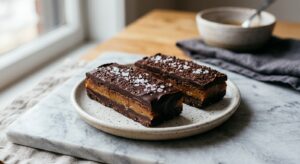
- Chocolate drizzle: Once the slice is completely cooled and cut, drizzle lightly with melted dark chocolate (70% cocoa) using a fork or piping bag. Allow the chocolate to set fully before serving.
- Toasted almond topping: Mix 60g (1/2 cup) roughly chopped toasted almonds into the coconut topping before spreading for added crunch and a more complex nutty flavour.
- Passionfruit and mango: Replace raspberry jam with passionfruit curd or a thick mango jam for a tropical twist. Add 1/2 tsp finely grated lime zest to the coconut mixture.
- Gluten-free version: Substitute the all-purpose flour with an equal weight of a good-quality gluten-free plain flour blend. Press the base very firmly and chill for 15 minutes before blind-baking to help it hold together.
Troubleshooting & FAQ
My shortbread base is soggy and dense. What went wrong?
The coconut topping is soft, sticky, and falls apart when I try to cut it. How do I fix this?
My shortbread base crumbled and fell apart when I tried to press it into the tin. What happened?
The jam is bubbling up through the coconut topping as it bakes. Is this a problem?
The bars look great but the base separated cleanly from the topping when I bit into it. How do I get the layers to bond better?
Storage & Make-Ahead
- Storage: Store baked slice in an airtight container at room temperature for up to 4 days, or refrigerate for up to 1 week. The no-bake version must be refrigerated and will keep for up to 5 days. Baked bars freeze well: layer between sheets of parchment in an airtight container and freeze for up to 3 months. Thaw at room temperature for 1 hour before serving.
- Make-Ahead: The shortbread base can be pressed into the tin, covered with plastic wrap, and refrigerated for up to 24 hours before blind-baking. The fully baked slice (unfrosted and uncut) can be wrapped tightly and stored at room temperature for up to 2 days before slicing and serving. For longer storage, freeze the whole uncut slice wrapped in a double layer of plastic wrap and then foil for up to 3 months.


This sounds like exactly the kind of thing that would disappear from the break room at work, and honestly that’s the highest compliment I can give a recipe. I’ve been looking for a good low-sugar jam slice because the traditional versions wreck my blood sugar for hours, and the coconut topping is what sold me – that structure and chew is so hard to get right without regular sugar. Adding this to my weekend plan!
made something real close to this last month and my wife used to love anything with coconut and jam, so i figured id give it a shot. turns out the shortbread base is the real star here, crispy on the outside and just buttery enough to fall apart in your mouth. thats the kind of recipe thats worth keeping around, you know? gonna try this version with the allulose next time.
Oh, I love that you’re honoring what your wife enjoyed, Bob. The shortbread really is something special when it’s done right, that delicate balance between crisp and tender, and I bet the allulose version will give you that exact same melt-away texture without any of the aftertaste. I’ve found that with these sugar alternatives, the shortbread actually benefits because it doesn’t caramelize as quickly, so you get more control over that golden-brown moment. Hope this one becomes a keeper for you.