
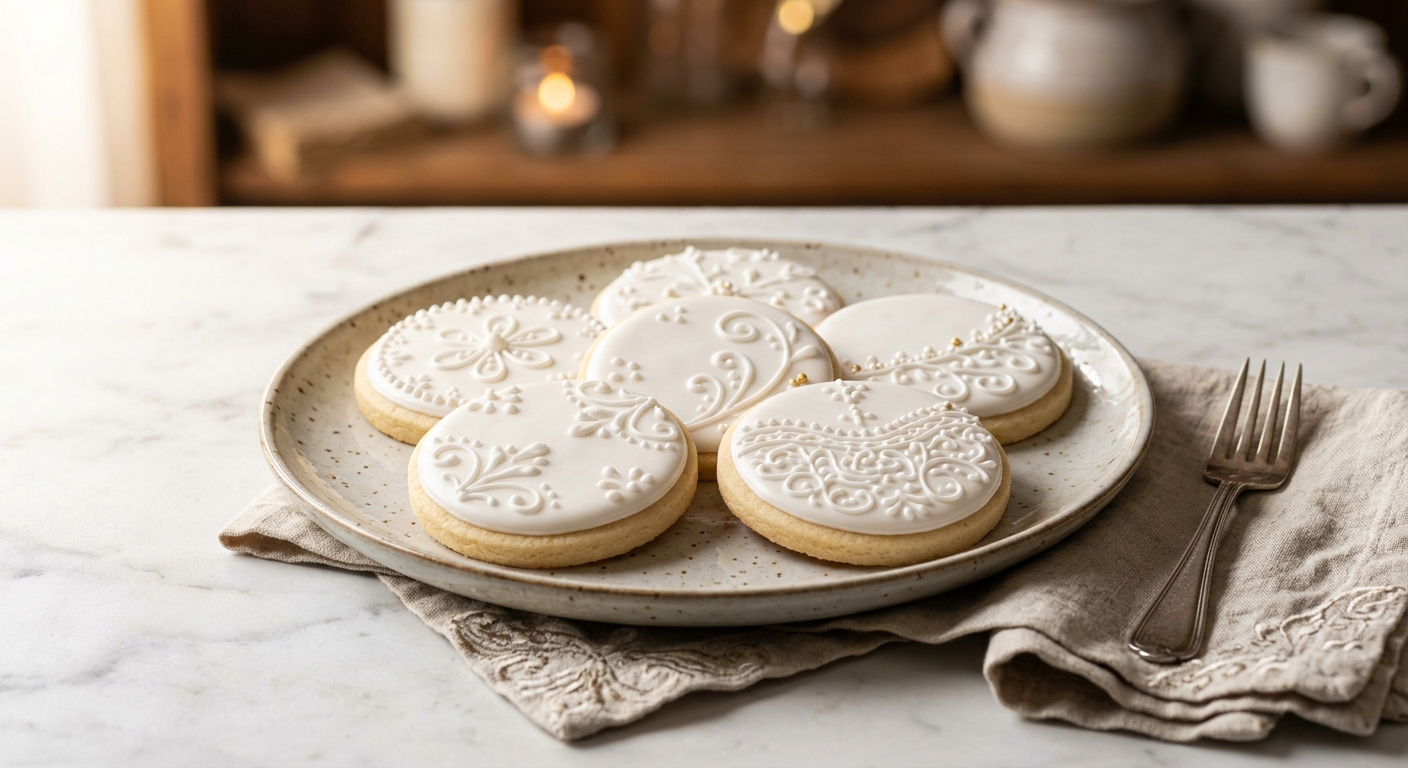
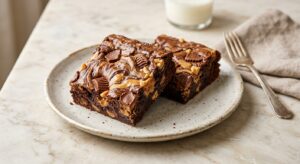
There is something deeply satisfying about a sugar cookie that actually tastes as good as it looks. Picture a stack of perfectly cut shapes, their edges crisp and defined, their surfaces a smooth canvas of white icing waiting for decoration. The kitchen smells of warm vanilla and just a whisper of lemon zest, and before the icing has even set, someone has already stolen one from the cooling rack. These cream cheese sugar cookies are that kind of cookie: the ones that disappear before the decorating is even finished.
What sets this recipe apart from a standard sugar cookie is the addition of full-fat cream cheese to the dough. The cream cheese does two remarkable things: it adds a subtle tang that balances the sweetness, and it contributes extra fat without making the dough greasy, resulting in a cookie that is tender and almost shortbread-like in texture. Critically, the cream cheese also helps the cookies hold their cut shapes with minimal spreading, so your stars look like stars and your hearts look like hearts, even after baking. The royal icing is made with meringue powder for food-safe stability and dries to a smooth, hard finish that is ideal for decorating and gifting.
This recipe sits firmly in the medium difficulty range. The dough comes together quickly in a stand mixer and requires a one-hour chill before rolling, so it is a great weekend project or a make-ahead holiday bake. It is ideal for anyone who loves decorating cookies, wants reliable results for gifting, or simply refuses to accept a sugar cookie that tastes like sweetened cardboard. No special skills are required, just a little patience with the chill time and the icing dry time.
24
servings
Ingredients
- 340 gall-purpose flour (about 2 3/4 cups, spooned and leveled), plus more for dusting
- 1.5 tspbaking powder
- 0.5 tspColima Sea SaltMicroplastic Free Salt
- 115 gfull-fat cream cheese (4 oz), softened to room temperature
- 113 gunsalted butter (1/2 cup / 1 stick), softened to room temperature
- 200 ggranulated sugar (1 cup)
- 1 largeegg, at room temperature
- 2 tsppure vanilla extract
- 1 tspfinely grated lemon zest (from about 1 lemon)
- —For the Royal Icing:
- 450 gpowdered sugar (about 3 3/4 cups), sifted
- 3 tbspmeringue powder
- 75 mlwarm water (5 tbsp), plus more to adjust consistency
- 0.5 tsppure vanilla extract or clear vanilla extract (for bright white icing)
- —Gel food coloring, as desired for decorating
Ingredient Substitutions
Instructions
Click on an item below to shop for the recommended items for this recipe on Amazon.
As an Amazon Associate, we earn from qualifying purchases.
- Make the dough: Whisk together the flour, baking powder, and salt in a medium bowl. Set aside. In the bowl of a stand mixer fitted with the paddle attachment (or using a hand mixer), beat the softened cream cheese and butter on medium speed for 2 to 3 minutes until completely smooth and fluffy, scraping down the bowl once. Add the granulated sugar and beat for another 2 minutes until pale and airy.
- Add the egg, vanilla extract, and lemon zest to the butter mixture. Beat on medium until fully incorporated, about 1 minute. Scrape down the bowl. Add the flour mixture all at once and mix on low speed just until the dough comes together and no dry streaks remain. Do not overmix. The dough will be soft but not sticky.
- Divide the dough in half. Flatten each half into a disk about 3/4-inch thick, wrap tightly in plastic wrap, and refrigerate for at least 1 hour or up to 2 days. Chilling is not optional: it firms the fat and relaxes the gluten so cookies hold their shape during baking.
- When ready to bake, preheat your oven to 350°F (175°C). Line two baking sheets with parchment paper. Remove one dough disk from the refrigerator. On a lightly floured surface, roll the dough to an even 1/4-inch thickness. Cut into shapes with lightly floured cookie cutters. Transfer cookies to the prepared baking sheets, spacing them about 1 inch apart. Re-roll scraps once. Repeat with the second disk.
- Bake one sheet at a time on the center rack for 10 to 12 minutes. The cookies are done when the edges are just barely golden and the centers look set but still slightly matte. They will firm up as they cool, so do not overbake. Cool on the baking sheet for 5 minutes, then transfer to a wire rack to cool completely before icing.
- Make the royal icing: In a large bowl, whisk together the sifted powdered sugar and meringue powder. Add the warm water and vanilla. Beat with a hand mixer on medium-high speed for 4 to 5 minutes until the icing is thick, glossy, and holds stiff peaks. This is your base icing.
- Divide the icing into bowls and tint with gel food coloring as desired. For flooding (smooth, filled surfaces), thin each portion with water, adding it one teaspoon at a time and stirring gently, until a ribbon of icing dropped from a spoon disappears back into the surface within 10 seconds. For outlining or fine details, keep the icing at stiff consistency. Pipe outlines first, let them set for 5 minutes, then flood the centers. Allow iced cookies to dry uncovered at room temperature for at least 4 to 6 hours, or overnight, before stacking or packaging.
- Prepare the dough exactly as directed in the oven method through the chilling step. A full chill is equally important here, as the air fryer’s circulating heat is more aggressive than a conventional oven.
- Preheat your air fryer to 325°F (165°C) for 3 minutes. Cut a piece of parchment paper to fit the air fryer basket, trimming it so it does not block the airflow vents on the sides.
- Roll the chilled dough to 1/4-inch thickness on a lightly floured surface and cut your shapes. Place cookies on the parchment-lined basket in a single layer with at least 1/2 inch of space between them. Bake in batches of 4 to 6 cookies depending on your air fryer size.
- Air fry at 325°F (165°C) for 7 to 8 minutes. Check at the 6-minute mark: the cookies are done when the edges are just set and the tops look dry. The bottom will be lightly golden. Because air fryers vary, your first batch is a test batch. Adjust time by 1 minute up or down as needed.
- Carefully lift the parchment with the cookies onto a wire rack and allow to cool completely before icing. Do not attempt to lift hot cookies directly from the parchment as they are fragile when warm. Ice exactly as directed in the oven method.
- Prepare the dough exactly as directed in the oven method. Instead of dividing into disks, turn the dough out onto a lightly floured surface and divide it in half.
- Shape each half into a log approximately 2 inches in diameter and 8 inches long. Roll each log tightly in plastic wrap, twisting the ends firmly to compress the dough into a neat cylinder. For extra-clean edges, roll the wrapped logs inside a sheet of parchment paper and use a ruler or bench scraper to square them off if you prefer a square slice shape.
- Place the wrapped logs in a zip-top freezer bag and freeze for at least 2 hours before slicing, or store for up to 3 months. Label with the date and baking instructions.
- To bake from frozen: preheat your oven to 350°F (175°C) and line a baking sheet with parchment. Remove a log from the freezer and let it sit at room temperature for 5 minutes (just enough to prevent the knife from cracking the dough). Using a sharp chef’s knife, slice the log into rounds 1/4 inch thick. Place on the prepared baking sheet about 1 inch apart.
- Bake for 12 to 14 minutes (1 to 2 minutes longer than fresh-rolled dough, to account for the frozen start), until the edges are just barely golden. Cool completely on a wire rack before icing as directed in the main method.
Nutrition Per Serving
Per 1 serving (makes approximately 24 cookies (3-inch cutters))
Why This Recipe Works
The star ingredient here is the cream cheese, and it earns its place in the dough for two reasons. First, cream cheese is higher in fat and lower in water than butter, which means less steam is produced during baking. Less steam equals less spread, which is exactly what you want in a cut-out cookie. Second, the lactic acid in cream cheese tenderizes the gluten strands in the flour, giving the cookies that soft, slightly melt-in-your-mouth texture without making them fragile or crumbly. The ratio of cream cheese to butter here is deliberately weighted toward butter so you get the best of both: tenderness and flavor from the butter, structure and tang from the cream cheese.
Chilling the dough is non-negotiable in this recipe. When you cream together butter and cream cheese with sugar, you incorporate air and warm the fat. Rolling and cutting at this stage would result in cookies that melt into puddles in the oven as the warm fat spreads before the flour can set. Refrigerating for at least one hour resolidifies the fat completely, meaning the cookie holds its cut shape for the first several minutes of baking. By the time the fat warms enough to spread, the flour proteins have already begun to set, locking the shape in place. This is the same principle behind any good shortbread or cut-out cookie dough.
Royal icing sets hard because of the way meringue powder works: it contains dried egg whites and cream of tartar, which form a protein network when rehydrated and beaten with air. As the icing dries, the water evaporates and the protein network tightens into a firm, glossy shell. The key to smooth flood icing is getting the consistency exactly right. Too thick and it will not level itself, leaving peaks and brush marks. Too thin and it will run off the edges. The ten-second test (a ribbon of icing should sink back into the surface within ten seconds) is the most reliable way to hit the sweet spot every time. If your icing is not setting after several hours, your kitchen may be too humid: a fan set to low nearby can help speed drying significantly.
Baker’s Tips
- Bring the butter and cream cheese to true room temperature (about 68 to 70°F / 20°C) before beating. Cold cream cheese will leave tiny lumps in the dough that you cannot beat out later. If you are short on time, cut them into small pieces and let them sit for 20 minutes.
- Flour your cutters, not just your surface. Dipping each cutter in flour before every cut prevents the dough from sticking to the cutter and distorting the shape as you press down.
- Roll between two sheets of parchment paper instead of on a floured surface if you find your dough sticking. This also means you can slide the whole sheet into the refrigerator for 10 minutes if the dough softens too much during rolling.
- Use gel food coloring, not liquid, for royal icing. Liquid food coloring adds too much water and throws off the consistency. Gel gives vibrant color with just a toothpick dip.
- Invest in squeeze bottles or piping bags with fine tips for decorating. Even a basic plastic squeeze bottle from a kitchen supply store will give you far more control than a spoon, and makes the difference between a tidy cookie and a messy one.
- Bake similar-sized shapes together on the same sheet. Larger cookies take longer than smaller ones, so separating them by size means no underbaked large cookies or overbaked small ones.
- Let the icing dry completely uncovered. Covering cookies while the icing is still wet traps moisture and can cause the surface to stay tacky. Give them a full night in a cool, dry spot before packaging.
Variations
- Almond extract variation: Replace the lemon zest with 1/2 tsp almond extract for a classic bakery-style flavor that pairs especially well with pink icing and sprinkles.
- Brown butter version: Brown the butter before using, let it resolidify in the refrigerator, then use in place of regular softened butter. This adds a nutty, toasty depth to the dough.
- Chocolate sugar cookies: Replace 40g (1/3 cup) of the flour with Dutch-process cocoa powder. These pair beautifully with white royal icing.
- Lemon glazed version: Skip the royal icing entirely and drizzle cooled cookies with a simple glaze made from 120g powdered sugar, 2 tbsp fresh lemon juice, and 1 tsp lemon zest. Much faster for everyday baking.
- Sprinkle cookies: Before chilling the dough, roll the slice-and-bake logs in rainbow sprinkles so every sliced cookie has a festive sprinkle border without any decorating required.
Troubleshooting & FAQ
My cookies spread and lost their shape in the oven. What went wrong?
My royal icing is not setting hard. It is still sticky after several hours.
My dough is crumbly and will not come together when I roll it.
My icing colors are bleeding into each other. How do I prevent this?
My cookies have a slightly puffy, domed top instead of a flat surface. Is that wrong?
Storage & Make-Ahead
- Storage: Store iced cookies in a single layer in an airtight container at room temperature for up to 5 days. Once the first layer of icing is fully set (overnight), you can stack them with a sheet of parchment paper between layers. Uniced cookies keep at room temperature in an airtight container for up to 1 week. Do not refrigerate iced cookies as condensation can cause the icing to become sticky.
- Make-Ahead: The cookie dough can be made up to 2 days ahead and refrigerated as disks, or frozen as logs for up to 3 months (see the Freezer method). Baked, uniced cookies can be made up to 3 days ahead and stored in an airtight container, or frozen for up to 2 months. The royal icing should be made fresh on decorating day, as it begins to dry out when stored, but you can cover it tightly with plastic wrap pressed directly onto the surface and use it within 24 hours.

been making sugar cookies for about forty years and never thought to add cream cheese til my wife got me to try it, game changer really, that tang just makes em taste like something special. gonna give your royal icing version a shot this weekend, my coffee group is always looking for an excuse to stop by and these sound like theyd go perfect with a cup of coffee on a tuesday morning.
Bob, I’m totally with you on this one! My wife actually got me into baking these too, and I remember being skeptical at first, wondering if cream cheese would make them too soft. But that tang you’re talking about, it’s like the cookies taste more like themselves somehow, you know? I’ve been making them for a couple years now and the royal icing tip here is gold – the smoothness really lets that subtle cream cheese flavor shine through instead of getting buried under sweetness like traditional recipes do.
This is beautiful to read, Bob – there’s something about learning to make something better from someone you love that sticks with you forever. My grandmother had this old cookie recipe she made every Christmas, nothing fancy, but I realized years later what made them special wasn’t the ingredients, it was the presence of whoever was making them. I bet these cream cheese cookies with that tang would’ve knocked her socks off, and now I’m definitely trying your approach.