
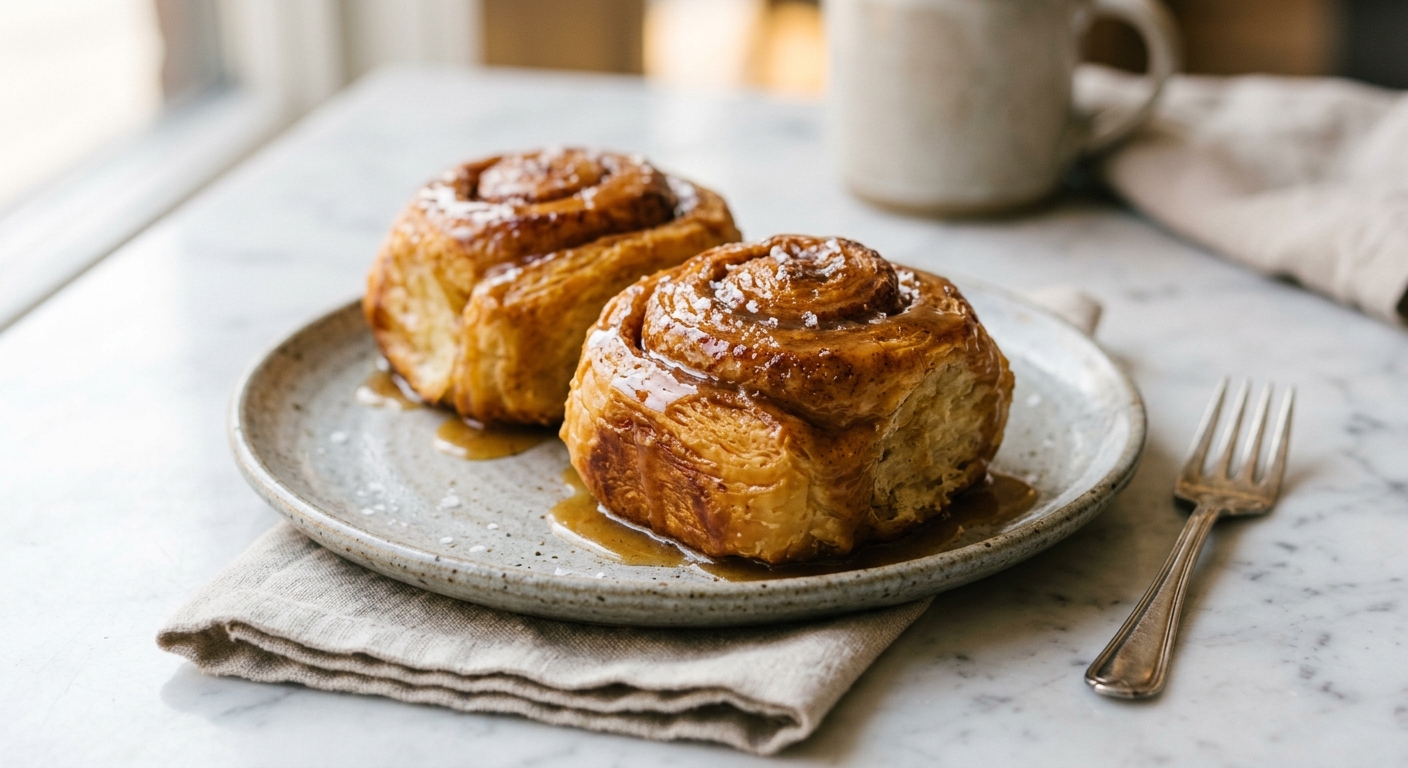
There is a particular kind of morning magic that only yeast-leavened dough can conjure. It starts the night before, when you mix flour and warm milk and a little yeast and let time do its quiet work. By morning, the dough has puffed and softened, and the kitchen carries that faint yeasty sweetness that means something wonderful is coming. These Salted Caramel Morning Rolls take that familiar joy and deepen it, layering in a filling built on genuinely browned butter, dark caramel, and a generous pinch of flaky sea salt that makes every sweet note sing a little louder.
What sets these rolls apart from the classic cinnamon bun is the filling, and specifically the fat at its heart. Most roll recipes call for softened butter spread straight from the refrigerator. Here, we take the extra five minutes to brown it on the stovetop until the milk solids turn amber and the whole pan smells like toasted hazelnuts and toffee. That browned butter is then stirred into a dark homemade caramel before being spread across the dough, meaning you are baking two layers of deep, complex flavor into every single swirl. The glaze doubles down, blending cream cheese with more caramel for something tangy, silky, and almost dangerously good.
These rolls sit comfortably at a medium difficulty level. You need patience more than skill, particularly for the two rises, but the dough is forgiving and the caramel is made in stages that are easy to manage. They are ideal for weekend bakers who want a project that pays off, and they are absolutely perfect for holiday mornings, slow Sundays, or any occasion where you want to show someone they are deeply loved.
12
servings
Ingredients
- Dough
- 720 gbread flour (about 6 cups, spooned and leveled), plus extra for dusting
- 7 ginstant yeast (one 0.25-oz packet, or 2.25 tsp)
- 50 ggranulated sugar (about 4 tbsp)
- 1.5 tspColima Sea SaltMicroplastic Free Salt
- 240 mlwhole milk, warmed to 110°F (43°C) (about 1 cup)
- 120 mlwater, warmed to 110°F (43°C) (about 0.5 cup)
- 2 largeeggs, room temperature
- 85 gunsalted butter, softened to room temperature (6 tbsp)
- —Filling
- Browning
- 115 gunsalted butter (1 stick, 8 tbsp)
- Caramel
- 200 ggranulated sugar (1 cup)
- 60 mlheavy cream (about 4 tbsp), warmed
- 2 tspColima Sea SaltMicroplastic Free Salt (such as Maldon), divided
- 1.5 tspground cinnamon
- 100 gdark brown sugar, packed (about 0.5 cup)
- —Cream Cheese Caramel Glaze
- 170 gfull-fat cream cheese, softened (6 oz)
- 180 gpowdered sugar, sifted (about 1.5 cups)
- 45 mlwhole milk or heavy cream (3 tbsp)
- 1 tsppure vanilla extract
- 60 mlreserved caramel sauce (from the filling, about 4 tbsp)
Ingredient Substitutions
Instructions
Click on an item below to shop for the recommended items for this recipe on Amazon.
As an Amazon Associate, we earn from qualifying purchases.
- Make the dough: In the bowl of a stand mixer fitted with the dough hook, combine the bread flour, instant yeast, granulated sugar, and fine sea salt. Whisk briefly to combine. Add the warm milk, warm water, and eggs. Mix on low speed for 2 minutes until a shaggy dough forms, then increase to medium speed and mix for 3 minutes.
- Add the softened butter one tablespoon at a time over 3 to 4 minutes, letting each piece incorporate before adding the next. Once all the butter is in, increase speed to medium-high and knead for 8 to 10 minutes until the dough is smooth, slightly tacky, and pulls cleanly away from the sides of the bowl. It should pass the windowpane test: a small piece stretched gently should become translucent before tearing.
- Shape the dough into a ball, place it in a lightly oiled bowl, and cover with plastic wrap. Let rise at room temperature for 1.5 to 2 hours until doubled, or refrigerate overnight (8 to 12 hours) for a slow, flavorful rise. If refrigerating, let the dough sit at room temperature for 30 minutes before rolling.
- Make the brown butter caramel filling: Melt the 115g butter in a light-colored saucepan over medium heat, stirring occasionally. Once it melts, it will foam, then the foam will subside, and small golden-brown specks will appear on the bottom. The moment the butter smells like toasted hazelnuts and turns a warm amber color (about 4 to 5 minutes), remove it from the heat immediately and pour it into a heatproof bowl to stop cooking.
- In a clean, dry saucepan, spread the 200g granulated sugar in an even layer. Cook over medium heat without stirring until the edges begin to melt and turn golden. Gently swirl the pan (do not stir with a spoon) to encourage even melting. Continue cooking until the caramel is a deep amber color and smells slightly smoky, about 8 to 10 minutes total. Remove from heat and carefully pour in the warmed heavy cream (it will bubble vigorously). Stir with a heatproof spatula until smooth. Add 1 tsp of the flaky sea salt. Reserve 60ml (4 tbsp) of this caramel for the glaze. Let the remaining caramel cool for 5 minutes, then stir in the browned butter, dark brown sugar, and cinnamon to form the filling paste.
- Assemble the rolls: Punch down the risen dough and turn it out onto a lightly floured surface. Roll it into a roughly 45x30cm (18×12-inch) rectangle, with the long edge facing you. Spread the filling paste evenly across the dough, leaving a 2cm (0.75-inch) border along the far long edge. Starting from the long edge closest to you, roll the dough up tightly into a log. Pinch the seam firmly to seal.
- Using a sharp serrated knife or unflavored dental floss, cut the log into 12 equal rolls, each about 3.5cm (1.5 inches) wide. Arrange them cut-side up in a greased 9×13-inch baking pan with about 1cm of space between each roll. Cover loosely and let rise for 45 minutes to 1 hour at room temperature until puffed and nearly touching.
- Preheat your oven to 350°F (175°C). Bake the rolls for 26 to 30 minutes until deeply golden on top and an instant-read thermometer inserted into the center of a middle roll reads 190°F (88°C). If the tops are browning too quickly, tent loosely with foil after 20 minutes.
- Make the glaze: Beat the softened cream cheese with a hand mixer until smooth. Add the powdered sugar, vanilla extract, and reserved caramel sauce, and beat until combined. Add the milk one tablespoon at a time until you reach a pourable but thick consistency. Pour the glaze over the rolls while they are still warm (not hot). Sprinkle with the remaining 1 tsp flaky sea salt. Serve immediately, pulling rolls apart at the table.
- Prepare the dough and filling exactly as described in the oven method through step 6 (assembling the log and cutting the rolls). Line a 6-quart slow cooker with parchment paper, leaving overhang on two sides to act as handles for lifting the rolls out.
- Arrange the 12 cut rolls in the lined slow cooker, cut-side up, in a single layer. They will fit snugly, which is fine. Cover loosely with a clean kitchen towel placed under the lid to absorb condensation and prevent dripping onto the rolls. Let the rolls rise inside the slow cooker (lid off, towel in place) for 30 to 40 minutes until noticeably puffed.
- Remove the towel and replace it with two layers of paper towels laid flat across the top of the slow cooker before putting the lid on. This is critical: it absorbs steam and keeps the tops from becoming soggy. Cook on High for 2 to 2.5 hours. Begin checking at the 2-hour mark. The rolls are done when the center rolls feel set and spring back gently when pressed, and an instant-read thermometer in the center reads at least 190°F (88°C).
- For optional caramelized tops: once cooked through, carefully lift the rolls out using the parchment handles and place on a foil-lined baking sheet. Broil on the center rack at 500°F (260°C) for 2 to 3 minutes, watching constantly, until the tops turn golden and slightly blistered. This step takes the rolls from good to exceptional.
- Transfer to a serving platter or leave in the parchment for a rustic presentation. Make the cream cheese caramel glaze as directed in the oven method step 9, and pour over the warm rolls. Sprinkle with flaky sea salt and serve.
- Make the dough through its first rise as described in the oven method steps 1 through 3, using the overnight refrigerator rise option. The dough can cold-rise for up to 14 hours.
- The following evening, make the brown butter caramel filling as described in oven method steps 4 and 5. Let the filling cool to room temperature before spreading (it should be spreadable but not liquid). Assemble and cut the rolls as in step 6.
- Arrange the cut rolls in a well-greased 9×13-inch baking pan. Cover the pan tightly with plastic wrap and refrigerate immediately. Do not allow a second room-temperature rise before refrigerating. The rolls will slowly proof overnight in the cold, puffing gently over 8 to 12 hours.
- In the morning, remove the pan from the refrigerator and let it sit at room temperature for 30 to 45 minutes while the oven preheats to 350°F (175°C). This brief warmup ensures even baking. The rolls may not look dramatically puffed, but they will rise significantly in the oven.
- Bake for 28 to 32 minutes (slightly longer than the same-day version due to the cold start) until deep golden on top and 190°F (88°C) in the center. Make the glaze while the rolls bake, pour over warm rolls, sprinkle with flaky salt, and serve.
Nutrition Per Serving
Per 1 serving (makes 12 large rolls in a 9×13-inch baking pan)
Why This Recipe Works
Bread flour is the right choice here rather than all-purpose flour because its higher protein content (typically 12 to 14%) creates more gluten strands during kneading. Those gluten strands form an elastic network that traps the carbon dioxide produced by the yeast, giving you rolls that puff dramatically and hold their structure. The windowpane test is your best tool: when a small piece of dough stretches thin enough to let light through without tearing, the gluten is developed enough. Adding the butter gradually during kneading rather than all at once is equally important. Fat coats gluten strands and can inhibit their development if added too early; introducing it slowly after initial kneading allows the gluten network to form first, then the butter enriches the dough without weakening its structure.
The caramel filling works through two overlapping processes. When you cook granulated sugar dry in the pan, the sucrose molecules break down through pyrolysis, creating over 1,000 different flavor compounds including diacetyl (butter-like notes), furans (nutty, toasty), and various acids that introduce slight bitterness. That controlled bitterness is what makes a dark caramel taste complex rather than just sweet. Browning the butter separately through the Maillard reaction creates similar nutty, toasty compounds from the milk solids (specifically the proteins and lactose). When you combine these two into one filling, you are layering two different versions of the same toasted, complex flavor family, which is why the result tastes so much more interesting than a standard brown sugar filling.
Pouring the glaze over warm (not hot) rolls is intentional. If the rolls are too hot, the cream cheese in the glaze will separate and turn greasy. If they are completely cool, the glaze sits on the surface rather than settling into the swirls. Warm rolls sit at the sweet spot where the glaze flows into every crevice and just barely melts into the top layer, creating that glossy, just-set finish you see in bakery cases. If your glaze ever seizes up before you are ready to pour, simply whisk in a teaspoon of warm milk to loosen it.
Baker’s Tips
- Use a light-colored saucepan when making caramel. In a dark pan, it is almost impossible to judge the color of the sugar, and you risk burning it. Stainless steel or enamel-coated pans work perfectly.
- The moment the browned butter smells nutty and you see amber specks on the bottom, take it off the heat and pour it into a bowl immediately. Residual heat in the pan will continue cooking it, and the line between brown butter and burnt butter is about 30 seconds.
- Unflavored dental floss is the cleanest way to cut your roll log. Slide a piece under the log, cross the ends over the top, and pull in opposite directions for perfectly shaped rolls without compressing the dough.
- All refrigerated ingredients (eggs, butter, cream cheese) must be at room temperature before you begin. Cold eggs can cause the enriched dough to tighten and even curdle slightly when the butter is added.
- If your kitchen is cool, create a warm proofing environment by placing the covered dough in a turned-off oven with just the oven light on. The light generates enough gentle heat to bring the temperature to around 75 to 80°F (24 to 27°C), which is ideal for yeast activity.
- Do not rush the second rise. Under-proofed rolls bake up dense and doughy in the center. They are ready when they look puffy, nearly touching each other, and leave a slow-rebounding indent when gently pressed with a floured finger.
- Reserve your caramel before mixing in the browned butter and brown sugar. The plain caramel you set aside for the glaze will mix more smoothly with the cream cheese than the thicker, butter-enriched filling paste.
Variations
- Apple and Brown Butter Rolls: Add 150g finely diced, lightly sauteed Granny Smith apples (cooked down until just soft with 1 tbsp butter and 1 tsp cinnamon) to the filling layer before rolling. The tartness of the apple balances the deep caramel beautifully.
- Cardamom and Orange Version: Replace the cinnamon with 1.5 tsp ground cardamom and add the zest of one large orange to the filling. Stir 2 tbsp fresh orange juice into the glaze in place of the milk. These have an almost Danish pastry quality.
- Pecan Praline Rolls: Scatter 120g toasted, roughly chopped pecans over the filling before rolling the dough into a log. Add another handful to the top of the glazed rolls. The pecans add crunch and a nutty depth that pairs magnificently with the salted caramel.
- Dairy-Free Version: Substitute the butter in the dough and filling with high-quality vegan butter (such as Miyoko’s), use oat milk throughout, replace the heavy cream with full-fat coconut cream, and use dairy-free cream cheese for the glaze. The rolls will be slightly less rich but still deeply flavorful.
Troubleshooting & FAQ
My caramel seized and turned into a grainy, hard mass when I added the cream. What happened?
My dough is not coming together or feels very sticky after 10 minutes of kneading. Should I add more flour?
The rolls are golden on top but doughy in the middle. How do I know when they are actually done?
My rolls came out of the oven and did not rise much. They look flat and dense. What went wrong?
My filling leaked out of the rolls during baking and pooled at the bottom of the pan. Is this normal?
Storage & Make-Ahead
- Storage: Store glazed rolls loosely covered at room temperature for up to 2 days. For longer storage, cover tightly and refrigerate for up to 5 days. Reheat individual rolls in the microwave for 20 to 30 seconds with a small damp paper towel draped over them to restore softness. Unglazed, unbaked assembled rolls can be frozen in the pan before their second rise for up to 1 month; thaw overnight in the refrigerator and proceed from the proofing step.
- Make-Ahead: The dough can be made and refrigerated after its first rise for up to 14 hours. The rolls can be fully assembled, cut, and arranged in the pan, then refrigerated overnight before their second rise and baking (see Overnight Refrigerator Method). The brown butter caramel filling can be made up to 3 days ahead and stored in an airtight jar in the refrigerator; warm gently before spreading. The glaze can be made up to 2 days ahead and refrigerated, then stirred and brought to room temperature before using.

These sound like such a special treat, and I’m drawn to what you said about the brown butter being where the magic happens – that’s so true. I’ve found that slowing down to actually listen to that butter as it toasts, waiting for that nutty smell, makes the whole baking process feel more intentional somehow. That caramel cream cheese glaze must be incredible with the salted layers underneath.
made these last weekend and my coffee group wont shut up about em, which if youve met retired folks you know is saying something. the brown butter really is everything, that nutty smell just fills the whole house and suddenly everyone remembers why they showed up. my late wife used to say a good roll is honest cooking, none of that rushing around, and these feel like that. thanks for sharing this one.
oh my goodness these sound absolutley incredible! i love that you focused on the brown butter because thats where all the magic happens – reminds me of when i tried making cinnamon rolls for the library holiday party a few years back and realized half the flavor comes from getting that butter just right. the salted caramel swirl has me sold tbh, thats such a clever way to balance sweetness. ngl im already thinking about making these for our book club meeting, do you think the dough holds up well if you prepare it the night before?