
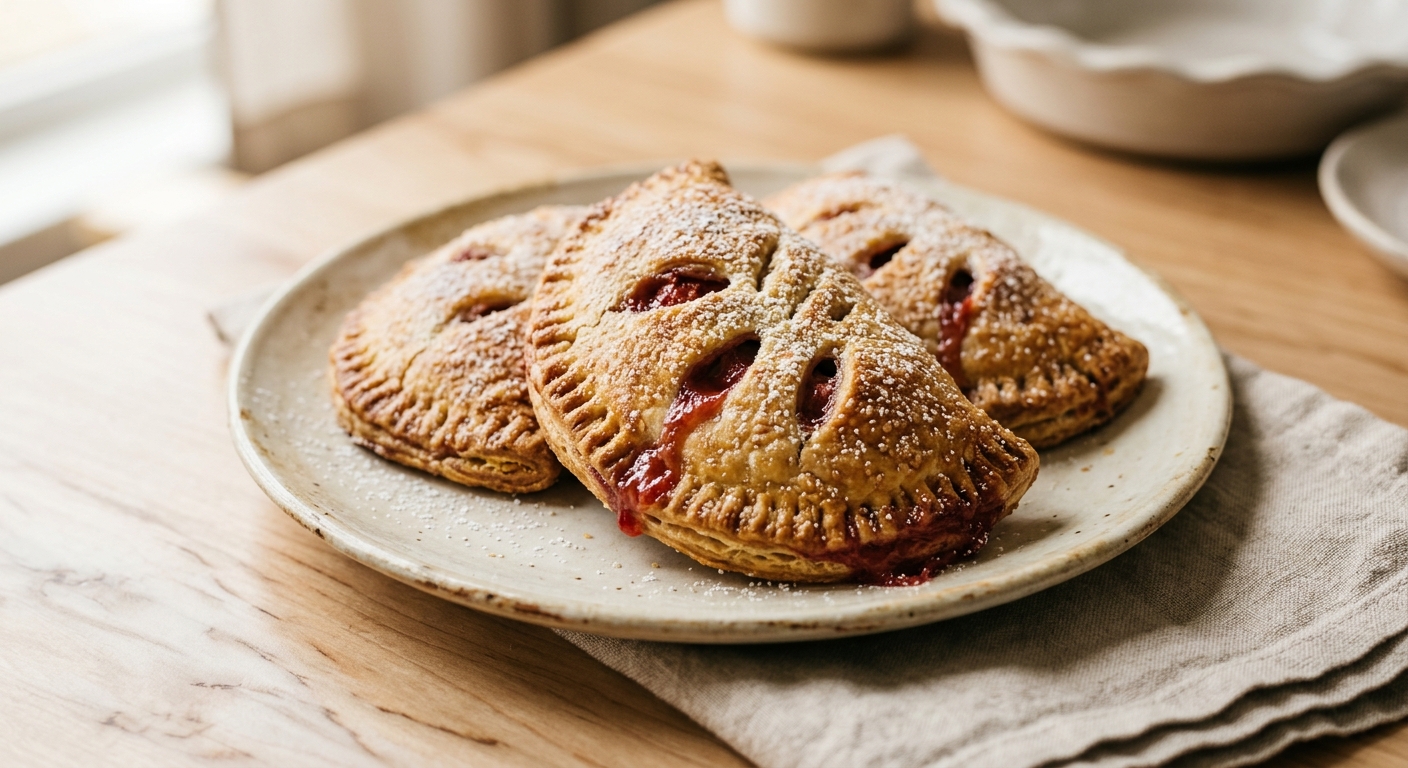
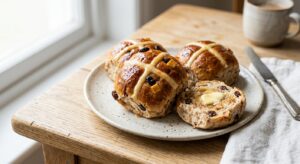
There is something about the combination of strawberry and rhubarb that feels like pure early summer in edible form. The berries bring their honeyed sweetness, and the rhubarb pushes back with a bright, almost wine-like tartness that keeps every bite interesting. Wrapped in a personal-sized parcel of golden pastry, these hand pies are everything a fruit pie should be, portable, generous, and unapologetically buttery. Picture them cooling on a rack while the kitchen smells like a farmhouse bakery, that sticky-sweet steam rising from their vented tops, the crimped edges bronzed and crackly.
What sets this version apart is the technique behind the crust. Rather than a traditional rubbed-in method, we use a series of quick folds during mixing, similar to a rough puff approach, that creates distinct, visible layers of butter throughout the dough. When heat hits those thin butter sheets in the oven, steam releases and the layers puff and separate into something genuinely flaky rather than merely tender. The filling is thickened with a combination of cornstarch and a small amount of tapioca flour, which gives it that glossy, jammy consistency that holds its shape when you bite in rather than running out the sides.
These hand pies sit comfortably in the medium difficulty range. The dough requires two short rests in the refrigerator and a bit of patience with the folding technique, but nothing here demands professional skill. They are perfect for bakers who have made a pie or two and are ready to try something a little more precise, and equally wonderful for a confident beginner who does not mind reading the steps twice before starting. Plan for about two and a half hours from start to finish, most of which is hands-off chilling time.
10
servings
Ingredients
- Filling
- 360 gall-purpose flour (about 3 cups, spooned and leveled), plus extra for dusting
- 1 tbspgranulated sugar
- 1 tspColima Sea SaltMicroplastic Free Salt
- 230 gunsalted butter, very cold, cut into 1/2-inch cubes (about 1 cup / 2 sticks)
- 120 mlice water (about 1/2 cup), plus more as needed
- 1 tbspapple cider vinegar
- 300 gfresh or frozen rhubarb, cut into 1/2-inch pieces (about 2 1/2 cups)
- 250 gfresh strawberries, hulled and roughly chopped (about 1 3/4 cups)
- 120 ggranulated sugar (about 1/2 cup plus 1 tbsp), divided
- 20 gcornstarch (about 2 1/2 tbsp)
- 10 gtapioca flour (about 1 tbsp)
- 1 tbspfresh lemon juice
- 0.5 tsppure vanilla extract
- 0.25 tspground cinnamon
- —Pinch of Colima Sea SaltMicroplastic Free Salt
- Sprinkling
- 1 largeegg, beaten with 1 tbsp whole milk (egg wash)
- 2 tbspcoarse or turbinado sugar
Ingredient Substitutions
Instructions
Click on an item below to shop for the recommended items for this recipe on Amazon.
As an Amazon Associate, we earn from qualifying purchases.
- Make the dough: Whisk together the flour, 1 tablespoon sugar, and 1 teaspoon salt in a large bowl. Add the cold butter cubes and toss to coat each piece in flour. Using your fingertips or a pastry cutter, press the butter into flat, rough shards rather than rubbing it into a fine crumb. You want irregular pieces ranging from pea-sized to almond-sized. Mix the apple cider vinegar into the ice water. Drizzle about 90ml of the ice water mixture over the flour-butter mixture and use a fork to bring it together, adding more water a tablespoon at a time until the dough just holds when you squeeze a handful. It will look shaggy and rough, and that is exactly right.
- Turn the dough out onto a lightly floured surface and press it into a rough rectangle. Fold it in thirds like a letter, then press gently into a rectangle again. Repeat this fold one more time. Divide the dough in half, flatten each half into a disk about 1 inch thick, wrap tightly in plastic wrap, and refrigerate for at least 45 minutes and up to 2 days.
- Make the filling: Combine the rhubarb, strawberries, and 100g of the granulated sugar in a medium saucepan. Stir and let sit for 10 minutes until the fruit releases some juice. Place over medium heat and cook, stirring occasionally, for 5 to 6 minutes until the rhubarb softens slightly but still holds some shape. Whisk together the cornstarch, tapioca flour, and remaining 20g sugar, then stir into the fruit along with the lemon juice, vanilla, cinnamon, and pinch of salt. Cook for 2 to 3 more minutes, stirring constantly, until the mixture thickens to a jammy consistency and turns glossy. Transfer to a bowl and press plastic wrap directly onto the surface. Refrigerate until completely cool, at least 30 minutes.
- Preheat your oven to 400°F (205°C). Line two large baking sheets with parchment paper. Remove one disk of dough from the refrigerator. On a lightly floured surface, roll it out to about 3mm thickness (roughly 1/8 inch). Using a 4.5-inch round cutter or a small bowl as a guide, cut out as many circles as possible. Gather the scraps, re-roll once, and cut more circles. You should get about 10 circles per disk, 20 total. Arrange 10 circles on the prepared baking sheets (these are your bases).
- Place a heaping tablespoon (about 30g) of the cooled filling in the center of each base circle, leaving a 3/4-inch border. Brush the border lightly with egg wash. Place a second dough circle on top and press the edges together firmly. Crimp all around with a fork or fold and pinch a decorative edge. Use a sharp paring knife to cut 2 to 3 small vents in the top of each pie. Transfer the assembled pies on their baking sheets to the refrigerator for 15 minutes to firm up, which helps them hold their shape and promotes flakiness.
- Remove from the refrigerator, brush the tops generously with egg wash, and sprinkle with coarse sugar. Bake for 24 to 28 minutes, rotating the pans halfway through, until the pies are deep golden brown and you can see the filling bubbling through the vents. If the edges are browning too quickly, loosely tent with foil. Transfer to a wire rack and cool for at least 20 minutes before eating. The filling will continue to set as it cools.
- Prepare the dough and filling exactly as described in Steps 1 through 4 of the oven method, including the cold rests for both the dough and filling. Assemble the hand pies as described in Step 5, pressing and crimping the edges firmly so they hold together during air frying.
- Cut a sheet of parchment paper to fit your air fryer basket and poke a few holes in it with a skewer to allow airflow. Place 2 to 3 assembled pies on the parchment, making sure they do not touch. Brush generously with egg wash and sprinkle with coarse sugar. Unlike the oven method, skip the final 15-minute refrigerator rest before baking when using the air fryer, as this can cause the egg wash to dry out unevenly.
- Preheat your air fryer to 375°F (190°C) for 3 minutes. Carefully place the parchment with the pies into the basket. Air fry for 14 to 16 minutes, checking at the 10-minute mark. The pies are done when the crust is a deep, even golden brown and the filling is visibly bubbling through the vents. Because air fryers vary, your first batch will tell you if you need to adjust the temperature by 10 to 15 degrees up or down.
- Use a spatula to transfer the finished pies to a wire rack immediately, as the parchment can trap steam underneath and soften the bottom crust if left to sit. Allow to cool for at least 15 minutes before eating. The filling inside will be extremely hot.
- Repeat with remaining pies, allowing the air fryer to return to temperature for 2 minutes between batches. Do not attempt to reheat a fully cooled hand pie in the air fryer at more than 325°F (160°C) or the crust may over-darken before the filling warms through.
Nutrition Per Serving
Per 1 serving (makes 10 hand pies, each approximately 4 by 3 inches)
Why This Recipe Works
The lamination-inspired folding technique used in this crust is the key to genuine flakiness. When you press the butter into flat shards rather than rubbing it into a fine powder, you preserve distinct layers of fat between sheets of flour and water. In the oven, the water content of the butter (which is roughly 16 to 18 percent in most unsalted butters) turns to steam and forces those layers apart, creating visible, shatteringly crisp strata. The brief folds reinforce this layering without overworking the gluten, which is why we stop at just two folds. Overworked dough develops too much gluten structure, which tightens up and makes the crust tough and chewy instead of tender and crisp. The apple cider vinegar plays a direct role here too: acid inhibits gluten formation, giving you a more relaxed, rollable dough and a more tender finished crust.
The two-starch thickening system in the filling is a deliberate choice. Cornstarch alone can produce a filling that is slightly cloudy and starchy tasting if not cooked long enough to fully gelatinize. Tapioca flour, derived from cassava, sets to a clearer, glossier gel and remains stable at lower temperatures, which is important because hand pie fillings are not protected by as much crust mass as a full pie and cool quickly. Together, these two starches give you a filling that is thick enough to stay put when you bite in, glossy and jewel-toned, and free of any chalky starchiness. Pre-cooking the filling on the stovetop is equally important. Raw fruit releases a large amount of liquid in the oven, which can make the bottom crust soggy before the starches have a chance to activate and thicken. Pre-cooking gelatinizes the starches in a controlled environment and drives off excess moisture, so what goes into the pie is already stable.
The final refrigerator rest after assembly is not optional for the oven method. Chilling the formed pies firms the butter back up completely, which means it starts its rapid steam-and-puff process from a cold solid state rather than a half-softened one. Cold butter hitting a hot oven creates more dramatic steam, more distinct layers, and better oven spring overall. If you skip this rest, the pies may spread, the edges may open, and the crust will be noticeably less flaky.
Baker’s Tips
- Keep everything cold. If at any point your butter starts to look greasy or the dough feels warm and sticky while you are rolling, slide it onto a baking sheet and refrigerate for 10 to 15 minutes before continuing.
- Use a bench scraper to help lift and fold the dough during the lamination steps and to release it from the work surface if it sticks. It is the single most useful tool for pastry work.
- Do not skip the filling pre-cook. Raw filling releases far too much liquid in the oven, leading to soggy bottoms and burst seams. The filling should be fully thickened and completely cool before it goes anywhere near your rolled dough.
- When cutting your rounds, press the cutter straight down without twisting. Twisting seals the edges of the cut and can inhibit the crust from puffing and separating properly.
- Press and crimp the edges firmly. Hand pies are under more pressure than a standard pie because they are fully enclosed. A thorough fork crimp all the way around is much more reliable than a pinched edge for preventing blowouts.
- Vent the tops generously. Two small slits will not do enough. Cut 3 small vents or use a small decorative cutter to punch a tiny shape out of the top circle before assembling. This lets steam escape and prevents the top crust from inflating and separating from the filling.
- Taste your rhubarb before making the filling. Rhubarb tartness varies enormously by variety and time of season. Early spring rhubarb can be intensely sour, while midsummer stalks are milder. Adjust the sugar up by 10 to 20g if yours tastes very sharp raw.
Variations
- Peach and ginger: Replace the strawberries with 250g of diced ripe peaches and add 1 teaspoon of freshly grated ginger to the filling. Reduce the sugar by 10g as peaches are sweeter.
- Blueberry lemon: Use 500g of blueberries in place of the strawberry-rhubarb combination, increase the lemon juice to 2 tablespoons, and add 1 teaspoon of lemon zest. Omit the cinnamon.
- Cream cheese layer: Stir together 60g of softened cream cheese with 1 tablespoon powdered sugar and a drop of vanilla. Spread a thin layer onto each base circle before adding the fruit filling for a tangy, cheesecake-like layer.
- Glazed finish: Skip the coarse sugar and, once the pies have cooled completely, drizzle with a simple glaze made from 80g powdered sugar whisked with 1 to 2 tablespoons whole milk and a tiny squeeze of lemon.
Troubleshooting & FAQ
My hand pie seams burst open in the oven and the filling leaked out everywhere. What went wrong?
The bottom crust is soggy even though the top is browned and done. How do I fix this?
My dough is crumbly and keeps cracking when I try to roll it. How do I fix it?
My filling is runny even after the filling pre-cook step. What happened?
The crust is more crumbly and biscuit-like than flaky and layered. Where did my layers go?
Storage & Make-Ahead
- Storage: Store cooled hand pies in a single layer in an airtight container at room temperature for up to 2 days. Refrigerate for up to 5 days, though the crust will soften slightly. Reheat in a 325°F (160°C) oven for 8 to 10 minutes to revive the crispness. Do not microwave, as this makes the crust leathery.
- Make-Ahead: The pie dough disks can be refrigerated for up to 2 days or frozen, well-wrapped, for up to 2 months. Thaw overnight in the refrigerator before rolling. The filling can be made up to 3 days ahead and kept covered in the refrigerator. Assembled but unbaked hand pies can be frozen solid on a baking sheet, then transferred to a zip-top bag and frozen for up to 2 months. Bake from frozen at 400°F (205°C) for 30 to 34 minutes.


These look like something I’d bake on a Sunday and bring to the food bank. People there don’t get treats like this often, and handheld means they can actually enjoy them. I’ve had better luck keeping the butter really cold and working fast – sounds simple but it makes all the difference with that flaky crust. The strawberry rhubarb combo is smart too, not too sweet.
man, i really respect that instinct – ive seen what a real pastry can do for someone whos been eating whatever gets donated, its not just food its like someone saying you matter enough for something made with care. your tip about cold butter and working fast is solid, thats the whole game right there, and yeah that tart rhubarb cutting through the strawberry means it doesnt hit that cloying wall that some sweets do – people actually want to eat the whole thing instead of it making them feel worse. sounds like youre doing good work.
Oh, these sound absolutely perfect for taking on a trail or packing into a daypack – there’s something about eating a warm, flaky pastry with your hands while sitting somewhere quiet that just hits different. I’ve had mixed results with hand pies before, but I’m really curious about your all-butter crust technique since that’s where mine always seem to either fall apart or get tough. The strawberry and rhubarb combo is exactly the kind of tart-bright filling that would cut through that richness beautifully, almost like the way early spring tastes when everything’s just waking up.