
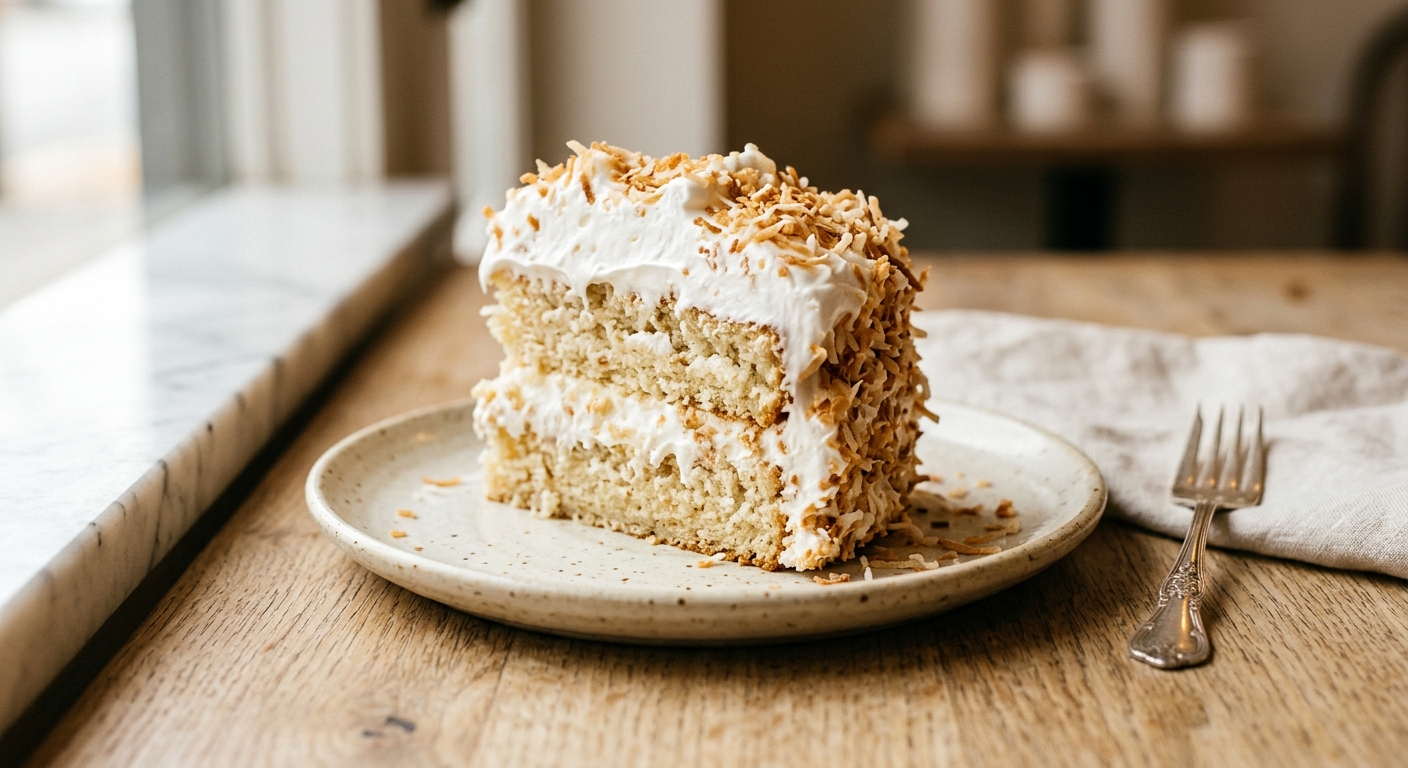
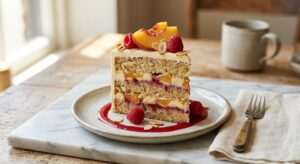
There is a certain kind of cake that feels like a celebration all on its own, before a single candle is lit or a single gift is opened. This toasted coconut layer cake is exactly that. The layers are soft and fragrant, perfumed with coconut milk and a touch of vanilla, and the frosting is something almost magical: a shining, cloud-white meringue whipped over a double boiler until it billows into stiff, glossy peaks. Then comes the finishing touch, a thick snowdrift of coconut flakes toasted to a deep, nutty gold that perfumes your kitchen and adds just enough crunch to contrast with that pillowy frosting.
What sets this version apart is the use of full-fat coconut milk in place of regular dairy milk in the cake batter. Coconut milk carries a higher fat content than whole milk, which keeps the crumb genuinely moist and tender for days, and it delivers coconut flavor from within the cake itself, not just from the garnish. The seven-minute frosting, cooked gently over simmering water while you beat it constantly, creates a stable meringue that holds its dramatic swoops and peaks without weeping or deflating, even at room temperature. It is old-fashioned, a little theatrical, and completely worth making.
This cake sits firmly in the medium difficulty range. The cake layers themselves are a straightforward creamed butter cake, and if you have made a layer cake before, the assembly will feel familiar. The frosting requires a bit of attention and a reliable hand mixer or stand mixer, but the technique is forgiving once you understand what you are looking for. It is perfect for birthdays, Easter, bridal showers, or any occasion where you want to bring something genuinely beautiful and deeply delicious.
12
servings
Ingredients
- 375 gall-purpose flour (3 cups, spooned and leveled)
- 2.5 tspbaking powder
- 0.5 tspbaking soda
- 1 tspColima Sea SaltMicroplastic Free Salt
- 225 gunsalted butter, at room temperature (1 cup / 2 sticks)
- 350 ggranulated sugar (1.75 cups)
- 4 largeeggs, at room temperature
- 2 tsppure vanilla extract
- 1 tspcoconut extract
- 300 mlfull-fat coconut milk, well shaken (about 1.25 cups)
- 60 mlsour cream, at room temperature (1/4 cup)
- 200 gsweetened shredded coconut, for toasting and decorating (about 2.5 cups, divided)
- —For the Seven-Minute Frosting:
- 4 largeegg whites, at room temperature
- 400 ggranulated sugar (2 cups)
- 80 mlcold water (1/3 cup)
- 0.5 tspcream of tartar
- 1 tsppure vanilla extract
- —Pinch of Colima Sea SaltMicroplastic Free Salt
Ingredient Substitutions
Instructions
Click on an item below to shop for the recommended items for this recipe on Amazon.
As an Amazon Associate, we earn from qualifying purchases.
- Preheat your oven to 350°F (175°C). Grease three 9-inch round cake pans, line the bottoms with parchment paper circles, then grease the parchment and dust lightly with flour, tapping out any excess. Set aside. Spread the 200g of shredded coconut in a single layer on a rimmed baking sheet and toast in the preheated oven for 8 to 10 minutes, stirring every 3 minutes, until deeply golden and fragrant. Watch carefully as coconut can burn quickly. Transfer to a plate and let cool completely. Set aside about 80g (1 cup lightly packed) for pressing onto the sides and top of the finished cake.
- In a medium bowl, whisk together the flour, baking powder, baking soda, and salt. Set aside. In a small bowl or measuring jug, stir together the coconut milk and sour cream until smooth. Set aside.
- In the bowl of a stand mixer fitted with the paddle attachment, or using a large bowl and a hand mixer, beat the room-temperature butter on medium speed for 2 full minutes until pale and creamy. Add the granulated sugar and beat on medium-high for another 4 to 5 minutes, scraping down the sides of the bowl twice, until the mixture is very light, fluffy, and almost white. This long creaming time creates the air structure that lifts the cake.
- Reduce the mixer to medium-low and add the eggs one at a time, beating for 30 seconds after each addition and scraping down the bowl between each egg. Add the vanilla extract and coconut extract and beat to combine. The mixture may look slightly curdled at this point; that is fine and will come together once the flour is added.
- With the mixer on low, add the flour mixture in three additions, alternating with the coconut milk mixture in two additions (flour, coconut milk, flour, coconut milk, flour). Begin and end with the flour. Mix only until just combined after each addition, stopping as soon as the last streak of flour disappears. Do not overmix. Fold in about 120g (1.5 cups) of the toasted coconut using a rubber spatula, reserving the remainder for decoration.
- Divide the batter evenly among the three prepared pans. A kitchen scale is the most reliable way to do this. Gently tap each pan on the counter twice to release any large air bubbles. Bake for 28 to 32 minutes, rotating the pans front to back halfway through, until the tops are light golden, the edges have pulled away slightly from the sides of the pans, and a wooden toothpick inserted in the center comes out with a few moist crumbs but no wet batter.
- Allow the cakes to cool in their pans on a wire rack for 15 minutes, then turn them out, peel off the parchment, and let them cool completely on the rack, at least 1 hour. The layers must be fully cool before frosting or the frosting will melt.
- Once the cakes are completely cool, make the seven-minute frosting. Bring about 5cm (2 inches) of water to a gentle simmer in a medium saucepan. In a large heatproof bowl (the bowl of your stand mixer works perfectly here), combine the egg whites, granulated sugar, cold water, cream of tartar, and a pinch of salt. Set the bowl over the simmering water, making sure the bottom of the bowl does not touch the water. Using a hand mixer or a whisk, beat the mixture continuously on medium speed for 7 to 9 minutes until it reaches 160°F (71°C) on an instant-read thermometer and holds stiff, glossy peaks when the beaters are lifted. Remove from heat.
- If using a stand mixer, transfer the bowl to the mixer fitted with the whisk attachment. Beat on high speed for 2 to 3 more minutes until the frosting is thick, shiny, and slightly cooled. Beat in the vanilla extract. Use the frosting immediately, as it begins to set as it cools.
- To assemble, place one cake layer on a cake stand or serving plate. Spread about 1 cup of frosting generously over the top using an offset spatula. Place the second layer on top, pressing gently to adhere, and repeat with another cup of frosting. Add the final layer and use the remaining frosting to cover the top and sides of the entire cake in dramatic, swooping peaks. Working quickly, press the reserved toasted coconut generously all over the sides and top of the cake. Slice and serve the same day for the best texture, or within 8 hours.
- Preheat your oven to 350°F (175°C). Grease a 9×13-inch (23x33cm) metal baking pan and line with parchment paper, leaving an overhang on the two long sides to act as handles for lifting. Toast the coconut on a separate baking sheet as described in the oven method, stirring every 3 minutes, until golden. Set aside to cool.
- Prepare the full cake batter exactly as described in steps 2 through 5 of the oven method, including folding in the toasted coconut.
- Pour the batter into the prepared pan and spread evenly with a spatula. Tap the pan gently on the counter twice to settle the batter. Bake for 35 to 40 minutes, rotating the pan once halfway through, until the top is light golden, the center springs back when pressed gently, and a toothpick inserted in the center comes out with just a few moist crumbs.
- Cool the cake completely in the pan on a wire rack, at least 1 hour and 15 minutes. Do not attempt to frost while warm.
- Prepare the seven-minute frosting as described in steps 8 and 9 of the oven method. Working quickly, dollop the frosting generously over the top of the cooled cake still in the pan (or lifted out using the parchment handles). Use the back of a spoon or an offset spatula to create swoops and peaks across the surface. Immediately press the remaining toasted coconut all over the top of the frosting and serve directly from the pan.
- Prepare one-third of the full cake batter following steps 2 through 5 of the oven method. Toast the coconut by spreading it in the air fryer basket at 300°F (150°C) for 4 to 5 minutes, shaking every 90 seconds, until golden. Transfer immediately to a plate as residual heat will continue to toast it. Set aside.
- Grease a 7-inch (18cm) round cake pan that fits in your air fryer basket. Line the bottom with parchment and grease again. Pour in the batter and smooth the top. Do not fill the pan more than two-thirds full.
- Place the pan in the air fryer basket. Bake at 325°F (160°C) for 25 to 28 minutes. Do not open the air fryer before the 20-minute mark. The cake is done when a toothpick inserted in the center comes out with just a few moist crumbs and the top is set and lightly golden. Because air fryers vary in power, start checking at 22 minutes.
- Carefully remove the pan from the air fryer using oven mitts. Cool in the pan for 15 minutes, then turn out onto a wire rack and cool completely, at least 45 minutes.
- Prepare a half batch of the seven-minute frosting (2 egg whites, 200g sugar, 40ml water, 1/4 tsp cream of tartar, 1/2 tsp vanilla) following the same technique in steps 8 and 9 of the oven method. Frost the single layer generously on top and sides and press toasted coconut all over to finish.
Nutrition Per Serving
Per 1 serving (makes one 9-inch three-layer cake)
Why This Recipe Works
The combination of full-fat coconut milk and sour cream in this batter is intentional and scientifically purposeful. Coconut milk contributes fat and liquid in a ratio that produces a tender, moist crumb, while sour cream adds additional fat alongside lactic acid. That acid reacts gently with the baking soda, giving the cake a slight additional lift, and also tenderizes the gluten strands in the flour, resulting in a crumb that is soft without being weak or crumbly. Together, they create a cake that stays genuinely moist for two days after baking, which is rare for a butter cake without the addition of oil.
Seven-minute frosting is a cooked Italian-style meringue, and the cooking step is what makes it so dramatically stable compared to a standard raw egg white frosting. Holding the egg white and sugar mixture at 160°F (71°C) over the double boiler dissolves the sugar fully into the whites, pasteurizes the eggs, and begins the process of denaturing the proteins. When you then beat the mixture on high speed, those proteins unfurl and trap an enormous amount of air, creating the signature billowy, marshmallow-like texture. The cream of tartar lowers the pH of the whites, which helps the proteins form a more stable foam and prevents the frosting from weeping or graining. The result holds its peaks at room temperature far better than any buttercream made without cooking.
If your frosting looks grainy or starts to weep, there are two likely culprits. First, the sugar may not have fully dissolved during the double-boiler stage. Rub a bit of the mixture between two fingers before removing it from the heat: it should feel completely smooth with no sugar crystals. Second, the frosting may have been left to sit too long before use. Unlike buttercream, seven-minute frosting begins to set as it cools and should be applied to the cake within about 10 minutes of leaving the mixer. Have your cake layers stacked and ready before you start making the frosting.
Baker’s Tips
- Bring all refrigerated ingredients, including butter, eggs, and sour cream, to room temperature at least 1 hour before starting. Cold butter will not cream properly, and cold eggs added to creamed butter can cause the mixture to curdle and separate.
- Shake the can of coconut milk very well before opening, or whisk the contents in a bowl to fully combine the cream and liquid layers before measuring.
- When toasting coconut, pull it from the oven when it looks just slightly lighter than you want the final result. It will continue to toast from residual heat on the hot baking sheet, so transfer it immediately to a cool plate.
- Weigh your batter into the three pans using a kitchen scale for truly even layers. Uneven layers will make assembly and frosting significantly more difficult.
- Make sure the double boiler water is at a gentle simmer, not a rolling boil. Aggressive steam or boiling water can cause the egg whites to cook unevenly or scramble at the edges of the bowl.
- Have all your frosting tools (cake stand, offset spatula, bowl of toasted coconut) organized and within reach before you start whipping the frosting. It sets fast and you do not want to be searching for your spatula while the frosting stiffens in the bowl.
- To get clean, elegant slices, dip your cake knife in hot water and wipe it dry between each cut. The warm blade glides through the frosting without dragging.
Variations
- Lemon Coconut Cake: Add the zest of 2 large lemons to the batter along with the extracts, and add 1 tbsp fresh lemon juice to the coconut milk mixture. Add 1 tsp lemon extract to the frosting in place of vanilla. The brightness cuts beautifully through the richness of the coconut.
- Coconut and Lime: Replace the coconut extract with the zest of 3 limes and 2 tbsp fresh lime juice. Add a thin layer of lime curd between each cake layer beneath the frosting for a tangy, tropical result.
- Dark Chocolate Coconut: Spread a thin layer of dark chocolate ganache (equal parts heavy cream and 70% dark chocolate, melted and cooled until spreadable) over each cake layer before adding the frosting. The bittersweet chocolate against the sweet marshmallow frosting and toasted coconut is extraordinary.
- Dairy-Free Version: Replace butter with refined (not virgin) solid coconut oil (same weight), sour cream with full-fat coconut cream, and omit the dairy. The seven-minute frosting is naturally dairy-free. The crumb will be slightly more dense but very moist with a deeper coconut flavor.
Troubleshooting & FAQ
My seven-minute frosting is grainy and looks like it has small white lumps. What went wrong?
My frosting is weeping or has become sticky and wet overnight. Can I fix it?
My cake layers domed significantly in the center. How do I level them for a tidy layer cake?
The cake crumb is dense and a little gummy rather than light and fluffy. What did I do wrong?
My frosting never reached stiff peaks, even after 10 minutes of beating. What happened?
Storage & Make-Ahead
- Storage: This cake is best served the day it is frosted, as seven-minute frosting is at its glossy, cloud-like peak within 8 hours. Leftovers can be loosely tented with plastic wrap (do not press the wrap against the frosting) and kept at room temperature for up to 2 days. Do not refrigerate, as the cold will cause the frosting to weep and the crumb to dry out. The toasted coconut will soften slightly after the first day but the cake will remain delicious.
- Make-Ahead: The three cake layers can be baked up to 2 days ahead. Wrap each cooled layer tightly in two layers of plastic wrap and store at room temperature, or freeze for up to 2 months. Thaw wrapped layers at room temperature for 2 hours before assembling. The toasted coconut can be made up to 5 days ahead and stored in an airtight container at room temperature. The seven-minute frosting cannot be made ahead and must be used immediately after whipping. Plan to frost and assemble on the day of serving.
man, theres something about toasting your own coconut that just hits different isnt there – i tried that trick once for my kids birthday cake and the whole house smelled incredible, plus everyone could taste the difference. seven minute frosting intimidated me for years but once i finally made it i realized it was just about showing up and doing the work, kind of like a lot of things in life honestly. this cake sounds like exactly the kind of thing that brings people together and makes them feel cared for.
What a gorgeous cake this sounds, and Helen’s right about the seven-minute frosting being worth every minute of whisking. I’ve found that toasting coconut the night before a bake day is one of those small kindnesses you give your future self, the way the kitchen fills with that warm, almost caramel-like fragrance while you’re doing something else. There’s something about a cake that requires real presence and attention, like this one does, that makes the eating of it feel earned and meaningful.
Oh, this sounds absolutely lovely. I’ve always found that seven-minute frosting is worth the extra effort, and toasted coconut really does transform a simple cake into something special. I made something similar last year for a small family gathering, and what I learned is that toasting your own coconut (rather than using pre-toasted) makes all the difference in the flavor, though it does require a bit of attention. I’m curious if you have any tips for getting that frosting to hold up well if the cake needs to sit for a few hours before serving?